Hellwig Sway Bar 55756 User Manual
Page 3
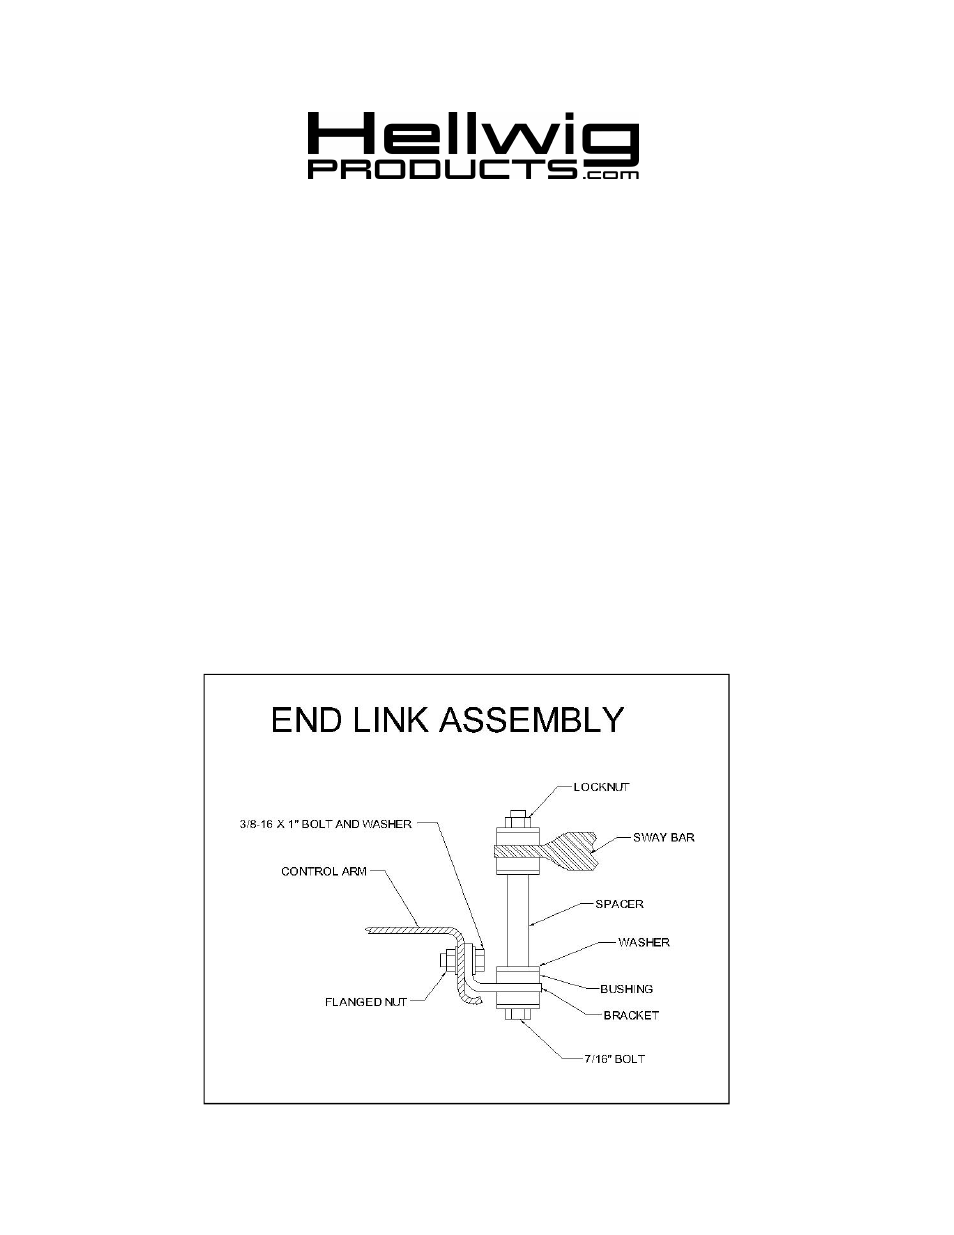
8. Align end links and end link mounting brackets on control arm so that end links are as vertical as possible.
9. When satisfied with fit, mark holes on control arms for mounting brackets and drill two 13/32” holes in
each control arm.
10. Attach end link mounting brackets to control arm using 3/8-16 X 1” bolts and serrated flange nuts.
11. Align sway bar and end links and tighten 3/8” mounting bolts to 25 ft-lb.
12. Tighten locknut on end of end link until bushings start to bulge slightly.
13.
Bounce the vehicle checking for clearance on all under carriage components.
Test drive the
vehicle and recheck all clearances and the installation alignment. Adjust as needed. Re-check your instal-
lation after one week of driving and periodically on a regular basis.
559-734-7451 800-367-5480 FAX 559-734-7460
5721(R-5721) 01/15/07