Hellwig Pro Series 61610 User Manual
Page 2
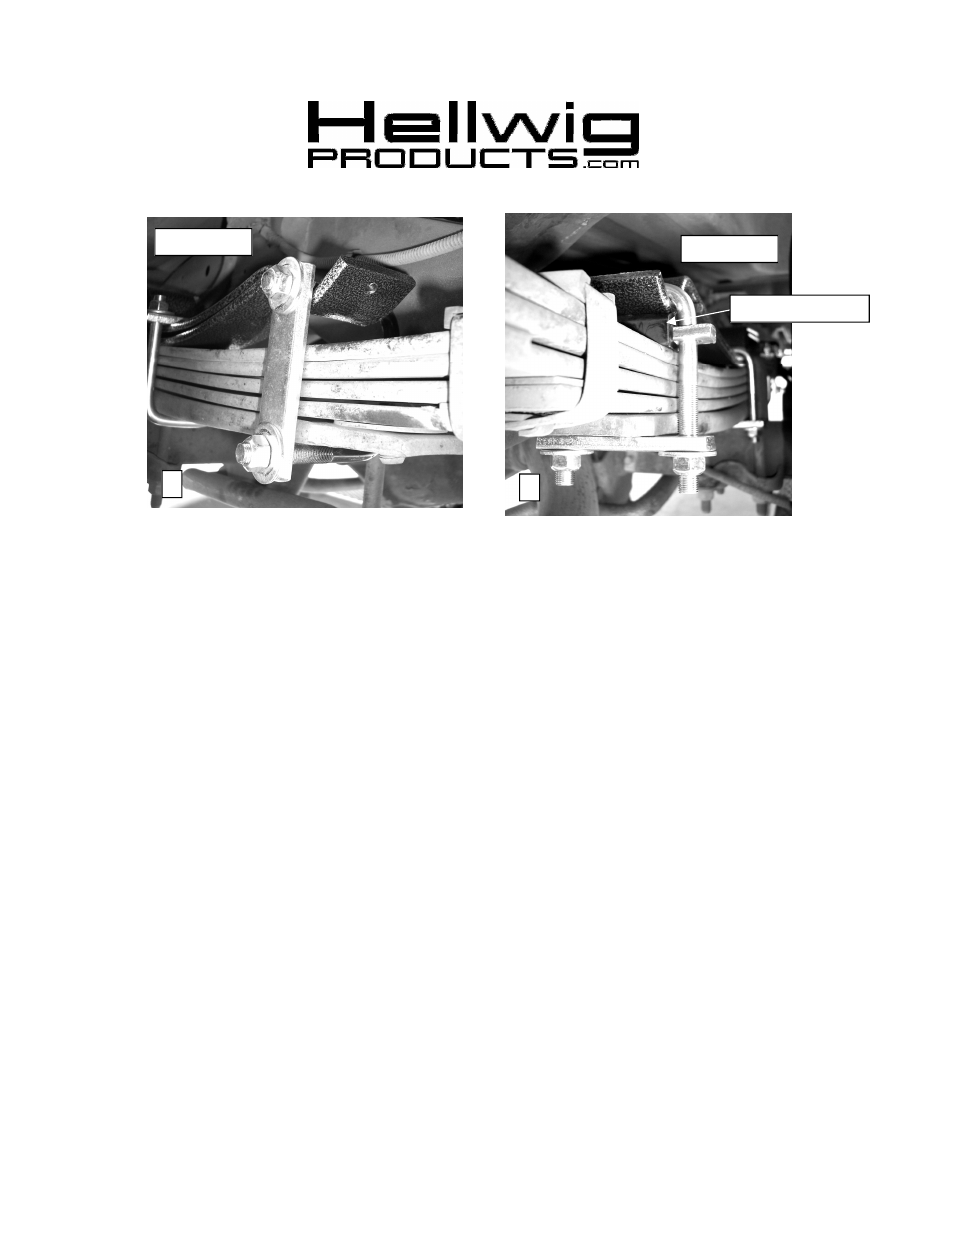
Front Cup
559-734-7451 800-367-5480 FAX 559-734-7460
1. Jack up the vehicle by the frame to allow the suspension to extend, making sure the e-brake is on, the tires are
chocked and the frame is supported by jack stands.
2. Remove the bracket holding the emergency brake cable just over the bump stop as shown in Photo 2. Zip tie
the lower brake cable to the upper one to keep it from drooping down.
3. Lay out the spring leaves into two (2) sets with the longer spring with the cups on top.
2. Place the spring on top of the main spring with the long end toward the rear of the vehicle and the hump
straddling the factory U-bolts as shown in Photo 1.
3. On the forward side of the center hump, install the 2.5” wide U-bolt with the legs up as shown in Photo 3 and
use the 1/2” stover nuts and washers to hold the cross bar across the top. Adjust the spring and crossbar
backwards and forwards to maximize clearance between the crossbar and the brake lines.
4. On the rearward side of the center hump, install the 2.5” wide U-bolt with the legs down as shown in Photo 4
and use the 1/2” stover nuts and washers to hold the cross bar across the bottom.
5. Check clearance between the spring and the underside of the vehicle. The spring can be moved slightly
backwards or forwards to maximize clearance.
6. Torque both of these to 50-75 ft-lbs.
7. On the forward cup, install the 3.5” wide U-bolt sideways with the legs facing out towards the tire. Secure in
place with the black, 2 hole plate, 1/2” stover nuts and washers as shown in Photo 5. Note: It may be necessary
to flex the spring tip down with a C-clamp to slide the U-bolt into position.
8. Slide the house shaped bushing over the 1” wide cross bar.
9. On the rear cup, install the 2.5” wide U-bolt with the legs facing down and the crossbar with the bushing in
between the spring cup and factory spring pack. Secure in place with the cross bar, 1/2” stover nuts and
washers as shown in Photo 6. Tighten the spring down until there is pressure on the bushing.
10. Lower vehicle to the ground and check your installation for clearance on all undercarriage components; wires,
fuel, brake, and air conditioning lines. Test drive the vehicle and recheck your installation, adjust as needed.
Recheck on a monthly basis thereafter.
INSTALLER: MAKE SURE THE OWNER RECEIVES THIS INSTRUCTION SHEET ALONG WITH
ALL IMPORTANT NOTES AND WARRANTY CARDS.
5
6
Rear Cup
( R-610)
07/16/2012
House Bushing