eLine Technology SNI-WiFi User Manual
Sniper wifi wireless camera – quick setup
eLineTechnology.com/support/documents Support 303.938.1133
Technical Support Knowledge Base
Sniper WiFi Wireless Camera – Quick Setup
Connect camera to network using network cable
1. Run CD included with the camera
2. Install Cam_Setup.exe
Network Configuration
1. Click on the camera in the camera list to bring up an image
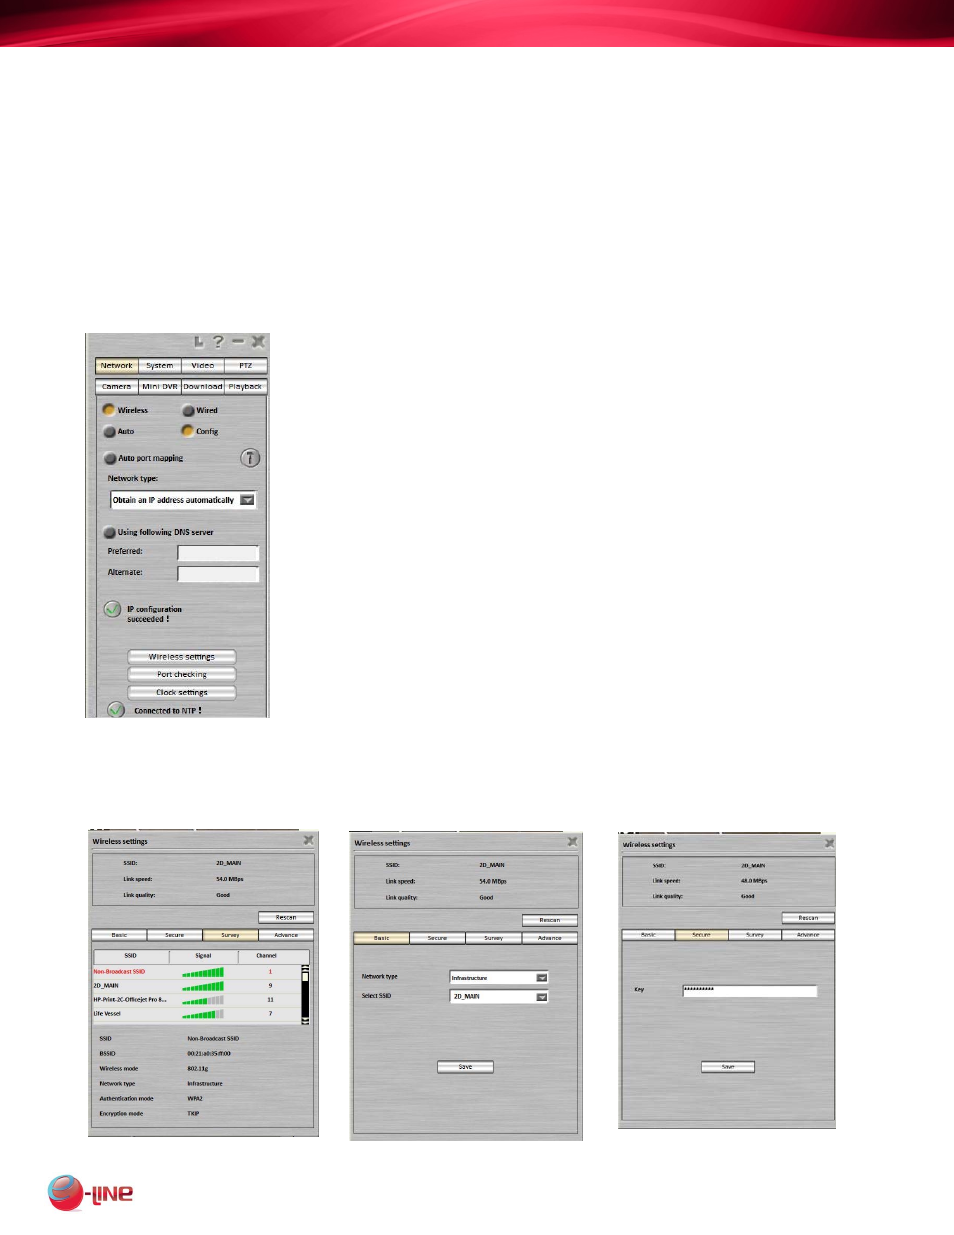
2. Click on NETWORK
3. Select WIRELESS
4. Select CONFIG
5. Select TYPE “obtain IP address automatically”
6. Click WIRELESS SETTINGS
7. Click SURVEY, verify the network SSID is in the list
**NOTE: All Sniper cameras will NOT CONNECT to SSID’s that
have a space in the name, WiFi encryption set to WPA, or 802.11N
not even in mixed b/g/n mode
8. Click BASIC, choose SSID form the list
9. Click SAVE
10. Click SECURITY, type in the encryption password
11. Click SAVE
Click the CLOSE button (looks like an X)
Camera is ready for wireless when it receives a connection status at the top of the screen,
and displays a Wifi IP address below the camera image.