Caution, Warning – EBARA EFQT3 User Manual
Page 31
EBARA Fluid Handling
31
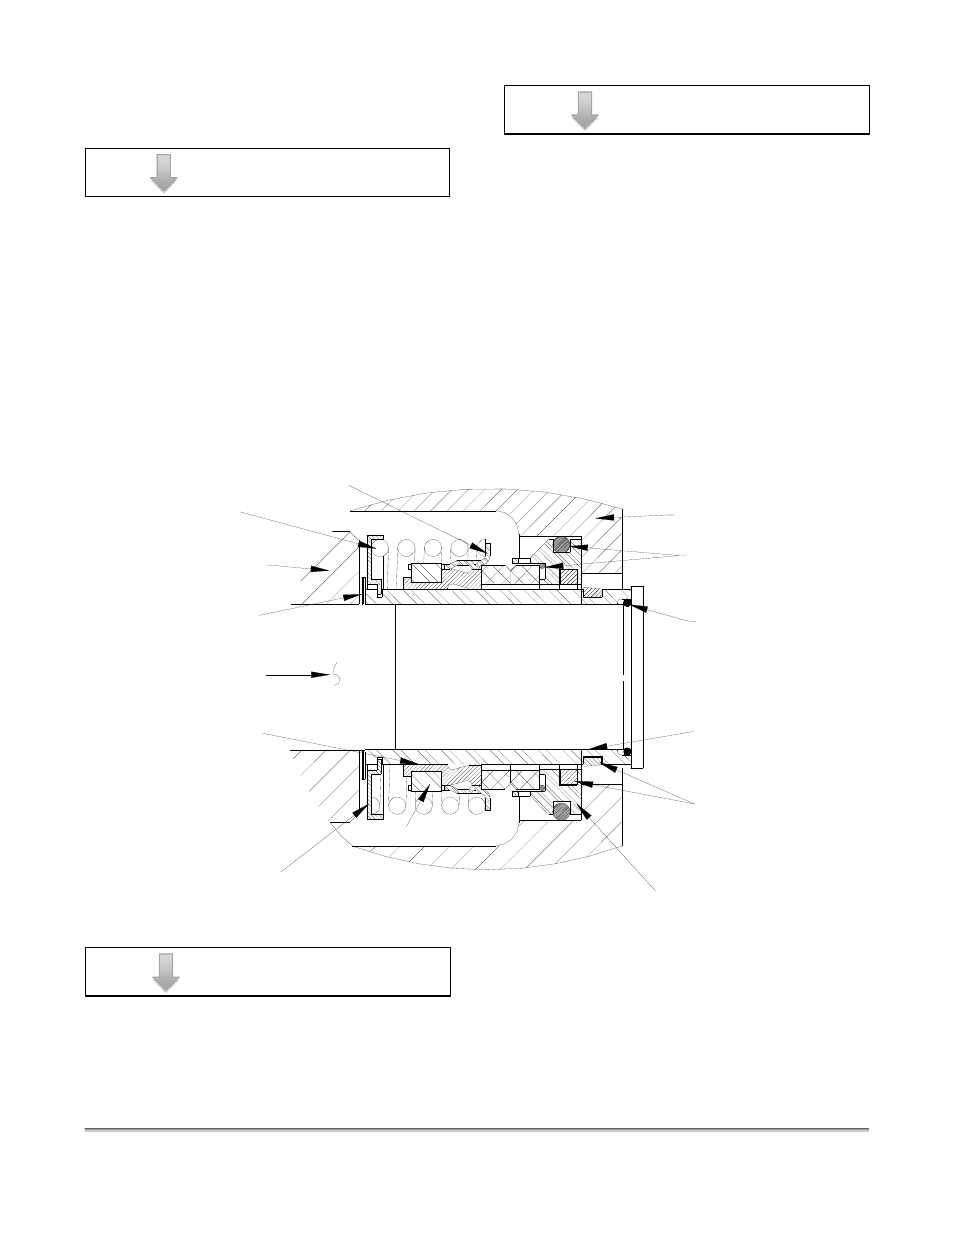
SEAL PLATE
O-RINGS
SLEEVE
O-RING
INTEGRAL
SHAFT
SLEEVE
SHEAR
RING
(SHEARED)
STATIONARY
SEAT
STATIONARY
ELEMENT
ROTATING
ELEMENT
DRIVE BAND
SPRING
CENTERING
WASHER
BELLOWS
IMPELLER
SHAFT
IMPELLER
SHIMS
IMPELLER
SPRING
RATAINER
Seal Installation
(Figures 2, 5, 6 and 7)
Most cleaning solvents are toxic and
flammable. Use them only in a well-
ventilated area free from excessive heat,
sparks, and flame. Read and follow all
precautions printed on solvent
containers.
Clean the seal cavity and shaft with a cloth
soaked in fresh cleaning solvent. Inspect the
stationary seat bore in the seal plate for dirt,
nicks and burrs, and
remove any that exist.
The stationary seat bore must be completely
clean before installing the seal.
This seal is not designed for operation at
temperatures above 160 º F (71º C). Do
not use at higher operating temperatures.
A new seal assembly should be installed any
time the old seal is removed from the pump.
Wear patters on the finished faces cannot be
realigned during reassembly. Reusing an old
seal could result in premature failure.
To ease installation of the seal, lubricate the
shaft sleeve O-ring and the external
stationary seat O-ring with a very small
amount of light lubricating oil. See Figure 5
for seal part identification.
If the seal plate was removed, install the seal
plate gasket (5). Position the seal plate over
the shaft and secure it to the bearing
housing with the hardware (25 and 26).
To prevent damaging the shaft sleeve O-ring
on the shaft threads, stretch the O-ring over
a piece of tubing 1-1/4 I.D. x 1-1/2 O.D x 2
inches long (32mm x 38mm x 51mm).
CAUTION!
CAUTION!
WARNING!
Figure 5 – Cartridge Seal Assembly