Instructions – Drill Doctor 750SP User Manual
Page 7
6
INSTRUCTIONS
STEP 4: Splitting The Drill Point
You can split either a 118° or 135° drill point. Refer to Figure 31 on page
10 for a drawing and definition of a properly split drill bit point.
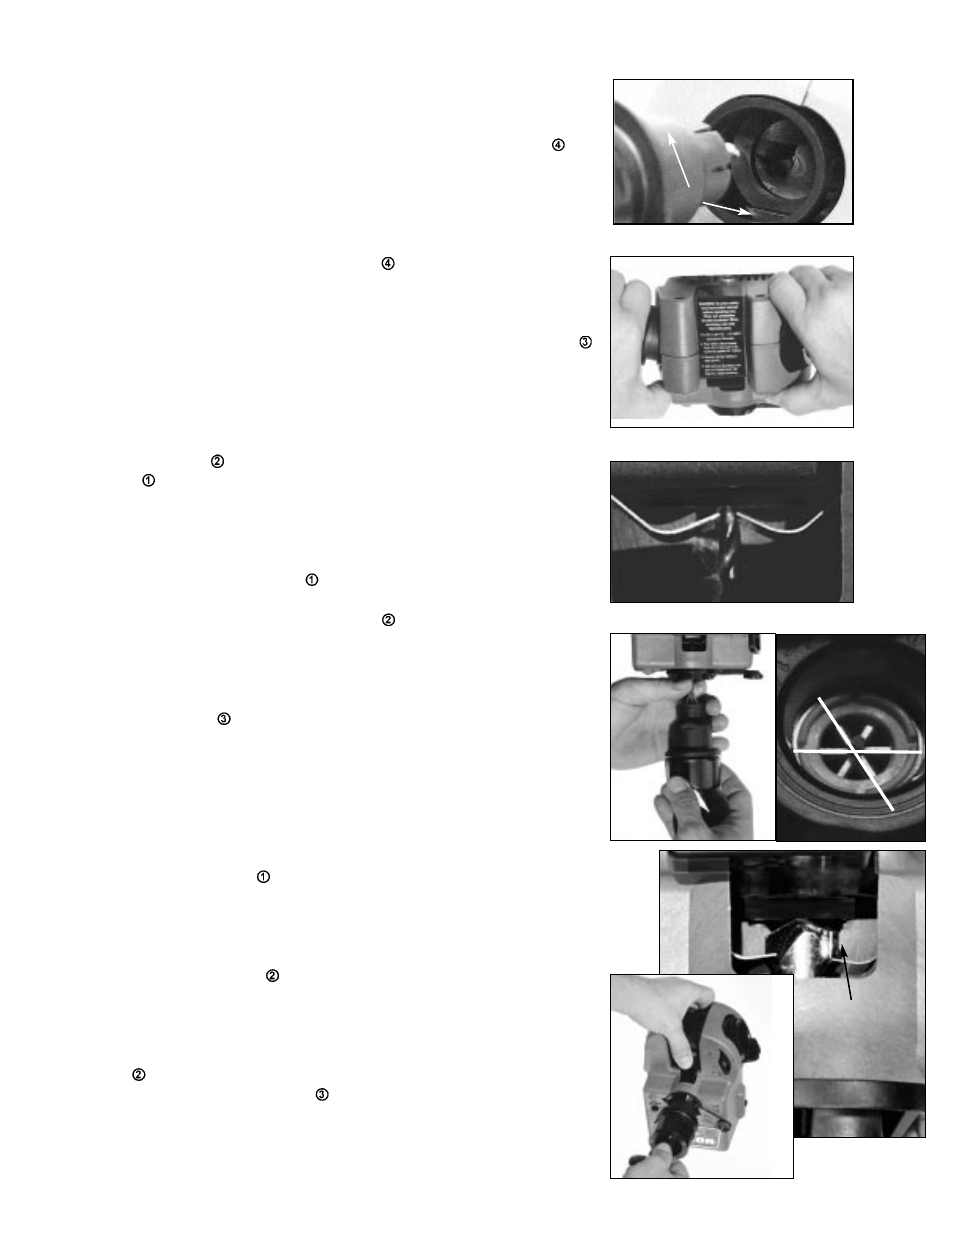
A. After sharpening the drill point, do not remove the drill bit from the
chuck. Align the flats on the chuck with flats in the splitting tube
and
insert to the point where the flats are touching (See Figure 14).
B. Slowly pull the chuck forward giving the drill bit one or two short ”pecks”
on the wheel (See Figure 15). Pull the chuck out and inspect the point.
Depending on the size of the drill bit, it may be necessary to repeat steps
A and B until the drill point is split to the middle (See Figure 31).
C. Pull the chuck out of the splitting tube
far enough to rotate it 180°.
Repeat steps A & B to split the other side.
NOTE: The rule of thumb is “it’s better to grind off not enough rather than too
much”. If the drill point is over-split, try re-sharpening in the sharpening tube
to reduce the over-split. If this doesn’t work repeat steps #2 – #4.
Sharpening Short or Small Diameter Drill Bits
A. Complete Step 2A on page 4. When completed, remove the drill bit from
the chuck.
B. Push the paddle
back, and insert the individual drill bit into the alignment
tube
all the way to the drill stop. Release the paddle and turn the drill bit
until it is secured by the pawls and pointing straight out
(see Figure 16)
.
C. Continue to hold the drill bit with one hand and carefully slide the chuck onto
the drill bit with the other (See Figure 17). Align the flats on the chuck with
the flats in the alignment tube
and push the chuck all the way in until the
flats on the chuck are entirely hidden. Tighten the chuck jaws onto the drill
bit with the chuck knob. Push the paddle
back and remove the chucked
drill bit.
D. Look in to the back of the chucked drill. The chuck jaws around the drill bit
should be in line. If not, turn the chuck knob counter clockwise to straight-
en (See Figure 18).
E. Sharpen in tube
.
NOTE: Too many rotations on small diameter bits will result in a
negative rake angle. Example: 3/8” rotate (16-20) 180 degree
turns, 1/8” rotate (4-6) and 3/32” (2-4).
Sharpening Masonry Drill Bits
A. Set the point angle indicator to 135° (see Figure 2 on page 4).
B. Set the alignment tube
pointer to the masonry position.
(See Figure 4 on page 4)
C. Complete Steps 2A and 2B on page 4.
NOTE: When aligning the masonry drill bit , the pawls are not used in the alignment
process. Push the paddle
back to the housing and insert the drill bit to the stop,
then release the paddle. Disregard the position of the pawls.
D. Grasp the shank end of the drill bit and rotate it so that the right cutting lip is high in
a 2 o’clock position (See Figure 19 and 20). Tighten the chuck knob. Push the pad-
dle
back and remove the chuck from the tube.
E. Sharpen in the sharpening tube
.
NOTE: The masonry drill bit may also require fewer rotations than
similar diameter standard drill bits.
Fig. 15
Fig. 16
Fig. 17
Fig. 18
2 o’clock
Flats
Fig. 14
Chuck jaws are inline
Fig. 20
Fig. 19