7 expansion cards, 1a 1b, 1 installing a standard size expansion card – Asus Xeon Tower/5U Rackmount Server AP1710-S5 User Manual
Page 36
Chapter 2: Hardware setup
2-18
2.7
Expansion cards
The chassis is designed with a screwless expansion slot frame on the rear
panel. This design feature allows you to install or remove an expansion
card in less steps.
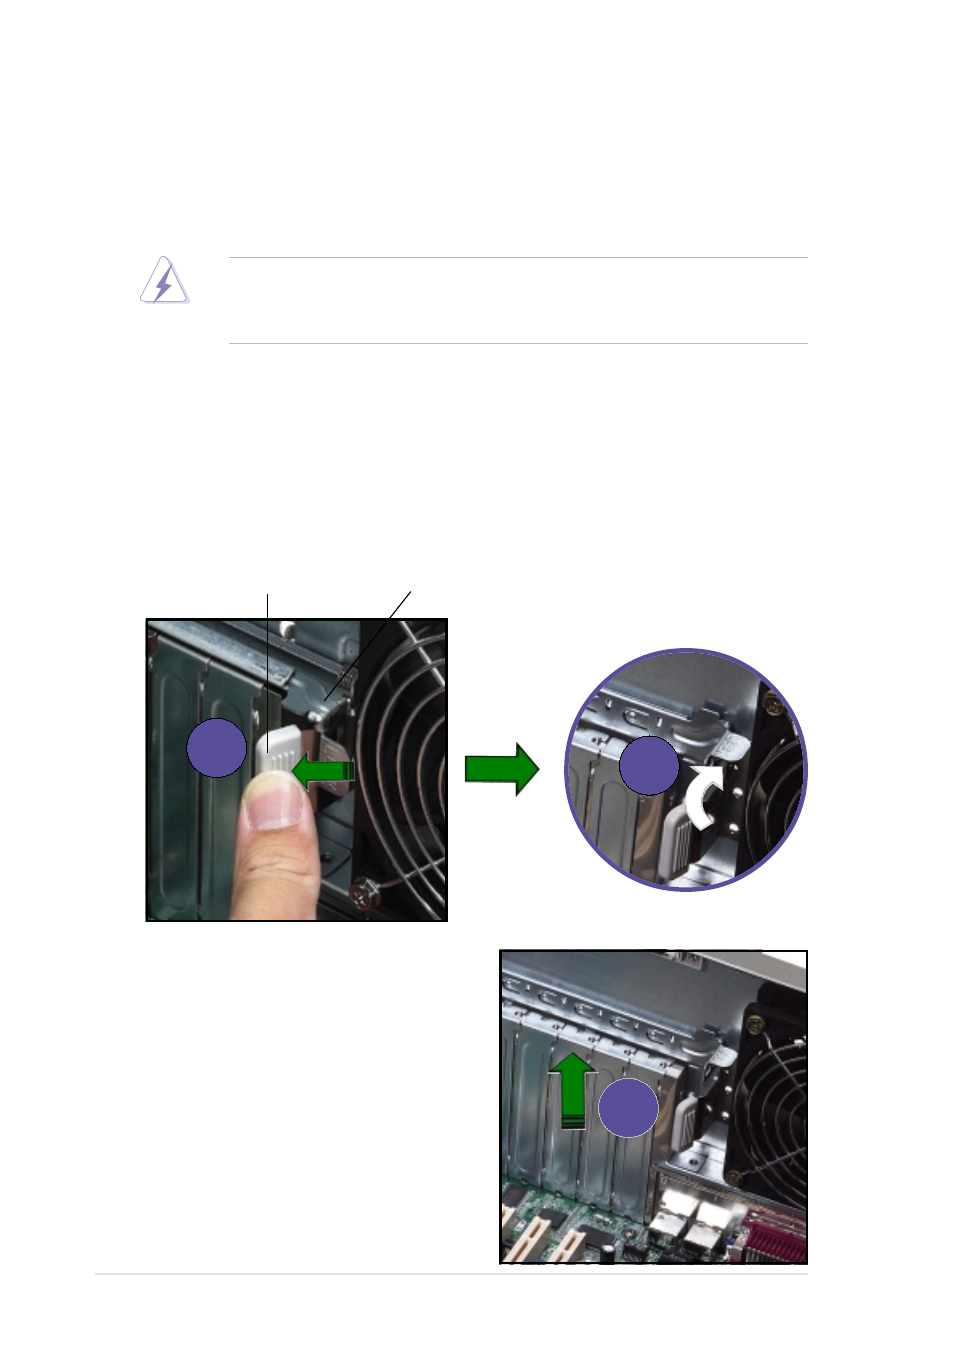
2. Slide out the metal bracket
opposite the PCI slot where you
wish to install the expansion card.
You may use a flat-head
screwdriver to easily remove the
bracket.
2.7.1 Installing a standard size expansion card
To install an expansion card:
1. Release the card lock.
a. Press the card lock lever.
b. The card lock flips up.
Make sure to unplug the power cord before installing or removing
expansion cards. Failure to do so may cause physical injury, and
damage to the card and motheboard components!
2
Card lock
Card lock lever
1a
1b
See also other documents in the category Asus Computers:
- CG8565 (410 pages)
- CG8565 (246 pages)
- CS5111 (26 pages)
- CS5120 (1 page)
- ET1611PUK (38 pages)
- S2-P8H61E (80 pages)
- P2-PH1 (80 pages)
- P1-P5945G (80 pages)
- P2-P5945GCX (90 pages)
- CG8270 (218 pages)
- CG8270 (536 pages)
- CG8270 (72 pages)
- CG8270 (76 pages)
- CG8270 (534 pages)
- CG8270 (362 pages)
- P3-P5G31 (100 pages)
- P3-PH4 (80 pages)
- P2-M2A690G (80 pages)
- P2-M2A690G (8 pages)
- P4-P5N9300 (1 page)
- P4-P5N9300 (82 pages)
- P1-P5945GC (92 pages)
- P2-P5945GC (92 pages)
- P3-P5G33 (98 pages)
- T3-P5945GC (80 pages)
- T3-P5945GCX (80 pages)
- P2-M2A690G (94 pages)
- T3-PH1 (80 pages)
- T3-PH1 (82 pages)
- T5-P5G41E (82 pages)
- T5-P5G41E (76 pages)
- S1-AT5NM10E (68 pages)
- P6-P7H55E (67 pages)
- ES5000 (174 pages)
- T4-P5G43 (104 pages)
- T-P5G31 (92 pages)
- BT6130 (60 pages)
- BT6130 (54 pages)
- BT6130 (2 pages)
- CG8265 (350 pages)
- CG8265 (210 pages)
- CM1740 (330 pages)
- CM1740 (70 pages)
- CM1740 (198 pages)
- P6-M4A3000E (59 pages)