Assembly and installation – CHIEF NAFB2BW User Manual
Page 3
Installation Instructions
NAFB2BW
3
ASSEMBLY AND INSTALLATION
NOTE:
The NAFB2BW fan panel is designed for use with 19"
wide equipment racks. See the specific installation
instructions provided with the rack for additional
installation information.
1.
Remove four screws and bottom cover panel from rack. (See
Figure 1)
Figure 1
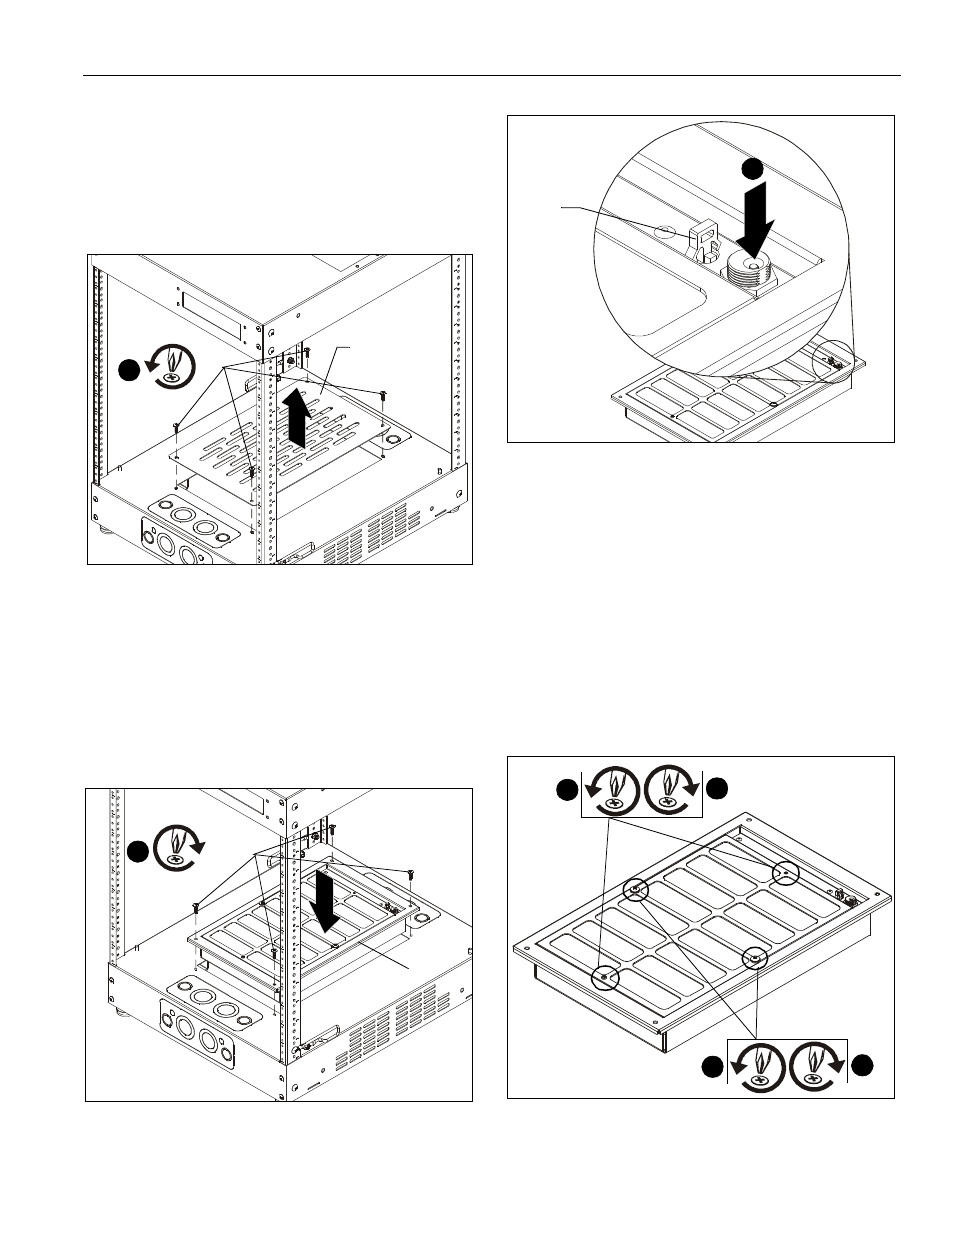
2.
Install fan panel (A) and fasten with four 10-32 x 3/4" Phillips
screws (B). (See Figure 2)
3.
Plug the adapter (D) into the DC power supply (C).
4.
Plug power supply into fan panel (A). (See Figure 3)
5.
Secure power supply plug using a cable tie (not included)
through the cable tie mount. (See Figure 3)
6.
Plug the power supply into an available outlet.
Figure 2
Figure 3
7.
Complete the installation following the rack installation
instructions.
Maintenance
Over time, the filter may need to be cleaned to optimize
performance.
1.
Remove two screws at sides of filter panel. (See Figure 4)
2.
Loosen clamping screws at ends of filter panel. (See Figure 4)
3.
Remove and wash the foam filter in water.
4.
Tighten clamping screws. (See Figure 4)
5.
Replace and tighten two screws at sides of filter panel. (See
Figure 4)
Figure 4
1
x 4
(NS1F1223 rack shown)
Bottom
cover
panel
2
(B) x 4
(A)
(NS1F1223 rack shown)
4
Cable tie
mount
1
5
2
4