Assembly and installation – CHIEF FLR100 User Manual
Page 5
Installation Instructions
FLR100
5
ASSEMBLY AND INSTALLATION
NOTE:
Dependent on display size, the FLR100 may be
installed while the display is attached to the wall mount.
If not, remove display before proceeding.
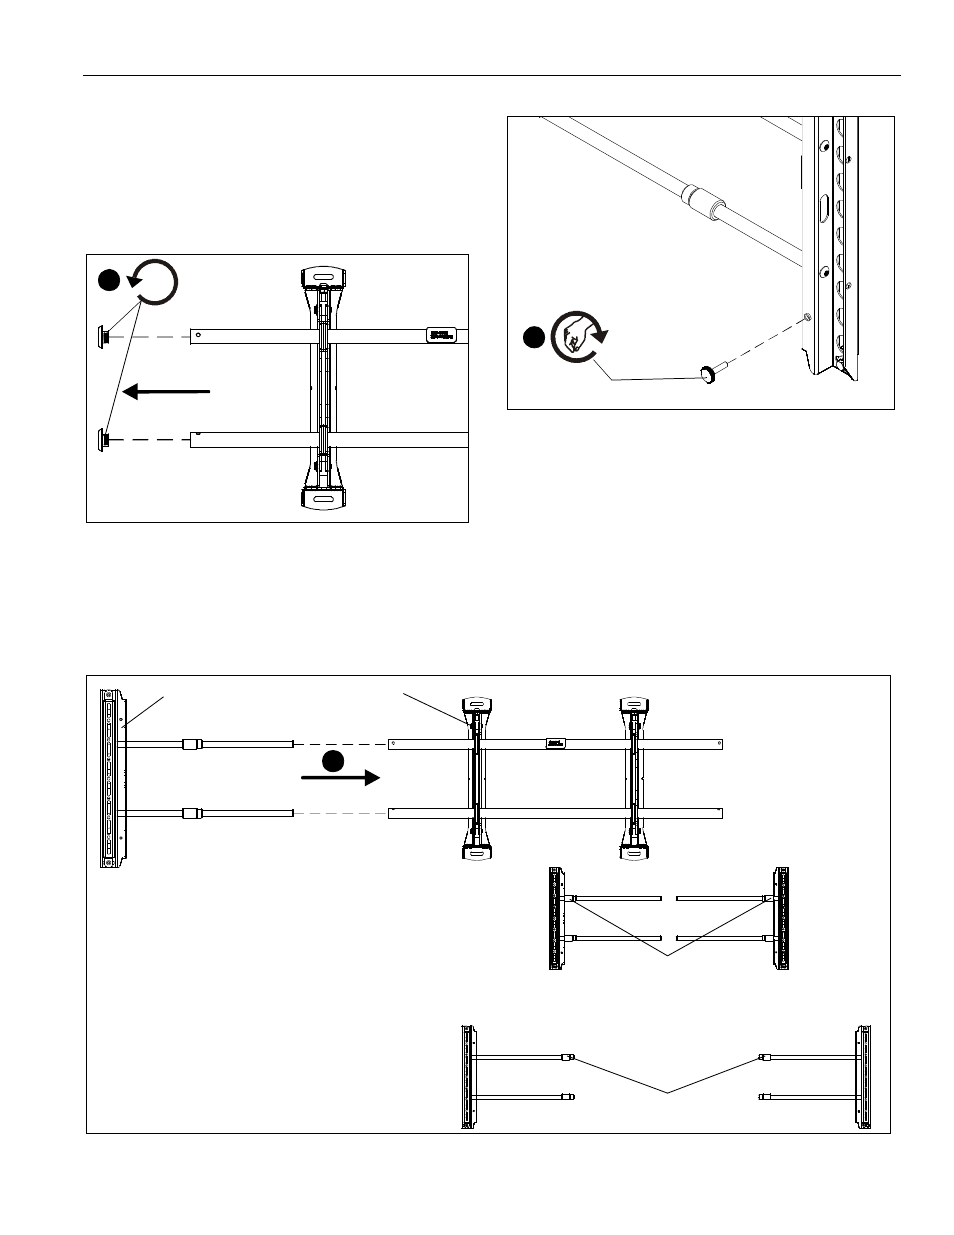
Attaching to Wall Mount
1.
Remove end caps from wall mount rails. (See Figure 1)
Figure 1
2.
Install and tighten the knob (G) on each speaker extension.
(See Figure 2)
Figure 2
3.
Slide FLR100 into wall mount rails. (See Figure 3)
4.
Tighten the side speaker bushings into the wall mount rails.
(See Figure 3)
NOTE:
It may be necessary to lift slightly on the FLR100 in
order to tighten the side speaker bushings.
1
(G) x 2
2
Figure 3
FUSION Mount
(A)
3
Side Speaker Bushing
for Minimum Extension
Side Speaker Bushing
for Maximum Extension
See also other documents in the category CHIEF Hardware:
- PACPC1 (8 pages)
- CMS Series Columns (8 pages)
- CPA Series Columns (4 pages)
- PAC390 (2 pages)
- KTA1005 Series (8 pages)
- KFA225 Series (12 pages)
- PAC391B (8 pages)
- KTA1007 Series (4 pages)
- KSA1024B (8 pages)
- PAC392B (8 pages)
- KTP Series (8 pages)
- KSA1011 (8 pages)
- FSA1015 (8 pages)
- OFB214 (4 pages)
- KTA220_225 (8 pages)
- KSA1021 (8 pages)
- KSA1022 (16 pages)
- KSA1250 (8 pages)
- KSA1250 (16 pages)
- KRA500 (4 pages)
- PAC261 Series (12 pages)
- KSA1023 (12 pages)
- KSA1020 (12 pages)
- FSA1001 (1 page)
- FSA1002 (2 pages)
- FSA1003 (1 page)
- FSA1005 (1 page)
- PAC200 (6 pages)
- MAC722 (8 pages)
- FSA1009 (8 pages)
- FSA1008 (1 page)
- PAC720 (6 pages)
- KSA1018 (8 pages)
- KSA1012 (1 page)
- MAC720 (6 pages)
- KTA1000 (4 pages)
- FSA1013 (8 pages)
- KTA1001 (8 pages)
- KSA1014 (6 pages)
- KSA1017 (8 pages)
- KTA1003 (6 pages)
- KSA1019 (8 pages)
- KTA1004 (8 pages)
- PAC775 (4 pages)
- PAC790 (8 pages)