Installation – CHIEF MAC1005 User Manual
Page 3
Installation Instructions
MAC1005
3
Installation
CAUTION:
FLAT PANEL DISPLAYS ARE EXTREMELY
FRAGILE.
NOTE:
In some installations (i.e. single arm mount) not all
fasteners included in this kit will be required.
WARNING:
INCORRECT ATTACHMENT OF BRACKET
TO DISPLAY MAY CAUSE DAMAGE OR PERSONAL
INJURY. Use the correct diameter and length of fastener to
attach interface bracket and/or Centris bracket to back of
display.
If Mount is Installed With Display
1.
Disconnect all wires and cables from display.
2.
Remove the four M4 x 12mm or M4 x 8mm screws from the
Centris bracket and carefully remove the display. (See
Figure 1)
Figure 1
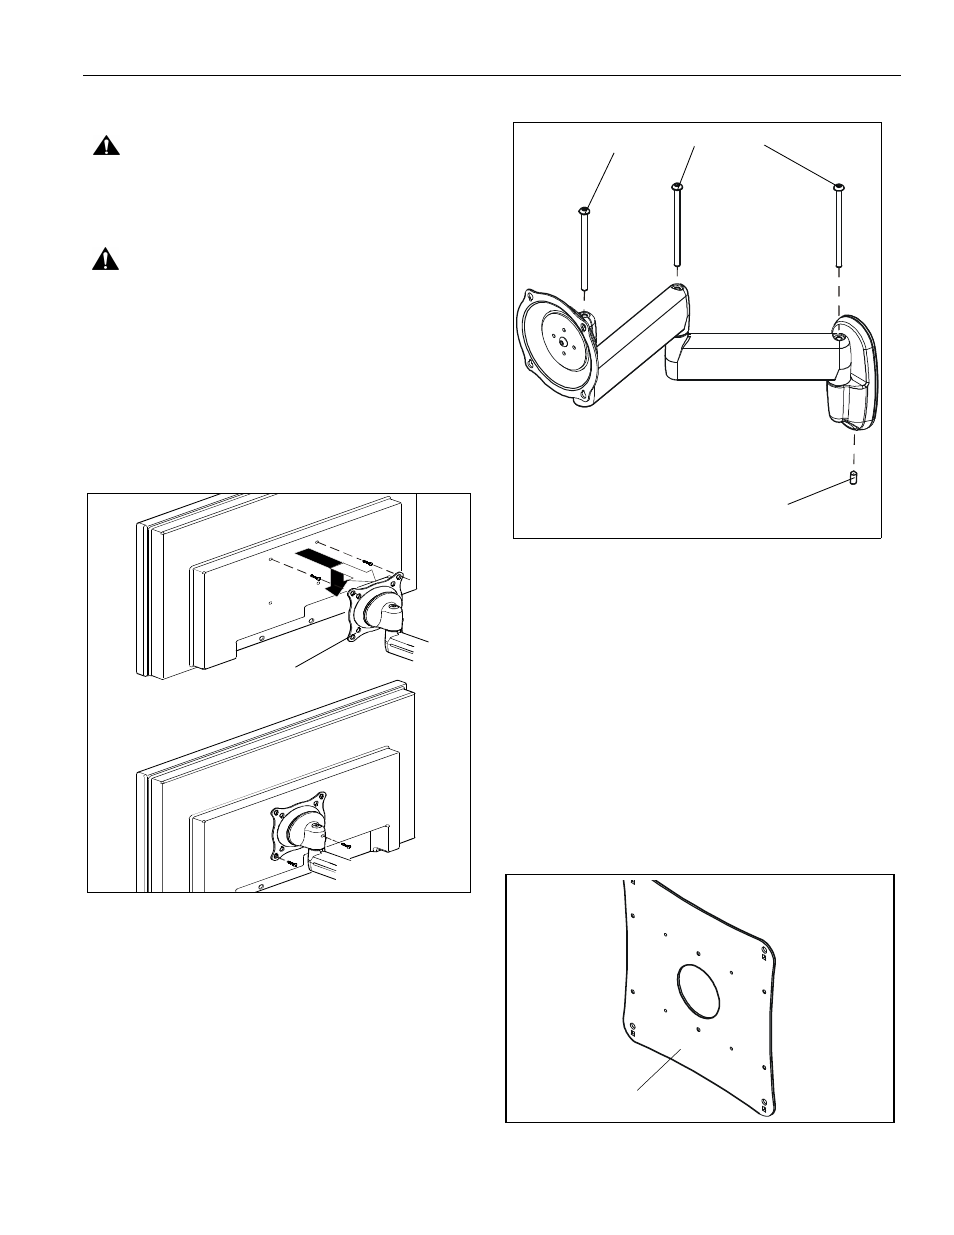
3.
Remove three existing fasteners on medium flat panel
mount (dual arm assembly shown for reference) and
replace with three 5/16-18 x 5" button head security screws
(F). (See Figure 2)
4.
Replace the set screw with the 5/16-18 x 3/4" security set
screw (E). (See Figure 2)
Figure 2
Re-Install Display
5.
If an interface bracket was used in this installation, remove
the screws attaching the interface bracket to the display.
Replace with the same size button head security screws
included in this kit (See Figure 3).
6.
Replace the four screws removed from the Centris bracket
with four M4 x 12mm button head security screws (AC) or
M4 x 8mm (AB) included in this kit. (See Figure 1)
•
Start two screws into top mounting holes on display.
•
Align mounting holes on Centris bracket with screws
installed on display. Hang display on Centris bracket.
•
Install two remaining screws into bottom mounting
holes on display.
•
Tighten four screws.
Figure 3
Centris Bracket
Replace with 5" Security Screw (F) x 3
Replace with Security Set Screw (E) x 1
Interface Bracket