CHIEF FCC100 User Manual
Page 6
FCC100
Installation Instructions
6
NOTE:
The hook bracket with attached speaker bracket may
be adjusted up or down on the upper hook bracket (A)
in 7/8" increments for 6-1/8" adjustment. There is also
a 1-3/8" infinite adjustment on the hook bracket (B) for
a total height adjustability of 7-1/2".
4.
Adjust the speaker height by holding onto hook bracket (B)
while using the adjustment slots to fine tune the speaker
height.
5.
Tighten four screws (E) with a 3/8" wrench. (See Figure 3)
Installing to Wall Mount with Display Removed
NOTE:
Installing the FCC100 to a wall mount where a display
has been removed allows use of security screws to
prevent the FCC100 from being removed.
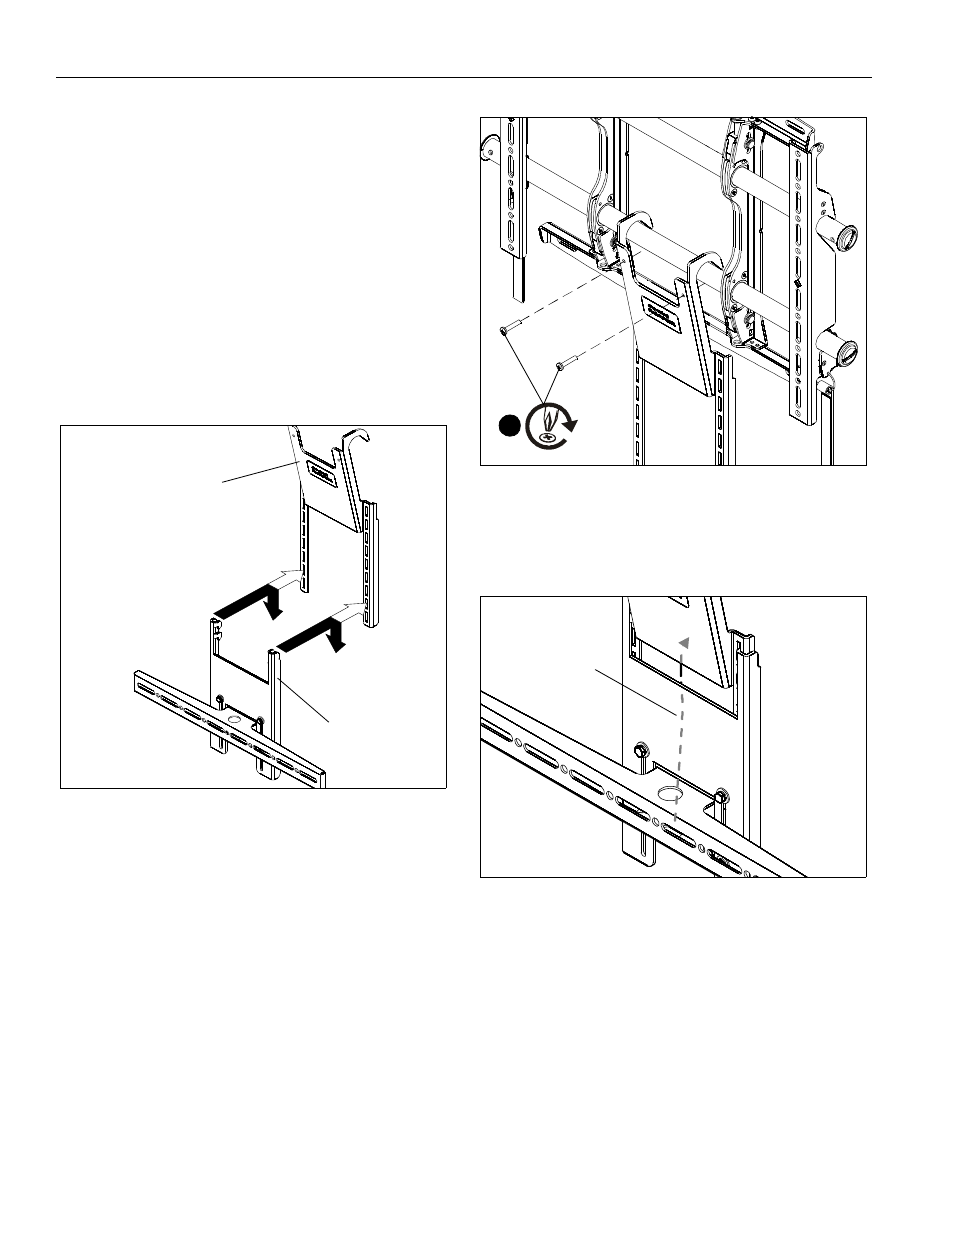
1.
Hang hook bracket (B) with attached speaker bracket onto
the upper hook bracket (A). (See Figure 4)
Figure 4
NOTE:
The hook bracket (B) with attached speaker bracket
may be adjusted up or down on the upper hook bracket
(A) in 7/8" increments for 6-1/8" adjustment, PLUS
1-3/8" infinite adjustment on the hook bracket (B) for a
total height adjustability of 7-1/2".
2.
Remove display if already attached to wall mount following
instructions included with the wall mount.
3.
Hang FCC100 on lower wall mount rail.
4.
Adjust location of FCC100 and secure to wall mount rail
using two 10-24 x 1" Phillips pan head screws (D). (See
Figure 5)
5.
Hang display on wall mount following installation
instructions included with the wall mount.
6.
Adjust the speaker height by holding onto hook bracket (B)
while using the adjustment slots to fine tune the speaker
height.
7.
Tighten four screws (E) with a 3/8" wrench. (See Figure 3)
Figure 5
Routing Cable
1.
Route cable from speaker up and behind the FCC100. (See
Figure 6)
Figure 6
(A)
(B)
4
(D) x 2
Route cable from
speaker up and
behind hanging
wall bracket