Installation – CHIEF KTA1004 User Manual
Page 5
Installation Instructions
KTA-1004
5
INSTALLATION
NOTE:
In order to reduce the chance of scratching to the
mounting surface, bumpers may be installed. However,
installation of bumpers is optional.
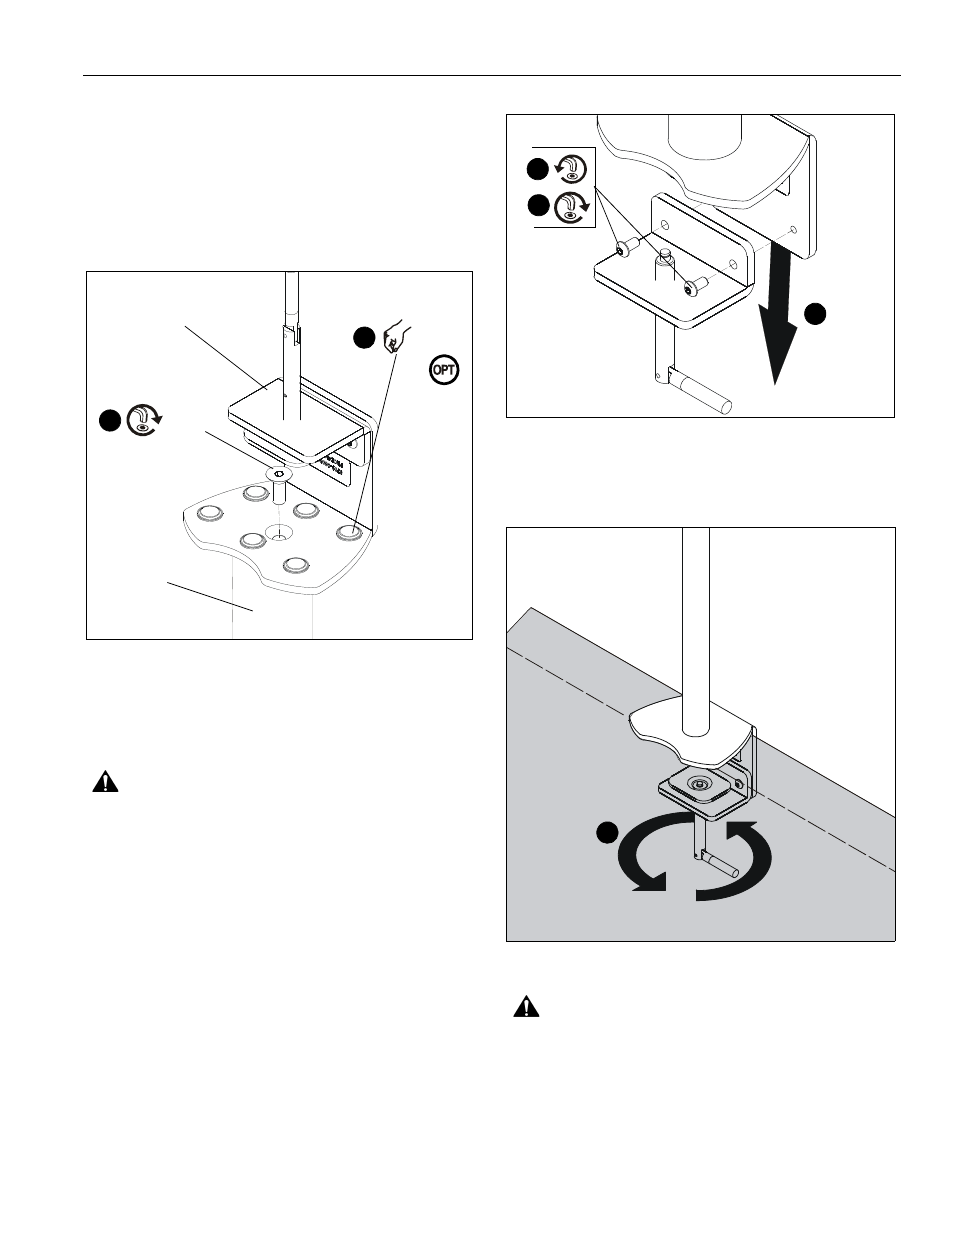
1.
Remove adhesive from underside of bumpers (B).
2.
Attach bumpers (B) to underside of desk clamp. (See Figure
1)
Figure 1
3.
Use 7/32" hex key (E) to install 3/8-16 x 1" flat head cap
screw (C) through the opening on top of desk clamp (A) and
into bottom of mounting pole (not included). (See Figure 1)
4.
Determine the location where desk clamp will be mounted.
WARNING:
Failure to keep all mounted equipment directly
above the desk surface at all times can result in serious
personal injury or damage to equipment! All mounted
equipment must remain directly above the surface of the
desk in order to ensure and maintain a stable mount.
5.
Place desk clamp (A) over desired mounting location on
desk. (See Figure 2)
6.
If there is not enough clearance behind the desk for the
device to clear, remove the bottom portion of the desk
clamp by using 5/32" hex key (D) to remove 2 connecting
screws. (See Figure 2)
7.
Reinstall bottom portion of the desk clamp (if necessary) by
reinstalling 2 connecting screws underneath desk. (See
Figure 2)
Figure 2
8.
Turn clamp screw until the clamp is secured to the desk as
tightly as possible. (See Figure 3)
Figure 3
WARNING:
Exceeding the weight capacity can result in
serious personal injury or damage to equipment! It is the
installer’s responsibility to make sure the combined weight of
all components attached to the KTA-1004 desk clamp up to
(and including) the display/projector does not exceed the
weight limits of the pole mount attached to the desk clamp.
9.
Install mount to mounting pole according to corresponding
installation manual for the specific mount to be attached to
mounting pole.
2
(B) x 6
3
(C) x 1
(A)
mounting pole
(view from bottom)
7
6
5
(behind desk)
8