CHIEF KRA500 User Manual
Page 3
Installation Instructions
KRA500
3
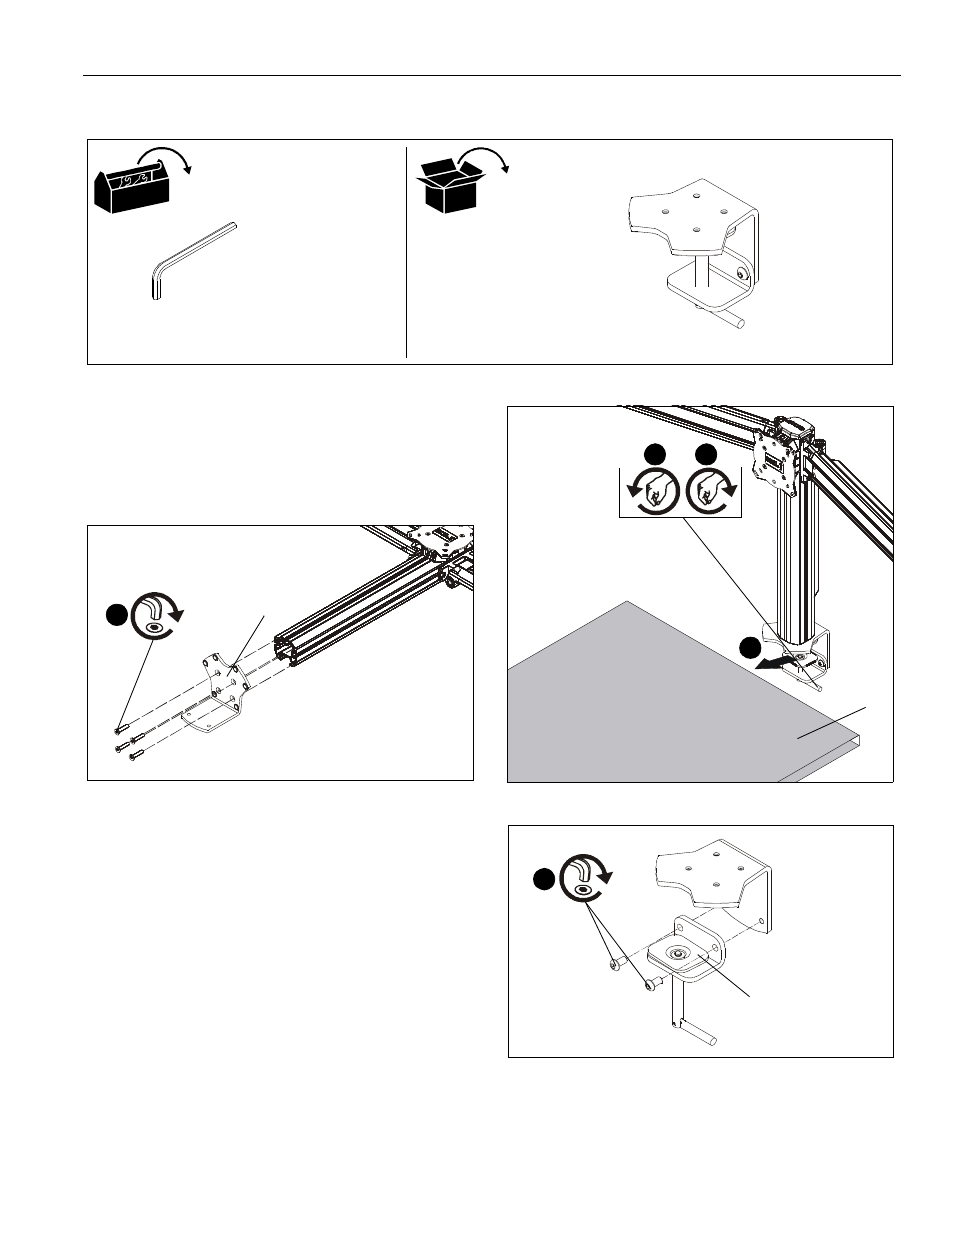
TOOLS / PARTS FOR INSTALLATION
ASSEMBLY AND INSTALLATION
IMPORTANT ! : For use with K3 Series mounts only! Do
not attempt to use with any other mount!
1.
Use four 1/4-20 x 1 1/4" button head cap screws from K3
Series mount to secure KRA500 clamp to K3 Series
column. (See Figure 1)
Figure 1
2.
Loosen clamp screw until enough space is created between
clamp and mount to allow for desk mounting. (See Figure 2)
3.
Place mount on top of desk at desired mounting location.
(See Figure 2)
NOTE:
If space is limited behind desk (i.e. against wall, etc.),
remove clamp screw and attachment bracket entirely.
(See Figure 3)
4.
If removed, reattach clamp screw and attachment bracket
below desk. (See Figure 3)
5.
Tighten clamp using clamp screw until mount is securely
fastened to desk. (See Figure 2)
Figure 2
Figure 3
6.
Complete the installation following the mount installation
instructions.
5/32" (included with K3 Series mount)
3/16" (included with K3 Series mount)
A (1)
[KRA500 clamp]
shown
1
x 4
(A)
(clamp screw and attachment
bracket shown removed for clarity)
2
3
5
desk
clamp screw and
attachment bracket
4