CHIEF KSA1024B User Manual
Page 5
Installation Instructions
KSA-1024
5
Assembly And Installation
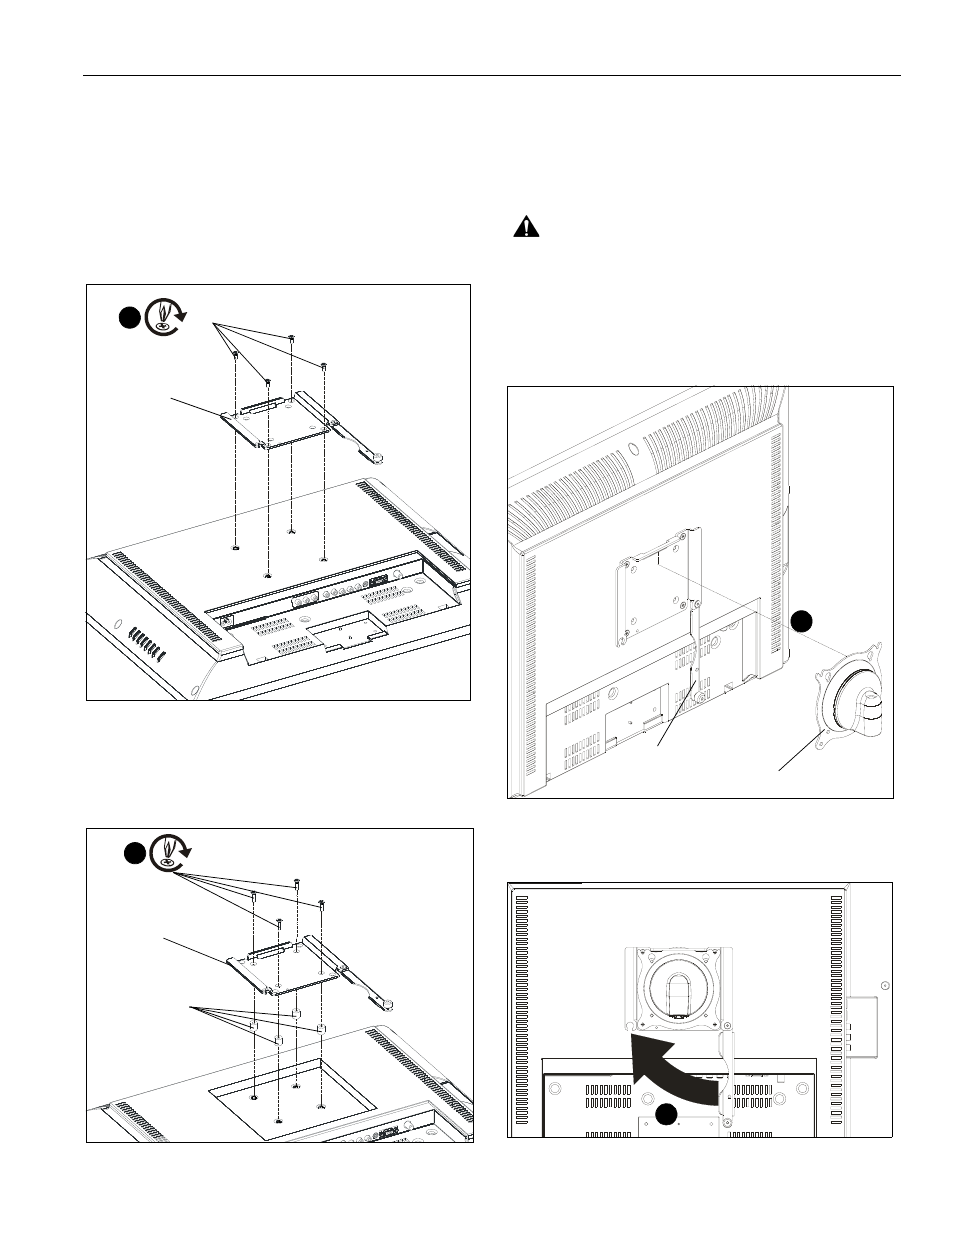
Attach Quick Connect/Disconnect Bracket to
Display
1.
Lay display face side down on a level, non-abrasive
surface. Lay down a cloth if necessary to avoid scratching
the screen.
2.
For non-recessed mounting holes, install four M4 x 12mm
Phillips flathead machine screws (D) through corresponding
bracket holes and into holes on back of display. (See Figure
1)
Figure 1
3.
For recessed mounting holes, install either four M4 x 20mm
or four M4 x 30mm Phillips flathead machine screws (E or
F) through corresponding bracket holes and four spacers (G
or H) and into holes on back of display. (See Figure 2)
Figure 2
Attach Bracket to Centris Plate
1.
Make sure quick connect/disconnect bracket flag is in the
open position. (See Figure 3)
2.
Place quick connect/disconnect bracket over Centris plate
making sure upper lip of bracket covers top of Centris plate.
(See Figure 3)
WARNING:
Exceeding the weight capacity can result in
serious personal injury or damage to equipment! It is the
installer’s responsibility to make sure the combined weight of
all components attached to this accessory does not exceed
40 lbs (18.14 kg).
DO NOT exceed the weight limitations of
the mount being installed to the bracket or of the office
furniture being used to mount the accessory.
Figure 3
3.
Move bracket flag to closed position. (See Figure 4)
Figure 4
(D) x 4
(A)
2
(E or F) x 4
(A)
(G or H) x 4
3
Centris head
2
flag in open position
3
(rear view)