CHIEF LCM1U User Manual
Page 8
MCM1U / LCM1U / MCM1US / LCM1US
Installation Instructions
8
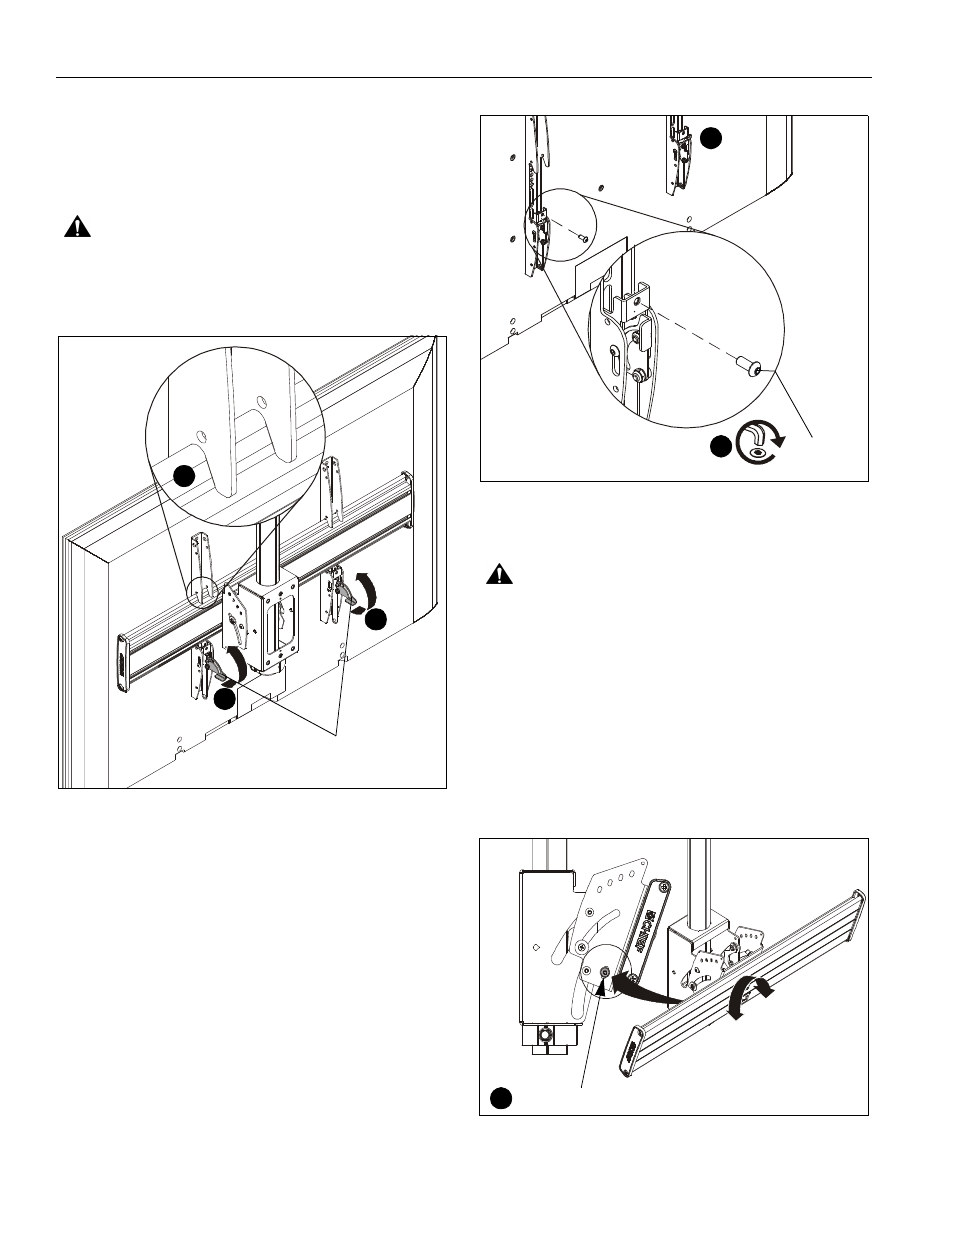
Attaching Display to Ceiling Mount
1.
Ensure that the latch mechanisms on interface brackets
(FF) are already lowered. (See Figure 5)
2.
While supporting both sides of display, lower display onto
ceiling mount, hooking top of interface brackets onto front of
ceiling mount. (See Figure 7)
WARNING:
IMPROPER INSTALLATION CAN LEAD TO
DISPLAY FALLING CAUSING SERIOUS PERSONAL
INJURY OR DAMAGE TO EQUIPMENT! The display MUST
be centered on the ceiling mount.
Figure 7
3.
Raise the latch mechanism on both interface brackets to
lock bracket in place. (See Figure 7)
4.
Fasten bracket against ceiling mount extrusion using one
10-24 x 5/8" button head cap screw (HH). (See Figure 8)
5.
Repeat for other interface bracket.
Figure 8
Adjustments
CAUTION:
Watch for pinch points! Do not place fingers
between moveable parts.
IMPORTANT ! : Always use two hands (one at bottom of
display and one at top of display) to adjust ceiling mount.
Roll
The ceiling mounts allow up to 3° roll each direction.
1.
Turn the roll adjustment screw in the direction necessary for
the desired roll. (See Figure 9)
2.
Stop adjusting when the desired setting is reached.
Figure 9
2
3
3
Latch
mechanism
(Ceiling mount not shown for clarity)
4
(HH) x 2
5
1
Roll adjustment screw
side
view