3a 3 – CHIEF RSA Series User Manual
Page 11
Installation Instructions
RSA Projector Mounts
11
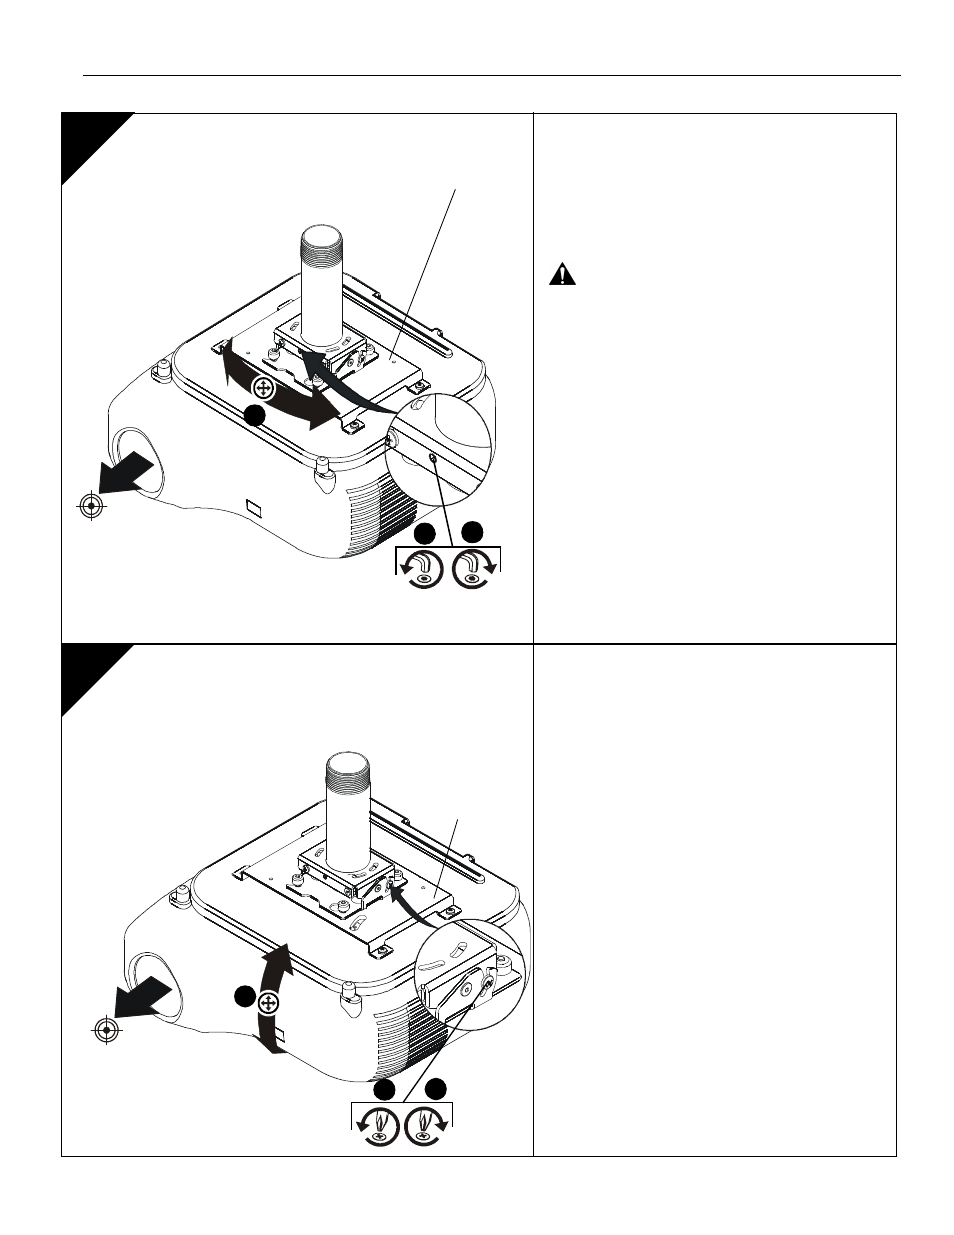
Pitch Adjustment
1.
Loosen pitch adjustment locking screw on each end
of the RSA projector mount using a #2 Phillips
screwdriver.
2.
Adjust projector angle to desired pitch.
3.
Tighten pitch adjustment locking screw on each end
of the RSA projector mount using a #2 Phillips
screwdriver.
ADJUSTMENTS
YAW Adjustment
1.
Loosen yaw adjustment screw using a 5/32" hex
key.
NOTE:
Yaw is only adjustable when attached to a
threaded pipe.
WARNING:
Do not turn the projector to the end of
the pipe threads. The projector, interface plate and
projector will fall from the pipe if it is unthreaded too
far! A minimum of four threads must be engaged in
order to ensure a secure connection!
2.
Adjust projector by turning the projector on the pipe
to the desired yaw position.
3.
Tighten yaw adjustment locking screw using a 5/32"
hex key.
3a
3
Example Only
(Interface bracket
varies dependent
on projector model)
Example Only
(Interface bracket
varies dependent
on projector model)
1
3
2
1
3
2