Hunter 25268 Original Schoolhouse Globe Light Kit User Manual
Page 4
4
43546-01 • 07/01/10 • Hunter Fan Company
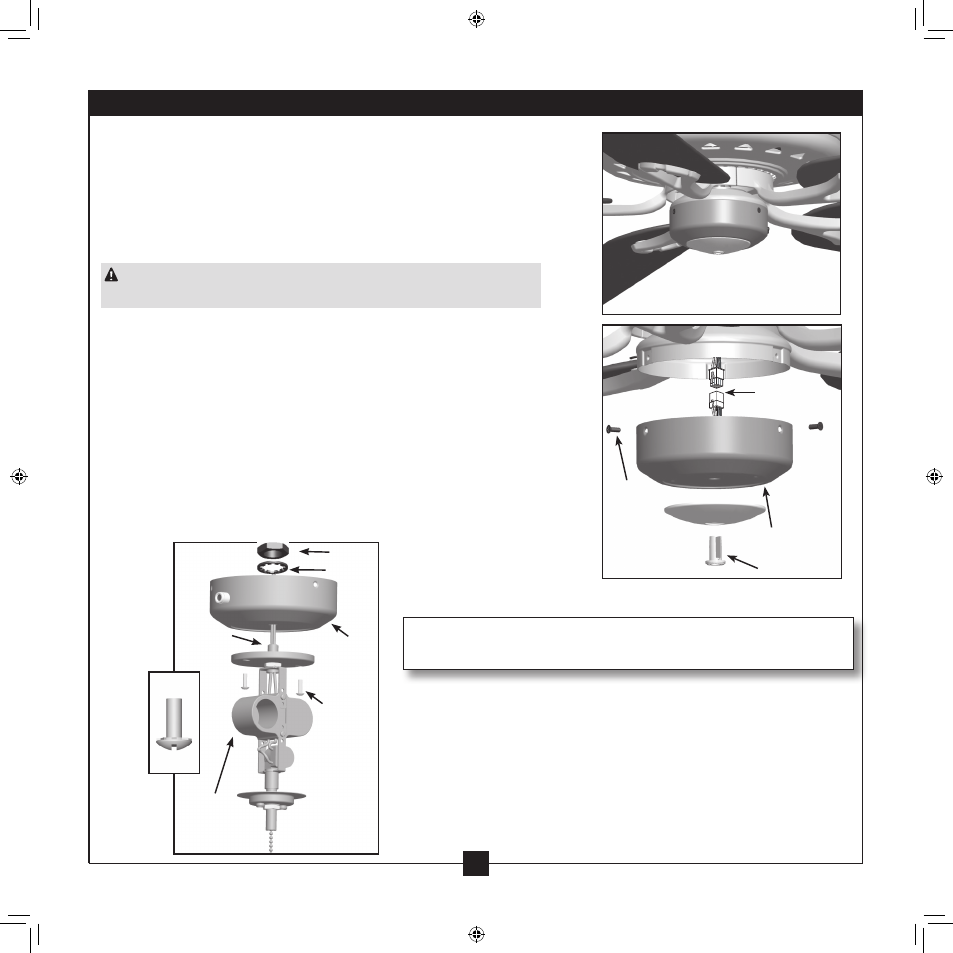
1 . Unscrew the three screws from the upper switch housing . Disconnect
the 9-pin plug connectors . Remove the lower switch housing .
2 . Push the plug button from inside the lower switch housing to remove
the plug button and switch housing cap .
NOTE: Save the plug button and switch housing cap should you
choose to remove the light fixture in the future .
CAUTION: If your fan is operated by remote control, take care not to
damage the small components on the circuit board inside the housing .
3 . Feed the two wires from the light fixture through the center hole in
the lower switch housing .
4 . Screw the threaded rod of the light fixture into the center of the lower
switch housing until you feel resistance . Unscrew the light fixture
slightly until the holes of the light fixture are aligned with the holes in
the lower switch housing .
5 . Finish attaching the light fixture to the lower switch housing using the
two attachment screws included . Securely tighten the two screws .
6 . Install the nut and washer inside the upper switch housing onto the
threaded rod from the upper light housing .
Removable Switch Housing
9-Pin Plug
Connector
Lower Switch
Housing
Plug Button
Screw
Steps 1-2
Lower
Switch
Housing
Light
Fixture
WARNING: Improper installation could cause the light fixture to fall .
Steps 3-6
Washer
Nut
Attachment
Screws
Threaded
Rod
Installing the Light Kit on Fans With Removable Switch Housing