Basic reminders about your aerogarden, Optional) trellis system, About the trellis system – AeroGarden 100733-DSS User Manual
Page 14: Attach trellis brackets to lamp hood, Use trellis system, Continued)
About the trellis system
(not included)
Your AeroGarden PRO
200
has the option of connecting a Trellis System to it’s Lamp Hood. The Trellis System
allows you to easily support heavy, fruit-filled branches on full-size plants such as tomatoes, peppers and cucumbers.
If you are interested in purchasing an AeroGarden Trellis System, you may do so at www.aerogardensupport.com or
from your retailer.
trellis system installation
If your PRO
200
is already assembled, you will need to remove the lamp Hood from lamp arm, and remove grow
Bulbs from the lamp Hood before starting. it is best to do this when the lights are off.
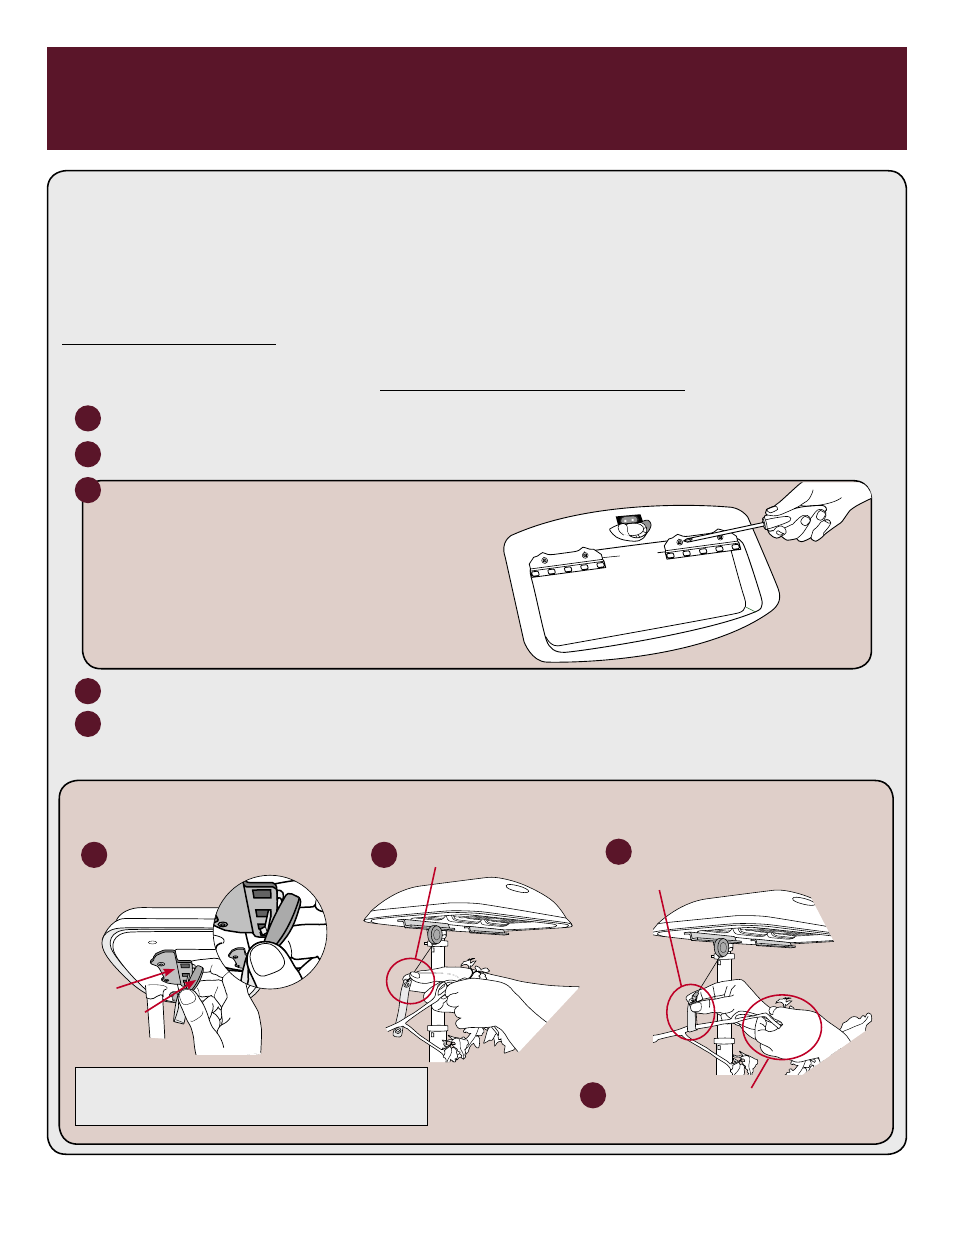
Attach trellis Brackets to lamp Hood
Unplug AeroGarden PRO
200
and carefully remove Lamp Hood from Lamp Arm.
Turn Lamp Hood over and remove Grow Bulbs.
(Be sure bulbs are cool before handling.)
Insert Grow Bulbs into Lamp Hood.
Replace Lamp Hood on Lamp Arm and plug in AeroGarden PRO
200
.
Hand tighten pre-mounted screws
with phillips head
screwdriver. Do not over-tighten.
Use trellis system
1
2
3
4
5
Basic Reminders About Your AeroGarden
(continued)
(optional) trellis system
1
Clip Trellis Coil on Bracket.
4
Gently push up on supported branch
until it is at desired height.
3
Wrap Strap around branch that
needs support and snap closed.
as a safety precaution, unplug aerogarden furnishing
before performing this task. Be sure Grow Bulbs are cool
to the touch before attaching or adjusting Trellis Coil.
2
Pull down Trellis Coil.
lamp Hood
Bracket
trellis Coil
13