Ab c d – Carolina 140 Series General Purpose Incubators User Manual
Page 2
Receiving
After unpacking, verify receipt of correct quantities of each component and that each component has
not suffered any shipping damage. If there are any problems, please refer to the enclosed
Damaged/Missing Item Report.
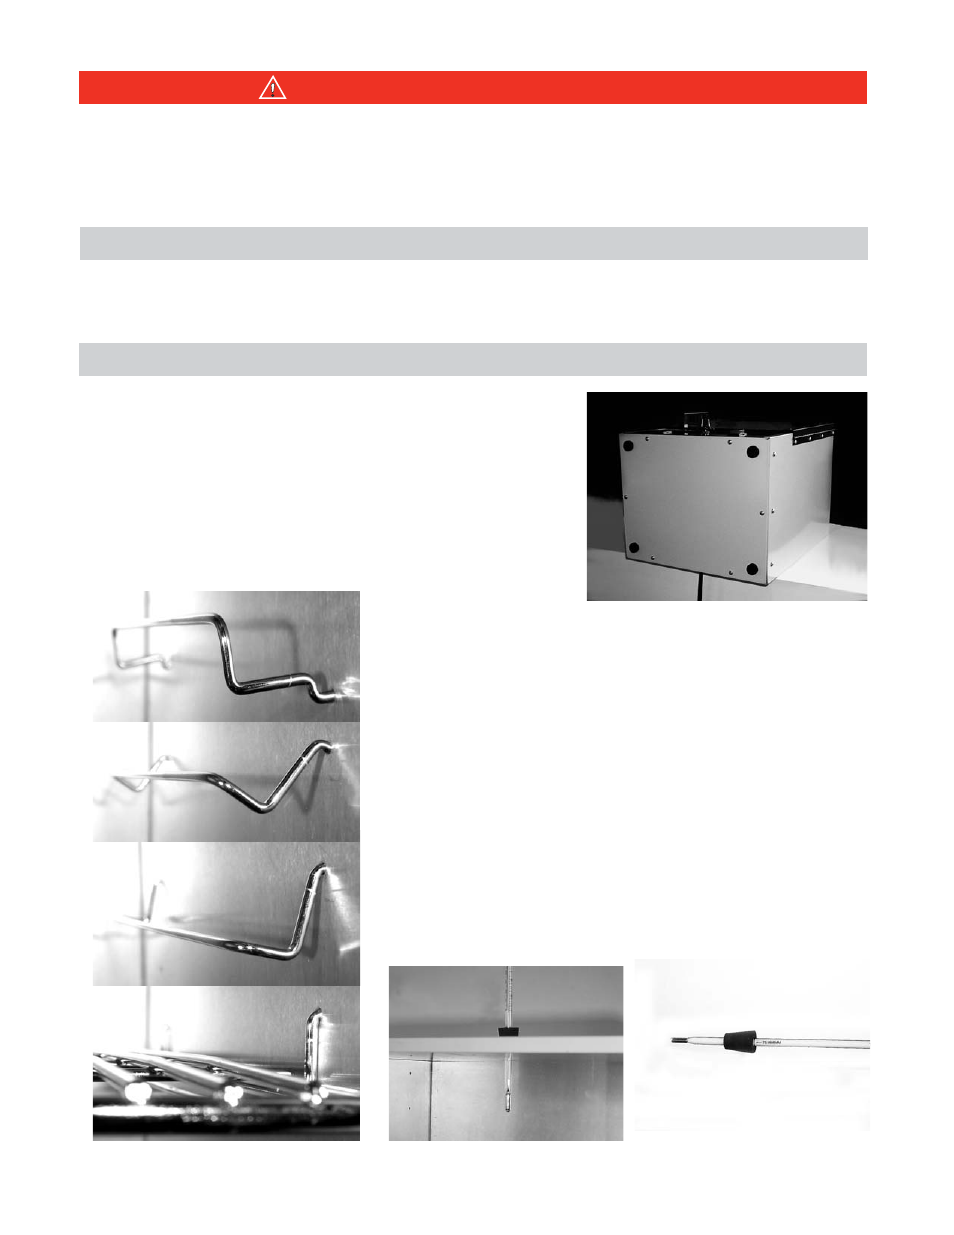
FIG. 4
Set-up & Installation
Place the unit on its back with the bottom surface facing you.
Install the (4) rubber feet into the (4) mounting holes by
pressing in and turning. (FIG 1) Do not operate unit without
the feet installed.
Place the unit upright. Position unit in its ultimate operating
location. Keep a minimum of 2" of airspace around the unit
and a minimum of 16" above the unit to allow for
thermometer.
FIG. 1
A
B
C
D
FIG. 2
FIG. 3
PAGE 2
Remove the glass thermometer from its container and insert
into the rubber grommet. (FIG 2)
Insert the rubber grommet/thermometer assembly into the
port through the top of the incubator. The thermometer
should extend into the incubator at least 1-1/2". (FIG 3)
Install adjustable shelf by placing the ends of the wire shelf
bracket into the corresponding holes located on the inner
sides of the oven at the desired height. Push the ends of the
bracket into the holes until the first bends in the bracket are
against the wall, then rotate the bracket down. Place the shelf
on the brackets. (FIG 4)
Plug the unit into a grounded outlet for your unit's rated
voltage. See units electrical label located on rear panel.
Read Operating Instructions thoroughly prior to operation. Use only a grounded outlet that is rated for
your models' electrical requirement. Do not modify the oven or factory control settings to operate the
oven above the stated maximum operating temperature. Exterior surfaces on the 180 models may
become hot to the touch when operating at higher set temperatures. Conduct periodic maintenance
as required.
Read Operating Instructions Thoroughly Prior to Operation
Safety Precautions