Product features, Using the baby unit – Lexibook SMBABY1 User Manual
Page 14
1
ENGLISH
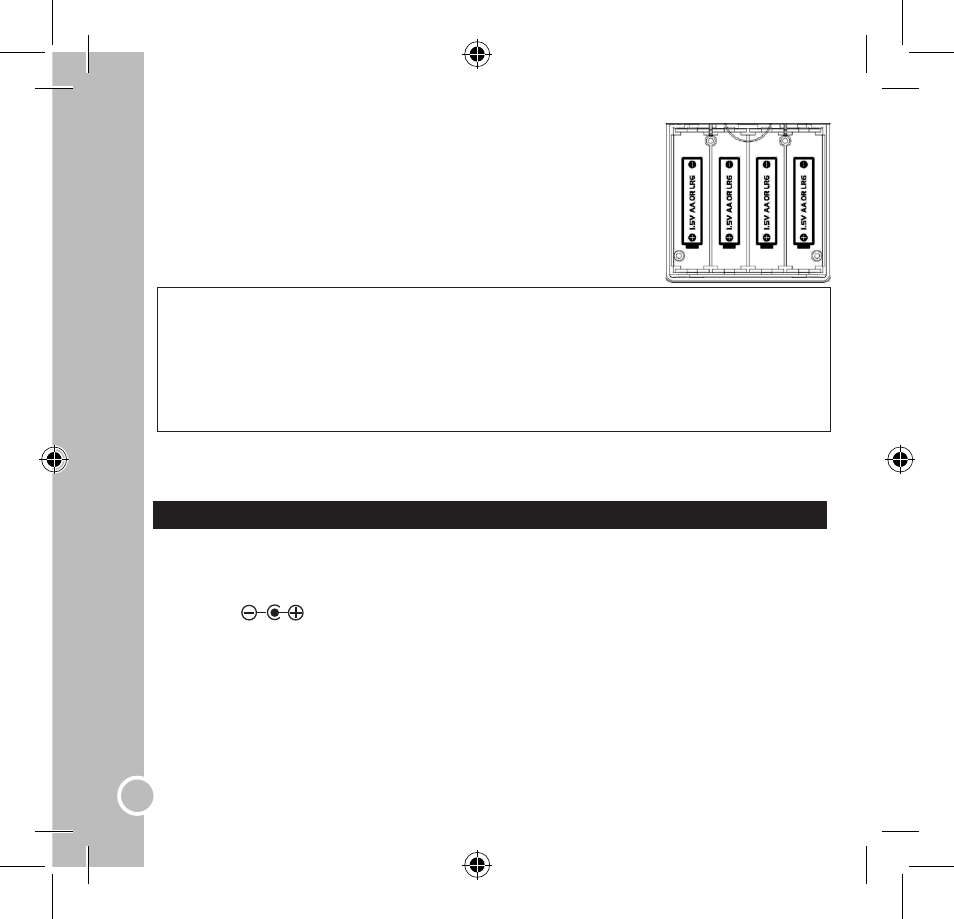
Battery installation
1. Using a screwdriver, open the battery compartment located at the back
of the parent unit.
2. Insert x AA/LR6 size batteries (not included) observing the polarity
indicated in the compartment, and as per the diagram shown opposite.
. Close the battery compartment and tighten the screw.
Note: The adapter must be disconnected from the DC IN jack on the
rear of the unit in order to let the product operate on battery power.
Non-rechargeable batteries are not to be recharged. Rechargeable batteries are to be removed
from the product before being charged. Rechargeable batteries are only to be charged under
adult supervision. Different types of batteries or new and used batteries are not to be mixed.
Only batteries of the same or equivalent type as recommended are to be used. Batteries are to
be inserted with the correct polarity. Exhausted batteries are to be removed from the product.
The supply terminals are not to be short circuited. Do not throw batteries into a fire. Remove the
batteries if you are not going to use the product for a long period of time.
WARNING: If the units malfunction or receive an electrostatic shock, press the RESET buttons. If
this proves to be ineffective, remove the batteries and insert them again.
Product features
Baby unit (picture A)
1. Night light
2. “Comfort Zone” button
3. “Sleep Guardian” Start/Stop button
. DC IN 6V
5. Volume button
6. “Night light” On/Off button
7. “Sleep Guardian” mode selector switch
8. “Sleep Guardian” sensitivity selector switch
9. Battery compartment
10. Baby unit table stand
11. “Baby monitor” transmission mode selector switch
12. Transmission channel selector switch
1. Battery compartment
Parent unit (picture B)
1. LCD screen
2. LED
3. “Baby monitor” On/Off button
4. “Comfort Zone Alarm” On/Off button
5. “Temperature display C°/F°” button
6. On/Off/Volume button
7. Transmission channel selector switch
8. Integrated speaker
9. Battery compartment
Place the unit in the child’s bedroom, on a side table using the removable stand, on the door
handle or above the bed using a strap (not included).
“Sleep guardian” feature
1. Use the selector switch located on the top of the unit to turn on or turn off (“OFF”
position) the “Sleep Guardian” function or to select one of the 5 modes:
• Mode 1: Lightshow
• Mode 2: Lightshow and sounds
• Mode : Lightshow and music
• Mode : Sounds
• Mode 5: Music
2. If the baby cries, the “Sleep Guardian” feature will start automatically for 8 minutes.
3. You can adjust the sensibility of the “Sleep Guardian sensor” with the slider on the back
of the unit.
. Use the volume button on the top of the product to adjust the volume level.
5. The “Sleep Guardian” feature can also be started or stopped manually with the “Star” button on
the front .
Night light mode
Use the “Night light” On/Off button located on the top of the unit to switch on or switch off the
light in the moon.
“Comfort Zone” indicator
Press the cloud-shaped “Comfort Zone” button on the front of the Baby unit and the light in
the moon will indicate if the conditions in the baby’s room are comfortable.
• Green indicates good conditions (temperature between 16 and 20 degrees C° and humidity
between 0 and 60 %).
• Red means out of comfort zone (temperature not between 16 and 20 degrees C° or humidity not
between 0 and 60 %).
Using the Baby Unit