atwood EDWIN RV Entry Door Window User Manual
Page 2
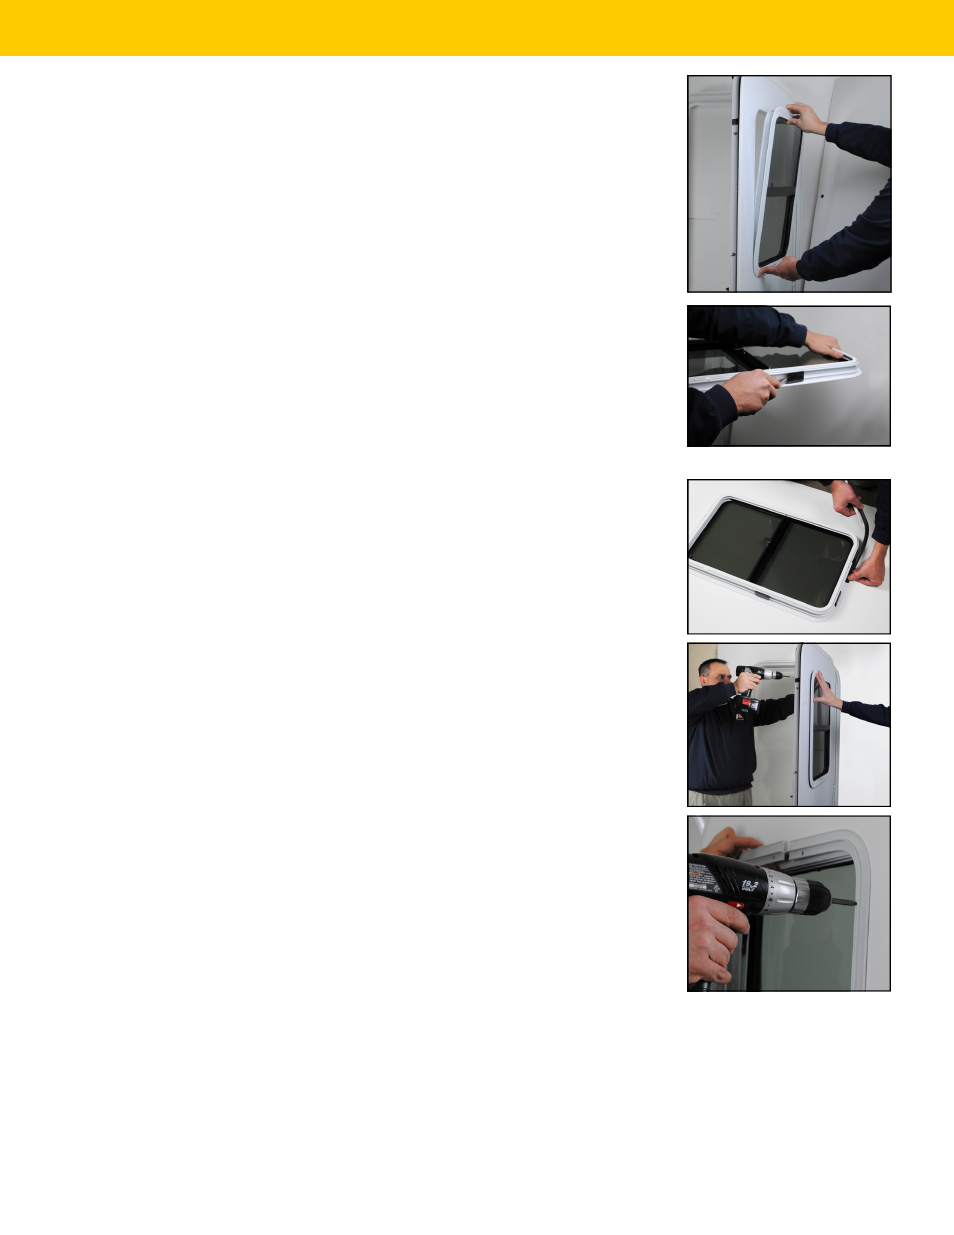
Step 2. Verify window fit.
•
First you will need to remove the 4 short packaging screws
holding the window and trim ring together. These are for
shipping purposes only and will not be needed.
•
Test fit the new window by simply placing it in the rough
opening to ensure a proper fit. (See Photo D)
•
If the window will not slide into the opening, use a screw-
driver to pop out one of the plastic black spacers located
on the side of the window and then retry. Continue to re-
move spacers until the window slides into the opening.
(See Photo E)
Step 3. Prepare and install your new EDWIN window.
•
Lay the new window face down on a soft surface so not to
scratch it, and apply the included flange seal tape around
the flange. Start in the center of the bottom side of the
window and apply the seal tape all the way around the pe-
rimeter until the ends meet, and trim flush. There should
not be a gap where the seal ends meet. (See Photo F)
•
Next, one person should place and firmly hold the window
into the opening from outside the vehicle. The second per-
son will align the trim ring on the inside of the window and
begin loosely fastening the interior trim ring with the pro-
vided screws. Start with the 4 corners first and work your
way around the perimeter gradually tightening each screw
as you go. This will slowly pull the trim ring and window
together. (See Photos G & H)
Step 4. Enjoy your new EDWIN window.
Now that your new window is properly secured and sealed you are ready to get back
out on the road and enjoy your RV.
Disclaimer: It is the consumers responsibility to ensure the accuracy of the window measurements submitted for order as well
as proper installation. Atwood assumes no responsibility for any incorrect measurements or installation errors made by the
consumer.
The Easy RV Window Replacement People.
EDWIN Do-It-Yourself Installation Guide (Page 2)
D
E
F
G
H