Mounting solutions, Super stand - universal rotating parts work stand, Part mounting instructions for model 7300 – Astro Pneumatic 7300 Super Stand - Universal Rotating Parts Work Stand User Manual
Page 4
MOUNTING SOLUTIONS
IF YOU NEED
FURTHER ASSISTANCE PLEASE
CONTACT YOUR NEAREST DISTRIBUTOR, OR
ASTRO PNEUMATIC TOOL COMPANY AT
(800)221-9705.
CHROME
HOOD
DOOR
BUMPER
7300
Super Stand
- Universal Rotating Parts Work Stand
page 4
PART MOUNTING
INSTRUCTIONS FOR
MODEL 7300
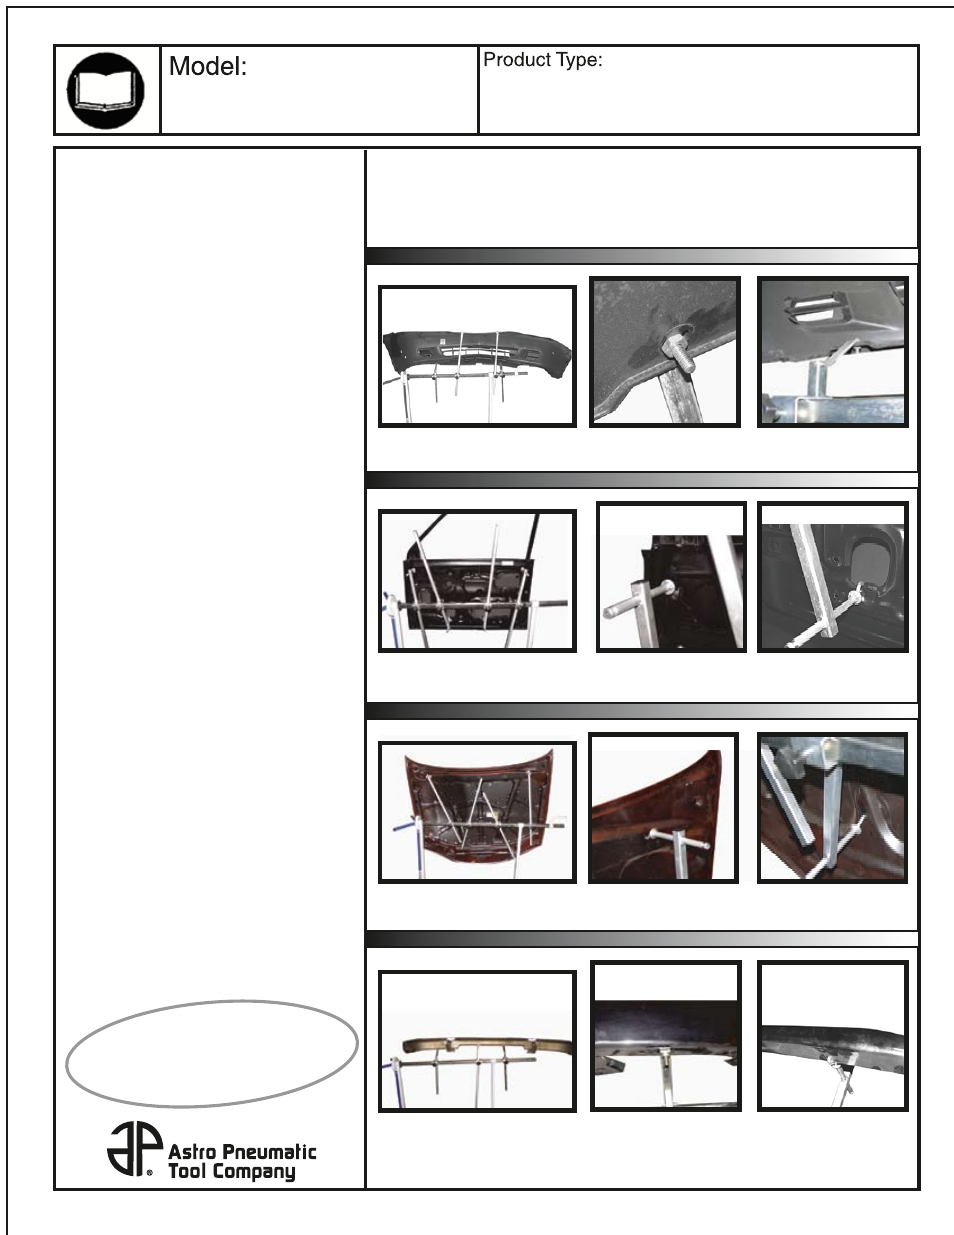
Due to the universal nature of this unit and its
capabilities to mount many types of
automobile parts, mounting instructions must
be given in a general manner. When
mounting any part you must first determine
what would be the safest way to secure the
automobile part to the Part Stand.
Begin by examining the specific part that
is being mounted and look for holes on the
partthat will allow the Suspend Arm (part
#1) or Prop Arm (part #2) to be inserted
into.
1)
Hints:
Select holes that are as close to the size of
the hook/straight mount for best support.
Select holes at the furthest point on the part
being mounted for better support.
Suspend Arm and/or Prop Arm can be set
at an angled position for wider range and
support.
Suspend Arms and Prop Arms can be used
separately or in conjunction.
Suspend Arms have hook on one side and
straight mount on opposite side. Depending
on size of hole selected to mount part,
select which will secure part best.
Prop Arms have holes at the end which can
be used to secure part being mounted. If
part being mounted has a lip/tab with hole,
align the hole on the Prop Arm with the hole
on the lip/tab and secure by using a nut &
bolt (not included).
•
•
•
•
•
•
Begin mounting process by deciding length
necessary for Suspend Arm/Prop Arm.
Secure Suspend Arm/Prop Arm into place
by tightening knobs.
Mount part onto Suspend Arm/Prop Arm.
Before proceeding to next step, assure that
part is secure and weight is well distributed
and will not cause stand to tip over.
Next, mount bottom of part to Suspend
Arm/Prop Arm. Follow instructions in step 1.
Assure that part is mounted securely. Test
by slowly rotating part.
2)
3)
4)
5)