Components, Getting started, V-screen installation – Aputure V-Screen VS-1 User Manual
Page 11
1
4
5
6
7
2
3
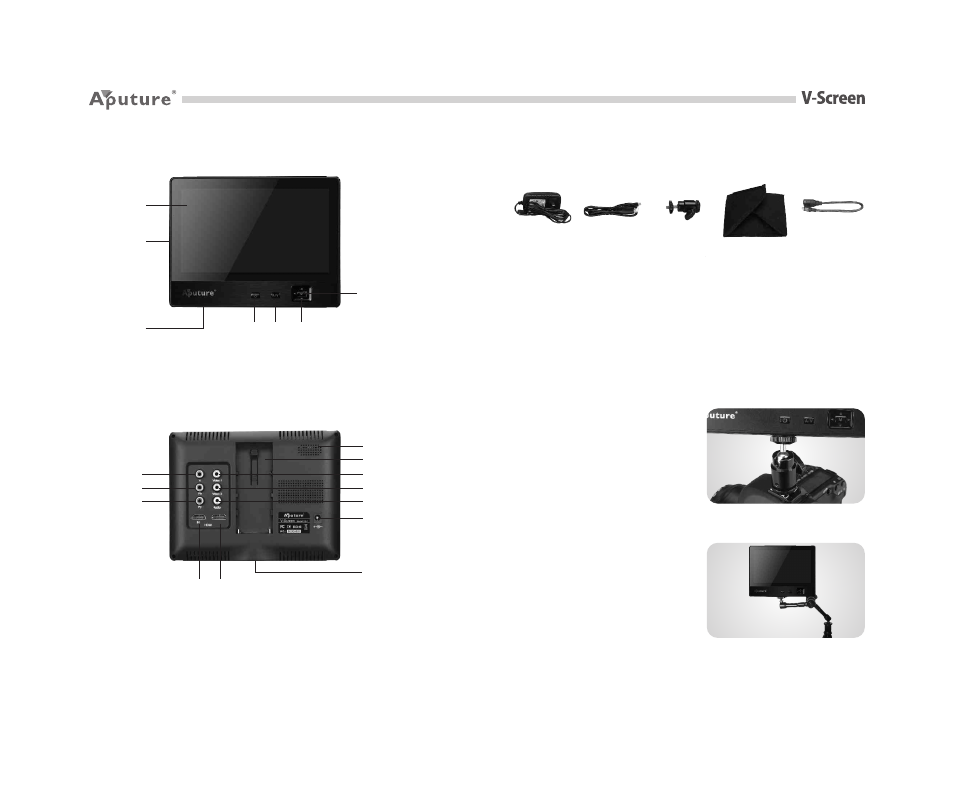
1. Power Adapter
2. HDMI Cable
3. Universal Hot Shoe Mount
4. Folding Sunshade
5. Firmware Upgrade
Cable
2. Components
4
5
3. Getting Started
1. Y Signal Input
2. Pb Signal Input
3. Pr Signal Input
4. Speaker
1. LCD Display
2. Mini USB Input (only for
firmware upgrades)
3. Earphone Jack
4. Power Switch
5. Signal Switch < A/V>
6. Menu Button
7. Direction Pad
5. Battery Slot
6. Video 1 Signal Input
7. Video 2 Signal Input
8. Audio Jack
9. DC Power Screw Mount
10. 1/4" Jack
11. HDMI Signal Input
12. HDMI Signal
Output (VS-2)
Front
Back
Accessories
V-Screen Installation
1) Mount on camera or camcorder
Fix V-Screen on your DSLR camera or
camcorder with the universal hot shoe
mount, then connect them by HDMI or
AV cable (Purchased separately).
2) Mount on the Magic Hand
Fix V-Screen on the magic hand or other
accessories with 1/4" connecter, and
lock them.
1
2
5
3
4
1
2
3
4
5
6
7
8
10
OUT
12
11
9
AP-025
Monday, January 14, 2013 11:56:37 AM