Anemostat SV22 User Manual
Nstallation, Verview, Etrofit
Stainless Steel - Installation
17
®
®
United States Patents issued for S-Vent
®
5,375,373 and 6,113,488
R
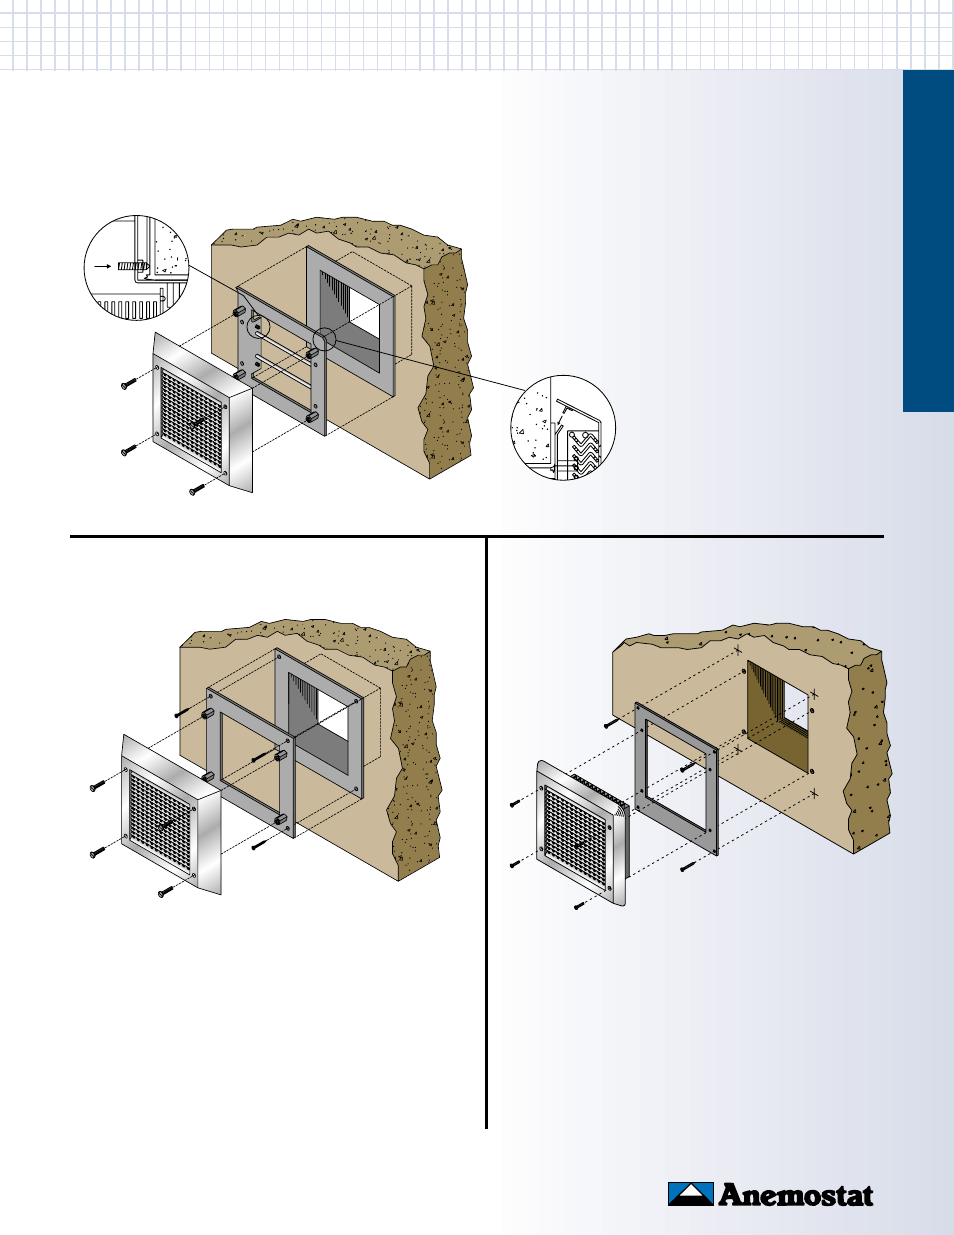
ETROFIT
INTEGRATED PLENUM
with “RAPITACH” MOUNTING PLATE
S-VENT
®
MODELS
SSV22, SSV23, SSV26
and
SSV42
1. Cut out the existing grille face, while leaving the face
flange and sleeve in place.
2. Insert “Rapitach” mounting plate into existing grille
ensuring it is properly orientated and secure with the
cone pointed setscrews supplied. Holes supplied for
supplemental welded attachments.
3. Set and align the grille (with integrated plenum) to the
“Rapitach” mounting plate.
4. Fasten grille to plate using approved security screws
(by others).
5. As necessary, seal any gaps around the faceplate
using an approved security sealant.
FACE MOUNTED GRILLE and PLATE
INTEGRATED PLENUM
with FACE MOUNTED GRILLE
S-VENT
®
MODELS
SSV22, SSV23, SSV26
and
SSV42
1. Attach the mounting plate using screws (by others)
or by welding.
2. Fasten grille to plate using approved security screws
(by others).
3. As necessary, seal any gaps around the faceplate
using an approved security sealant.
S-VENT
®
MODELS
SSV22, SSV23, SSV26
and
SSV42
1. For more efficient air flow, cut out the existing grille
face. Leave all else in place.
2. Attach the mounting plate using screws (by others)
or by welding.
3. Fasten grille to plate using approved security screws
(by others).
4. As necessary, seal any gaps around the faceplate
using an approved security sealant.
NOTE: To maximize sealant use, prepare enough plenum
rough-ins so that a full tube of caulking can be used.
I
NSTALLATION
O
VERVIEW