Aeromotive 13107 - GM LT-1 REGULATOR User Manual
Page 2
4. Place shop towels around the regulator to catch any gasoline that is spilled during this step of the
installation. Remove the regulator mounting bolt and carefully remove the regulator from the fuel rail.
5. Remove the clip at the base of the regulator holding the return line in place and remove the regulator
from the car.
If your application utilizes AN style braided return line, the fitting in the base of the fuel pressure
regulator may be replaced with Aeromotive p/n 15606 for AN-06 return lines.
6. Apply light oil to the o-rings supplied in the Aeromotive package. Replace the o-ring on the fuel return
line with the Aeromotive supplied o-ring.
7. Install the new Aeromotive regulator using the reverse of the foregoing removal procedure.
8. Due to OEM manufacturing tolerances some installations may require use of the provided shims to
be placed between the OEM mounting bracket and the Aeromotive regulator mounting bracket to
achieve proper fit.
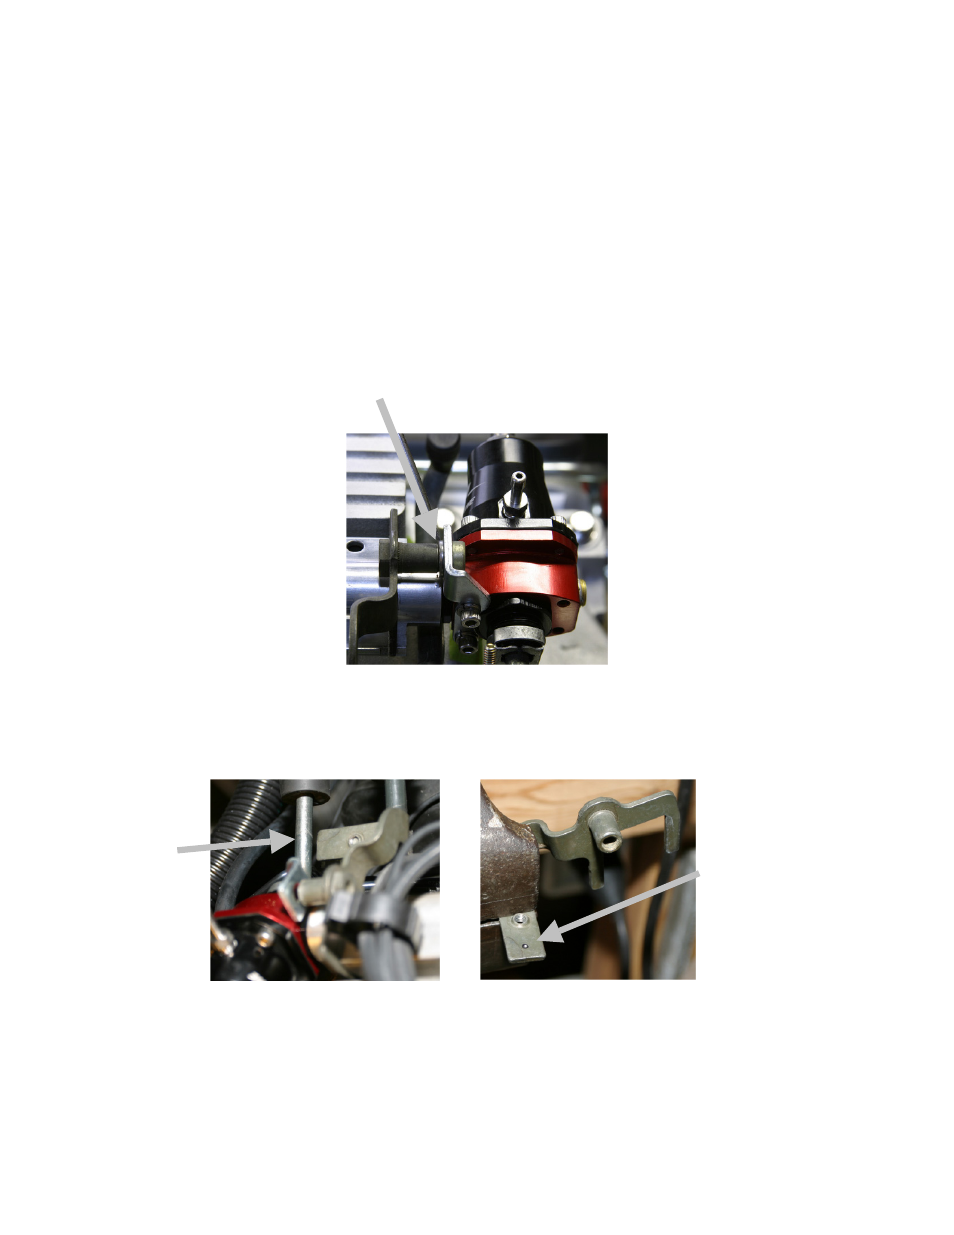
9. In some installations it may be necessary to relocate the return line mounting clamp. Using the
enclosed cushioned line clamp as a pattern, mark the OEM line bracket and drill a hole using a #18
drill bit (.170 Diameter).
OEM
Return Line
Mark and drill
No longer
#18 hole.
aligns with
the OEM
bracket