Aeromotive 17201 - SS CARBURETED FUEL SYSTEM User Manual
Page 2
Section 1 - Fuel pump installation:
DO NOT RUN THE PUMP DRY! Excessive wear will result if the pump runs dry.
DO NOT DISASSEMBLE THE PUMP! Disassembly will throw the pump out of calibration and void all warranties on this
product.
DO NOT ATTEMPT TO ADJUST THE OUTLET PRESSURE SCREW! The maximum outlet pressure has been preset at
the factory and locked in its current position. Adjusting it will void all warranties on this product.
1-1. Once the engine has been allowed to cool, disconnect the negative battery cable and relieve the fuel system
pressure.
1-2. Raise the vehicle and support it with jack stands.
1-3. Referring to the appropriate vehicle service manual for instructions, drain and disconnect any electrical and fuel
component connections, plug the open fuel line ends and remove the existing pump.
1-4. Find a suitable place on the vehicle chassis to mount the Aeromotive fuel pump. Make sure the location will
accommodate the pump mounting bolts, will position the pump lower than the fuel tank, is clear of the exhaust, is
clear of any moving suspension or drivetrain components and will keep the pump clear of road obstructions or debris.
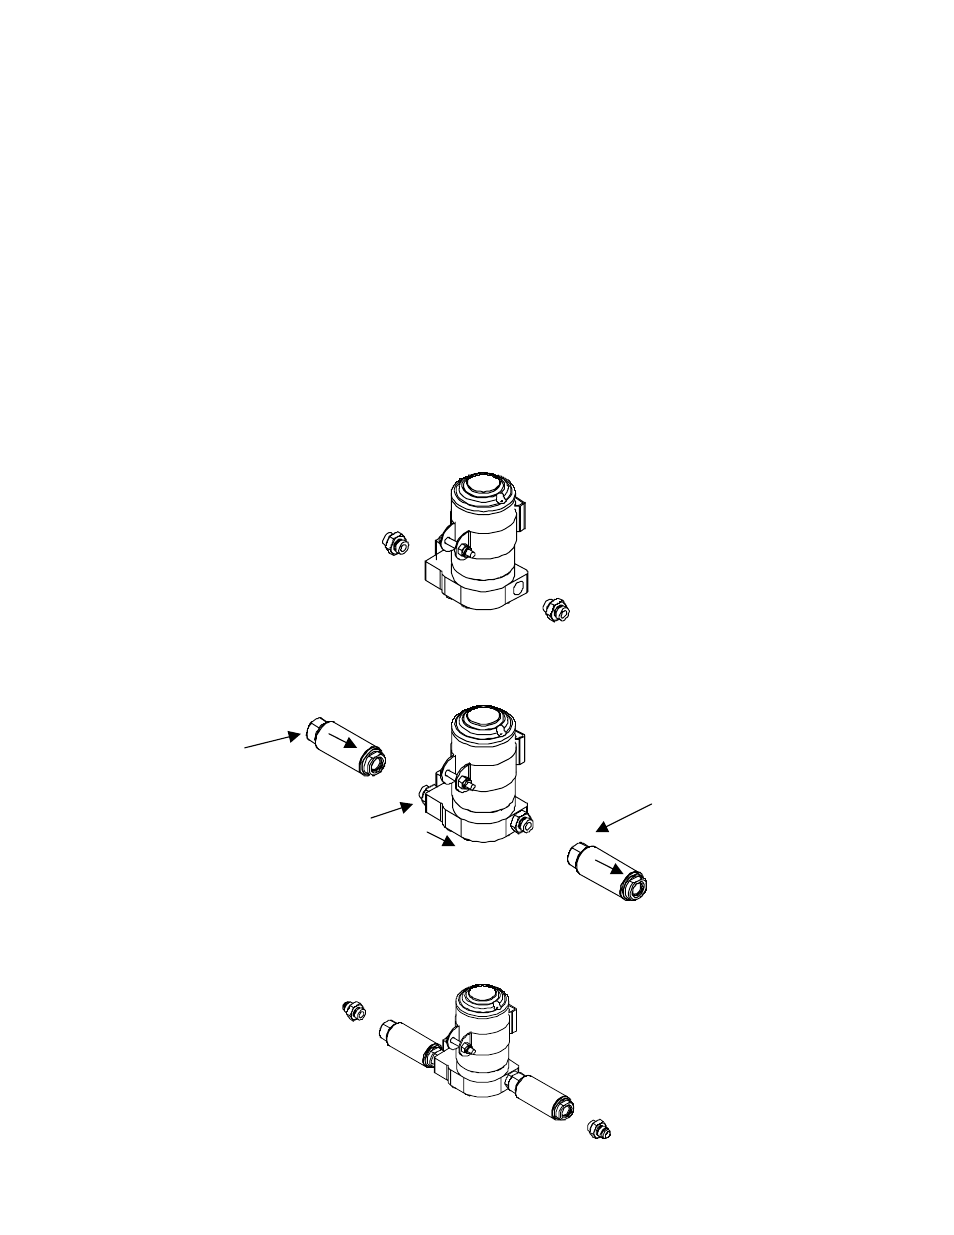
1-5. Apply pipe thread sealant to one end of each of the two 3/8-NPT hex nipples and thread into each side of the
Aeromotive fuel pump. (Figure 1-1)
Figure 1-1
1-6. Apply pipe thread sealant to remaining side of 3/8-NPT hex nipples and thread Aeromotive filters on both side of
Aeromotive fuel pump, paying close attention to pump and filter inlets and outlets. (Figure 1-2)
Figure 1-2
1-7. Apply pipe thread sealant to the pipe thread side of two 3/8-NPT to AN-08 Adapters and thread into the remaining
side of the fuel filters. (Figure 1-3)
Figure 1-3
Inlet Side
Inlet Side
Inlet Side