Pcmcia/compactflash – AAEON PCMCIA_CompactFlash User Manual
Page 18
PCMCIA/CompactFlash
™
ATA to IDE Drives and Modules
18
9 When finished, save your settting and exit the BIOS Setup. Your
computer will automatically re-boot. Allow your computer’s
operating system to load normally.
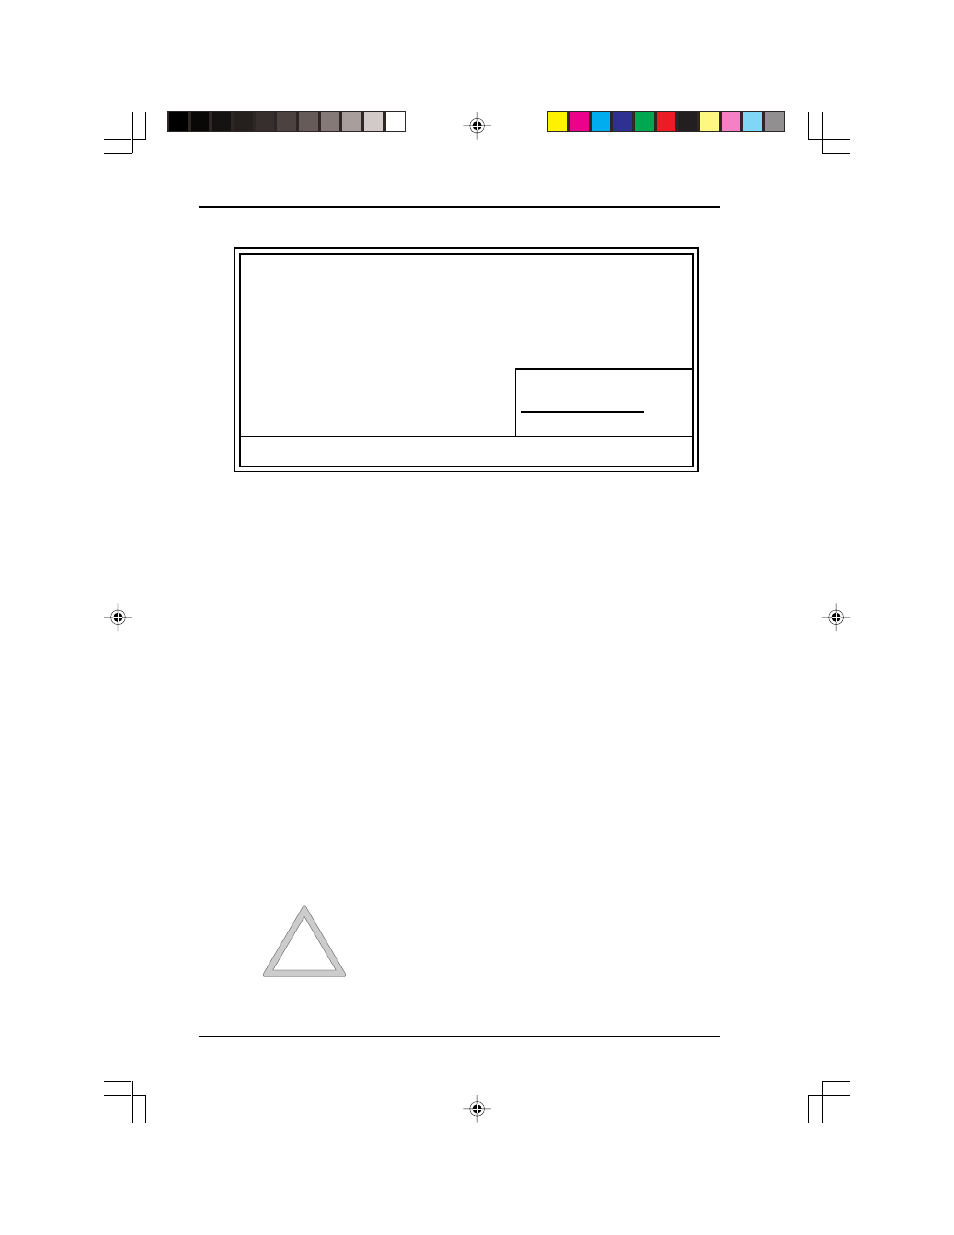
Open your File Manager or Windows Explorer to verify that your
operating system has identified the new drive correctly. The figure on
the following page shows that the new drive has been assigned a drive
letter according to the standard naming conventions of the operating
system.
Note:
If your computer’s BIOS fails to identify the new drive
correctly, the problem is most likely due to one of two reasons.
First, check your drive’s jumper setting that controls whether
the drive is configured as either the master or the slave. If
changing the jumper setting does not correct the problem, it is
possible that the PCMCIA or CompactFlash card that you are
using is defective. Repeat BIOS configuration procedure with
a new card.
Warning:
PCMCIA and CompactFlash cards in the
PCMCIA/CompactFlash (ATA) to IDE drive or
module are NOT hot-swappable. You must
turn off your computer before attempting to
eject or insert a card. Attempting to change
cards while the computer is running will not be
successful and may damage your card and/or
your computer.
Date
Time
HARD DISKS
TYPE SIZE CYLS
HEAD
PRECOMP
LANDZ
SECTOR
MODE
Primary Master
:Auto 4310 14848
9
65535
14847
63
Normal
Primary Slave
:None 0
0
0
0
0
0
--------
Secondary Master :Auto 20
640
2
65535
639
32
Normal
Secondary Slave
:None 0
0
0
0
0
0
--------
Drive A: 1.44M. 3.5 in.
Drive B: None
Base Memory:
640K
Extended Memory: 15360K
Other Memory: 384K
Video: EGA/VGA
Halt On : All But Keyboard
Total Memory:
16384K
ESC: Quit
- ¯ ® ¬
: Select Item
PU/PD/+/-: Modify
F1: Help