3 assembly, Ssembly – Physio-Control LUCAS User Manual
Page 16
16
100057-00 F, ©J
OLIFE
AB 2007
LUCAS
TM
C
HEST
C
OMPRESSION
S
YSTEM
, I
NSTRUCTIONS
FOR
U
SE
t
y
u
i
3.3 A
SSEMBLY
WARNING – LETHAL PINCH HAZARD
If the air is connected during the assembly
procedure, and the
ON/OFF
-knob is in the
Active
position, the compressions may seriously injure the
patient or create conditions leading to death of the
patient.
Always follow the described sequence of air
connection and assembly.
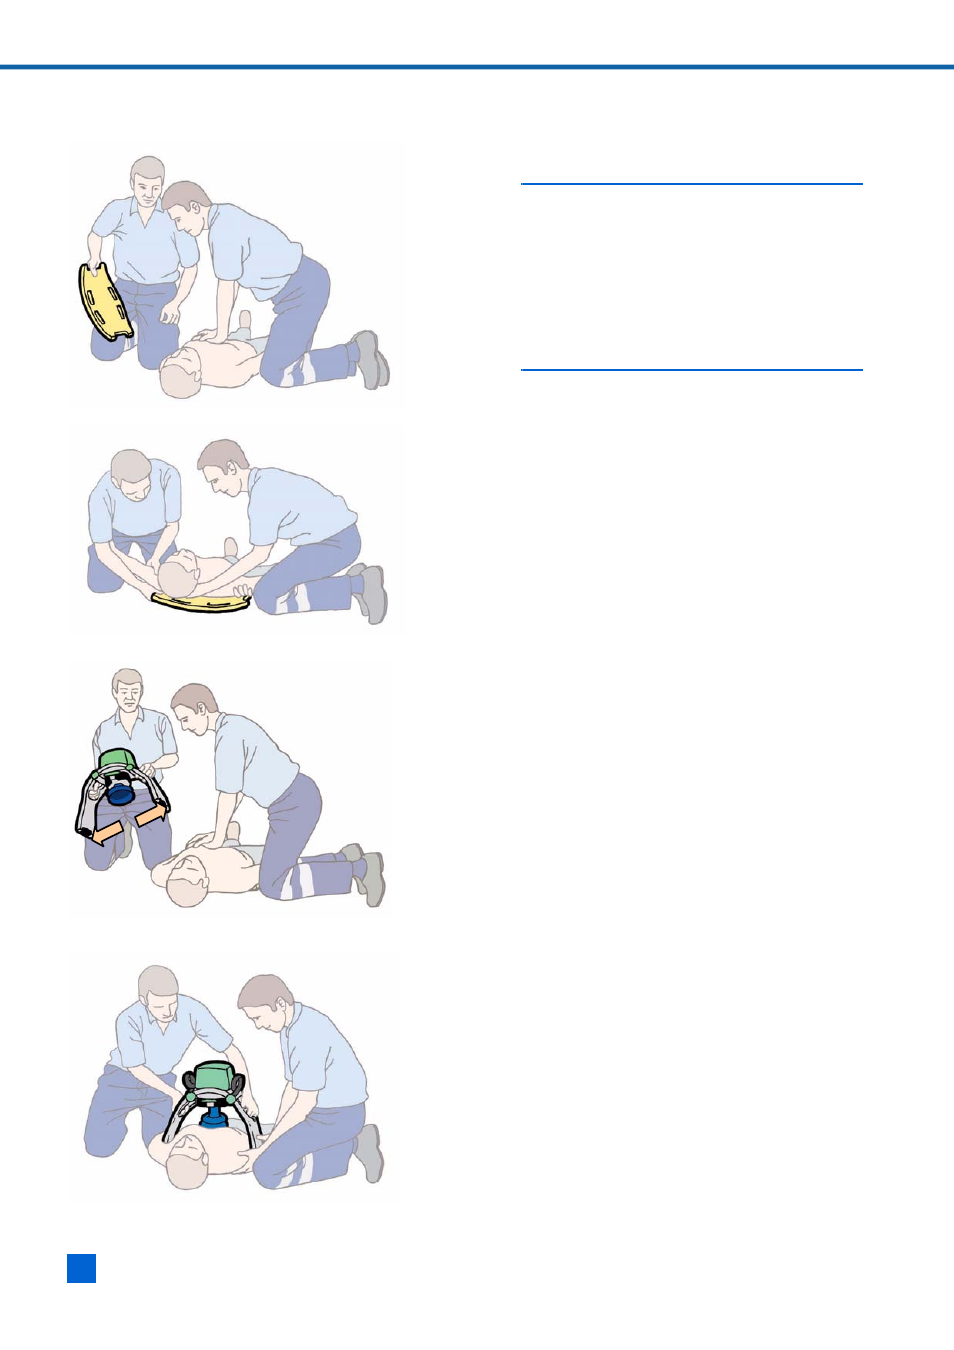
1.
Take the back plate out of the bag and approach
the patient (Figure
).
2. Instruct those carrying out CPR to interrupt
chest compression.
3. Work in a pair, one person on each side of the
patient.
4. Take hold of the patient’s arms. One of the
LUCAS team should support the patient’s head.
5. Lift up the patient’s upper body and lay the
back plate below the armpits. Ensure that the
patient’s arms are outside the back plate
).
6. Continue manual chest compressions.
7. Take the upper part of LUCAS out of the bag.
Lift it out by holding on to the handles of the
support legs. Ensure that the support legs have
reached their outer position (Figure
8. Pull up once on the release rings to check that
the claw locks are open.
9. Interrupt manual chest compression.
10. Place the upper part of LUCAS over the
patient’s chest so that the claw locks of the
support legs will engage with the back plate
).
11. Start by pressing on the support leg nearest to
you and then the one on the other side so the
support legs lock against the back plate.
12. Check by pulling upwards, that both support
legs have locked against the back plate.