Troubleshooting, Setup guide — dvi dl 201 tx/rx (cont’d) – Extron Electronics DVI DL 201 Tx_Rx Setup Guide User Manual
Page 2
Setup Guide — DVI DL 201 Tx/Rx (cont’d)
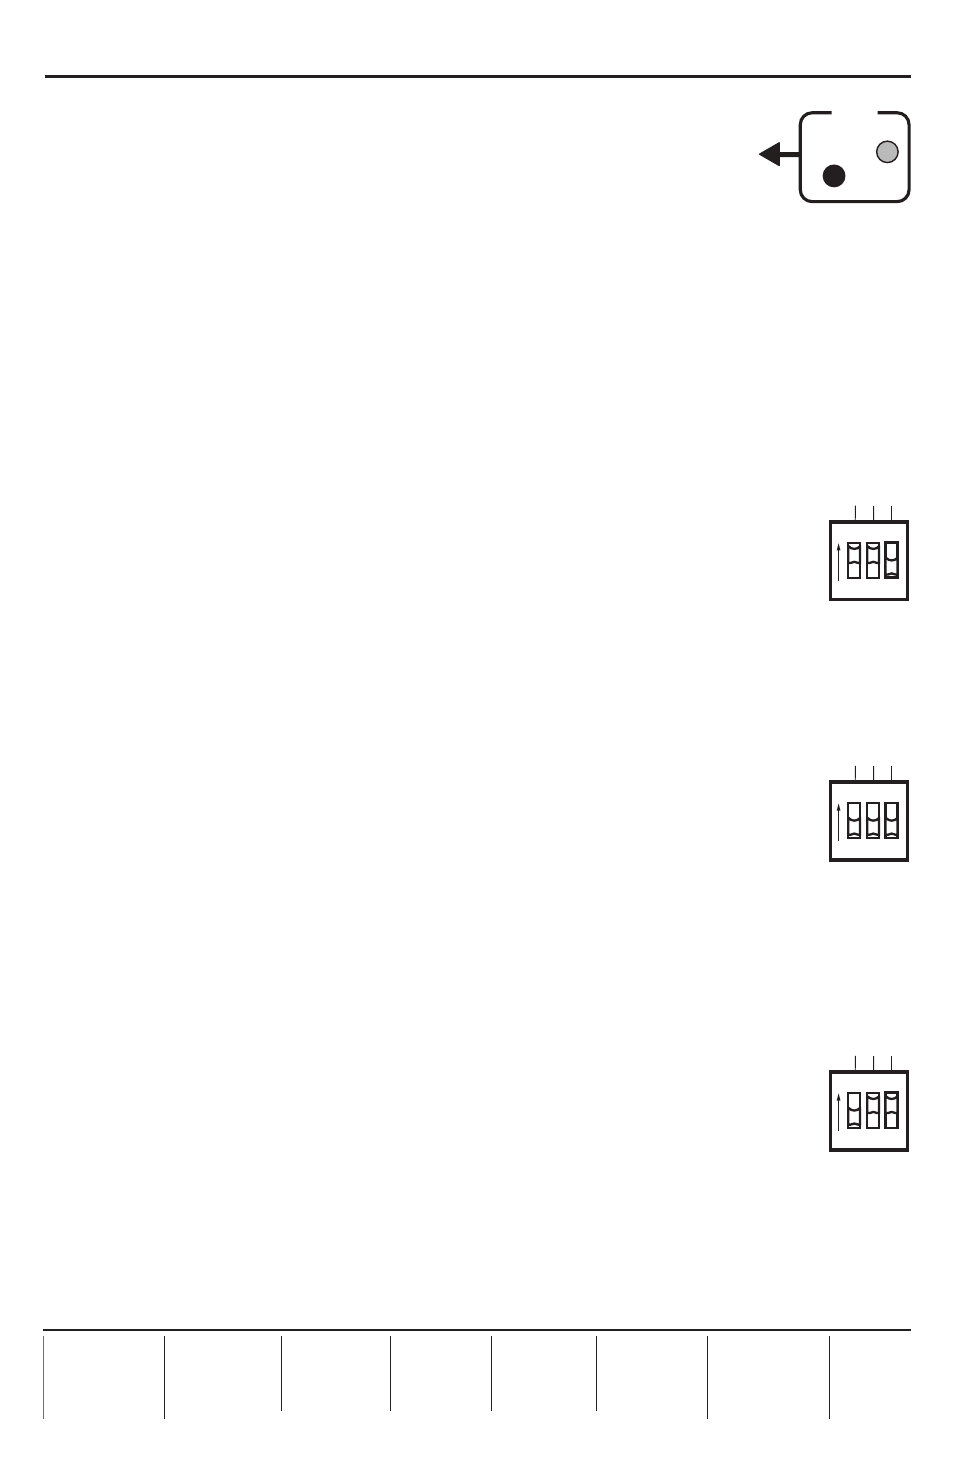
d.
Press and release the EDID “Store” button (see the figure at right). The
rear panel LED turns amber while the EDID information is read and
stored from the local monitor. Afterwards, the LED turns green.
e.
Power off and disconnect the display from the transmitter.
f.
Connect the transmitter to the receiver.
g.
Connect a source device to the transmitter.
h.
Connect a display device to the receiver and, if required, a local monitor to the transmitter.
i.
Power on the display device(s), the transmitter, and the receiver.
j.
Power on the source device.
Option 2 —
To use the default EDID (2560x1600 @ 60 Hz):
a.
Configure the DDC switches as shown in the figure at right.
b.
Connect a source device to the transmitter.
c.
Connect a display device to the receiver and, if required, a local monitor to
the transmitter.
d.
Connect the transmitter and receiver.
e.
Power on the transmitter, receiver, and display devices.
f.
Power on the source device.
Option 3 —
To use DDC pass-through routed to the local monitor:
a.
Configure the DDC switches as shown in the figure at right.
b.
Connect a source device to the transmitter.
c.
Connect a display device to the receiver and, if required, a local monitor to
the transmitter.
d.
Connect the transmitter and receiver.
e.
Power on the transmitter, receiver, and local monitor.
f.
Power on the source device.
g.
Power on the display device.
Option 4 —
To use DDC pass-through routed to the remote display:
a.
Configure the DDC switches as shown in the figure at right.
b.
Connect a source device to the transmitter.
c.
Connect a display device to the receiver and, if required, a local monitor to
the transmitter.
d.
Connect the transmitter and receiver.
e.
Power on the transmitter, receiver, and display devices.
f.
Power on the source device.
Troubleshooting
For complete instructions, consult the User’s Manual, which is available at the
If problems are encountered, verify that the cables are routed and connected properly.
If the pr
.
ON
1 2 3
ON
OFF
DEF
AUL
T EDID
EDID MINDER
REMOTE DDC
ON
1 2 3
ON
OFF
DEF
AUL
T EDID
EDID MINDER
REMOTE DDC
ON
1 2 3
ON
OFF
DEF
AUL
T EDID
EDID MINDER
REMOTE DDC
STORE
EDID
68-1531-50
Rev. A
01 10