Front panel features, Configuring the avt 200hd using the front panel, Product category – Extron Electronics AVT 200HD Setup Guide User Manual
Page 3
Product Category
3
Front Panel Features
AVT 200HD
ATSC TUNER
ADJUST
IR
MENU
SDTV
EDTV
HDTV
NEXT
VOLUME
CONFIG
CHANNEL
1
2
3
5
7
8
9
10
6
4
a
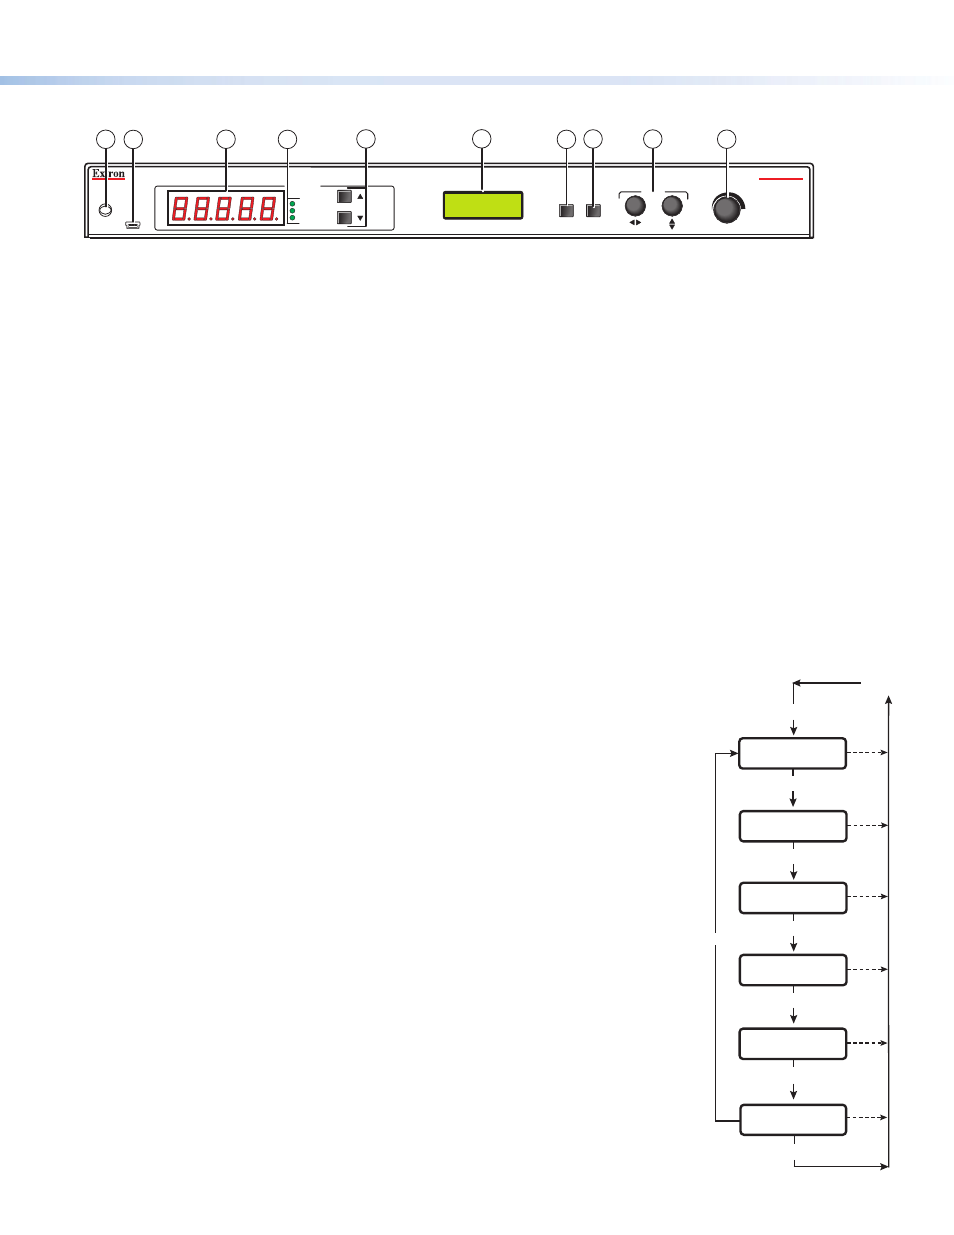
IR receiver — Receives commands via infrared signals from the optional AVT 200HD IR Remote Control. By default, the
IR sensor is enabled.
b
Config port — Connect a USB cable (USB A to mini B) between your computer and this port to configure and control
the AVT via SIS commands or the Windows-based control software, and to update the firmware.
c
LED display — This 5-digit, alphanumeric LED display indicates the over-the-air TV or CATV channel that is being
received (in Tune mode) or the selected channel preset (in Preset mode).
d
TV format indicator LEDs — Light to indicate the digital television format of the input signal. Supported resolutions
include SDTV (480i), EDTV (480p), and HDTV (720p and 1080i). When no TV signals are detected, none of the LEDs light.
e
Up (
>
) and Down (
<
) buttons — Change the channel or preset, depending on the selected operating mode. Each
press increments or decrements the number in the LED display (
c
).
z
In Tune mode (default): The buttons select channel numbers to switch to channels that have been saved.
z
In Preset mode: The buttons select the preset numbers to switch to channels that have been saved as presets.
Pressing and holding a button causes the displayed numbers to cycle up or down rapidly. When you release the button,
the displayed channel or preset is selected.
f
LCD window — Displays messages, menu information, and your menu selections
g
Menu button — Press this button to access the AVT 200HD menu system and step through the menus.
h
Next button — Within a menu, press this button to step through the submenus.
i
Adjustment knobs — Within a submenu, turn these horizontal and vertical Adjustment knobs to select options from
the submenu, such as the output resolution or the RF source (Air or Cable).
j
Volume knob — Turn this knob to change the output volume from 0% (muted) to
100%. This knob adjusts volume for analog and PCM digital output only. It does not
affect Dolby surround digital (AC-3) volume.
Configuring the AVT 200HD Using the Front Panel
Menu selections are displayed on the front panel LCD screen (see the menu flow diagram
at right). To use any menu, press the Menu button repeatedly until the desired menu is
displayed on the LCD screen. Press the Next button repeatedly until the desired submenu is
displayed. Rotate the appropriate Adjustment knob to select an item from the submenu. To
exit a submenu and return to the main menu, press the Menu button at any time.
1.
Place the AVT in tune mode:
a.
From the Output Configuration menu, press Next until the Tuner Mode submenu is
displayed.
b.
Rotate either Adjustment knob to select
Tune
.
2.
Select the radio frequency (RF) source:
a.
Press the Menu button once to display the Channel Setup menu, then press the Next
button once to display the RF Source submenu.
b.
Rotate either Adjustment knob to select a source:
Air
,
Cable
Standard
,
Cable
HRC
, or
Cable
IRC
.
3.
Scan for channels:
a.
From the Channel Setup menu, press Next until the LCD window displays
Press
Up
button
to
start
scan
.
b.
Press the Up (
>
) button on the front panel to start the scan.
OUTPUT
CONFIGURATION
Menu
Menu
AUDIO
CONFIGURATION
Menu
30 sec.
VIEW
COMM SETTING
Menu
30 sec.
30 sec.
Default
Cycle
Menu
Next
PRESS NEXT
TO EXIT
Menu
30 sec.
CHANNEL
SETUP
30 sec.
30 sec.
UNIT
RESET
Menu