H-312 – Xylem H-312-22 User Manual
Page 19
H-312
Maintenance 3-3
CAUTION:
Do not use sticks and the like to push sediment out of the ports. This may
cause a hydraulic effect and over pressure the internal sensor. Use common
sense.
Step 5 Reinstall the plastic and the stainless steel screens. Position the joints of the stainless and
plastic screens 180 apart. One end of the stainless steel screen has a slight bend. Position
the bent end on the outside to help keep the sharp end from protruding out. Compress the
screen with a turning action and slip both screens into the shallow groove in the sensor
housing..
Step 6 Screw the nose piece into place until it contacts the screens. Twist the screens until both
screens slip into the grooves of both the sensor housing and the nose piece. Continue to
tighten the nose piece while being careful to not crinkle the screens. You may need to
twist the screens now and then to keep the screens centered in the grooves. Fully hand
tighten the nose piece.
3.5 Trouble Shooting
Experience over the years with submersible sensors has identified several common problems:
No SDI-12 response or intermittent data
1.
Check all wiring including power and ground connections. Battery connections can
become corroded.
2.
The H-312 measures and reports it’s internal power supply voltage along with
Stage and Pressure. Make a measurement and check to see if the voltage is
between 10.0 and 16.0 Volts.
3.
Check the connections between your data recorder and the H-312 sensor.
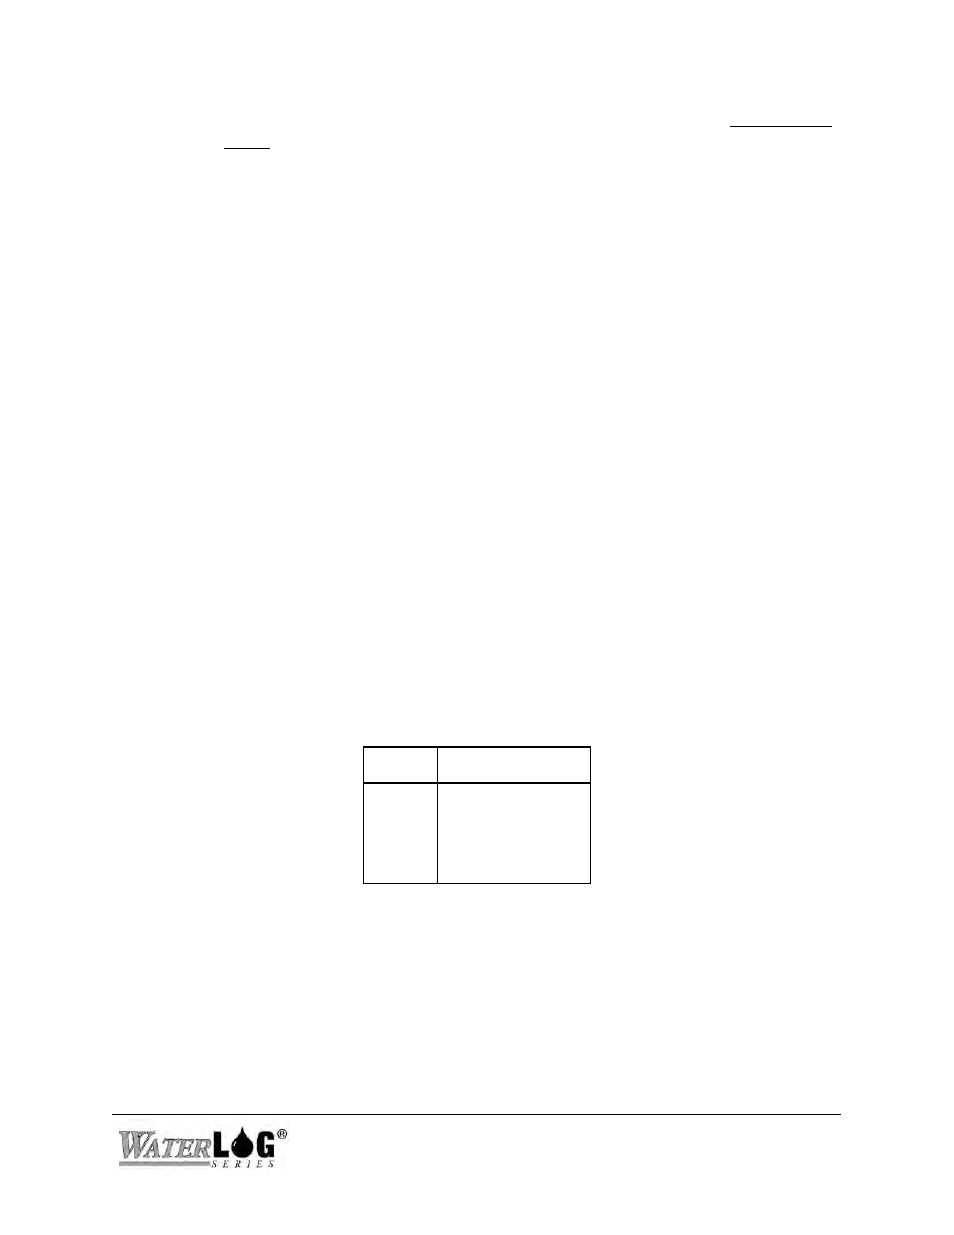
Wire
Name
Red
White
Black
Shield
+12Volt DC
SDI-12 Data
Ground
Ground
Offset Drift
Check the desiccant packs. If moisture accumulates in or blocks the vent tube, barometric
pressure changes will affect the pressure measurement. If this is the case, you should contact
Design Analysis for instructions as how to proceed.