Xylem IM248R01 High Temp Sump Pump User Manual
Page 4
4
To check the seal housing oil level, where used, lay the
unit on its side with the fill plug at 12 o’clock. Remove
the plug. The oil should be within ½” (13mm) of the top.
If low, refill with an ASTM 150 turbine oil. Replace the
plug.
Oil is available in 5 gallon cans through our distributors.
You can also source oil locally at motor repair shops.
Typical oil brands are: Shell Turbo 32, Sunoco Sunvis
932, Texaco Regal R&O 32, Exxon Nuto 32 and Mobil
DTE Light.
Check the strain relief nut on power cable strain assem-
blies. Power cables should be torqued to 75 in. lbs., cable
supplied is for high temp use.
Warranty does not cover damage caused by connecting
pumps and controls to an incorrect power source (volt-
age/phase supply).
Record the model numbers and serial numbers from the
pumps and control panel on the front of this instruction
manual for future reference. Give it to the owner or affix
it to the control panel when finished with the installation.
FOR ALL SES PUMP INSTALLATIONS
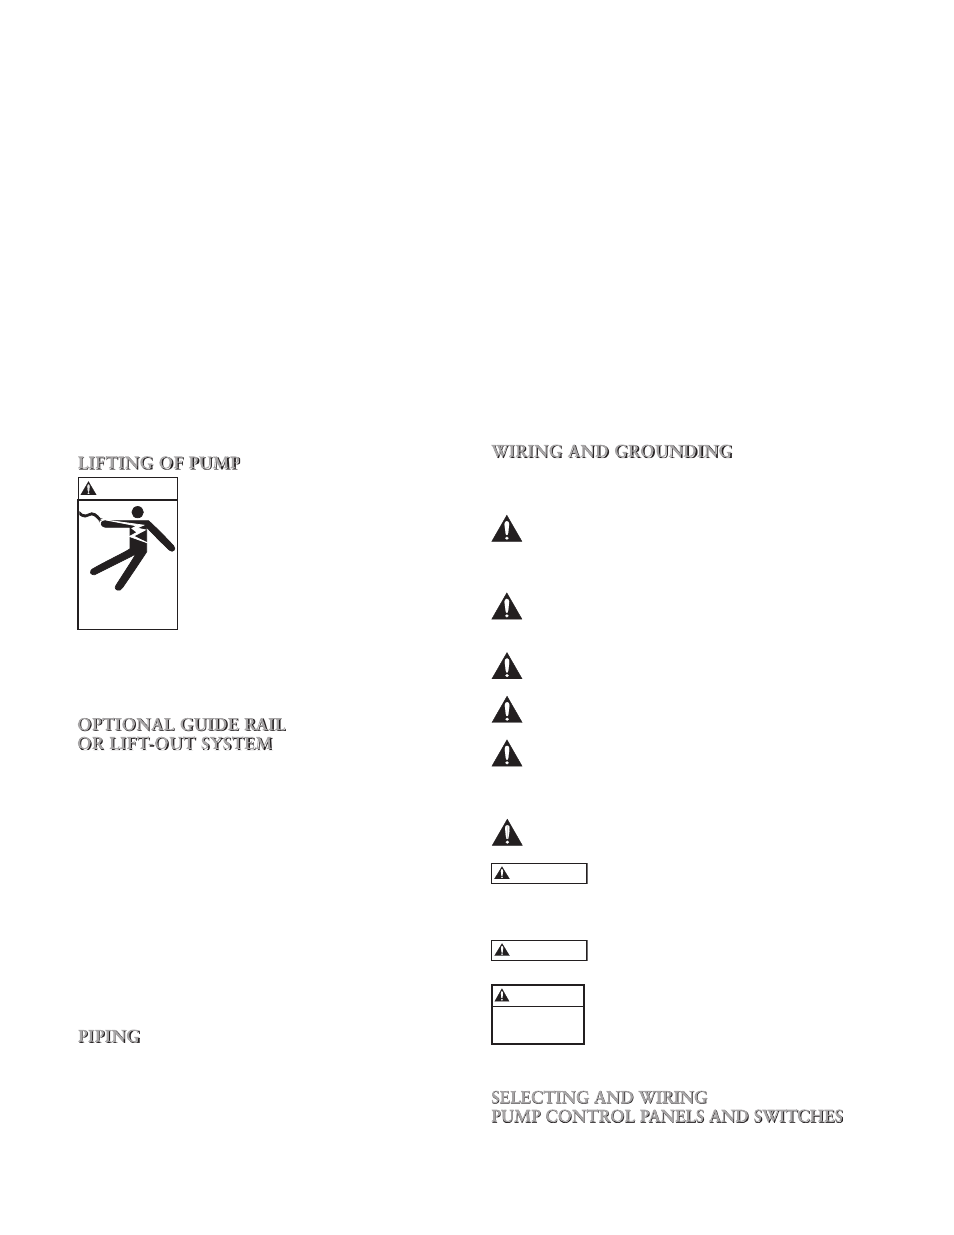
LIFTING OF PUMP
DO NOT LIFT, CARRY OR HANG
PUMP BY THE ELECTRICAL
CABLES. DAMAGE TO THE
ELECTRICAL CABLES CAN CAUSE
SHOCK, BURNS OR DEATH.
Lift the pump with an adequately sized chain or cable at-
tached to the lifting eye bolt. DO NOT damage electrical
cables while raising and lowering unit.
OPTIONAL GUIDE RAIL
OR LIFT-OUT SYSTEM
In many effluent and sewage basins or lift stations it is
advisable to install the pump on a guide rail system or on a
lift-out adapter to facilitate installation and removal for in-
spection and/or service. Most codes do not allow personnel
to enter a wetwell without the correct protective equipment
and training. Guide rails are designed to allow easy removal
of the pump without the need for entry into the wetwell
or need to disturb piping. The guide rail or lift-out adapter
should locate the pump opposite the influent opening pre-
venting stagnate areas where solids can settle. The basin or
pit must be capable of supporting the weight of the pump
and guide rail. The pit floor must be flat.
NOTICE: FOLLOW THE INSTRUCTIONS THAT ARE
PROVIDED WITH THE GUIDE RAIL ASSEMBLY.
PIPING
Discharge piping should be no smaller than the pump
discharge diameter and kept as short as possible, avoid-
ing unnecessary fittings to minimize friction losses. Piping
should be rated for high temperatures if used in high
temperature applications.
Install an adequately sized check valve matched to the
solids handling capability of the pump to prevent fluid
backflow. Backflow can allow the pump to “turbine”
backwards and may cause premature seal and/or bearing
wear. If the pump is turning backwards when it is called
on to start the increased torque may cause damage to the
pump motor and/or motor shaft and some single-phase
pumps may actually run backwards.
Install an adequately sized gate valve AFTER the check
valve for pump, plumbing and check valve maintenance.
Important – Before pump installation. Drill a
3
⁄
16
”
(4.8mm) relief hole in the discharge pipe. It should be
located within the wetwell, 2” (51mm) above the pump
discharge but below the check valve. The relief hole al-
lows any air to escape from the casing. Allowing liquid
into the casing will insure that the pump can start when
the liquid level rises. Unless a relief hole is provided, a
bottom intake pump could “air lock” and will not pump
water even though the impeller turns.
All piping must be adequately supported, so as not to
impart any piping strain or loads on the pump.
The pit access cover must be of sufficient size to allow for
inspection, maintenance and crane or hoist service.
WIRING AND GROUNDING
Important notice: Read Safety Instructions before
proceeding with any wiring.
Use only stranded copper wire to pump/motor and
ground. The ground wire must be at least as large
as the power supply wires. Wires should be color
coded for ease of maintenance and troubleshooting.
Install wire and ground according to the National
Electrical Code (NEC), or the Canadian Electrical
Code, as well as all local, state and provincial codes.
Install an all leg disconnect switch where required
by code.
Disconnect and lockout electrical power before
performing any service or installation.
The electrical supply voltage and phase must match
all equipment requirements. Incorrect voltage or
phase can cause fire, motor and control damage,
and voids the warranty.
All splices must be waterproof. If using splice kits
follow manufacturer’s instructions.
Select the correct type and NEMA grade
junction box for the application and loca-
tion. The junction box must insure dry,
safe wiring connections.
Seal all controls from gases present which
may damage electrical components.
FAILURE TO PERMANENTLY
GROUND THE PUMP, MOTOR AND
CONTROLS BEFORE CONNECTING
TO POWER CAN CAUSE SHOCK,
BURNS OR DEATH.
SELECTING AND WIRING
PUMP CONTROL PANELS AND SWITCHES
FLOAT SWITCH TYPES
High Temp floats can be purchased for High Temp ap-
plications. They are normally open (NO) for pump down
operations.
WARNING
Hazardous
voltage
WARNING
WARNING
WARNING
Hazardous voltage
can shock, burn or
cause death.