Connect the optional low-suction pressure switch, Piping checklist – Xylem AquaBoost CS and VS Pumping Packages User Manual
Page 29
3. Precharge the tank according to the tank-specific IOM.
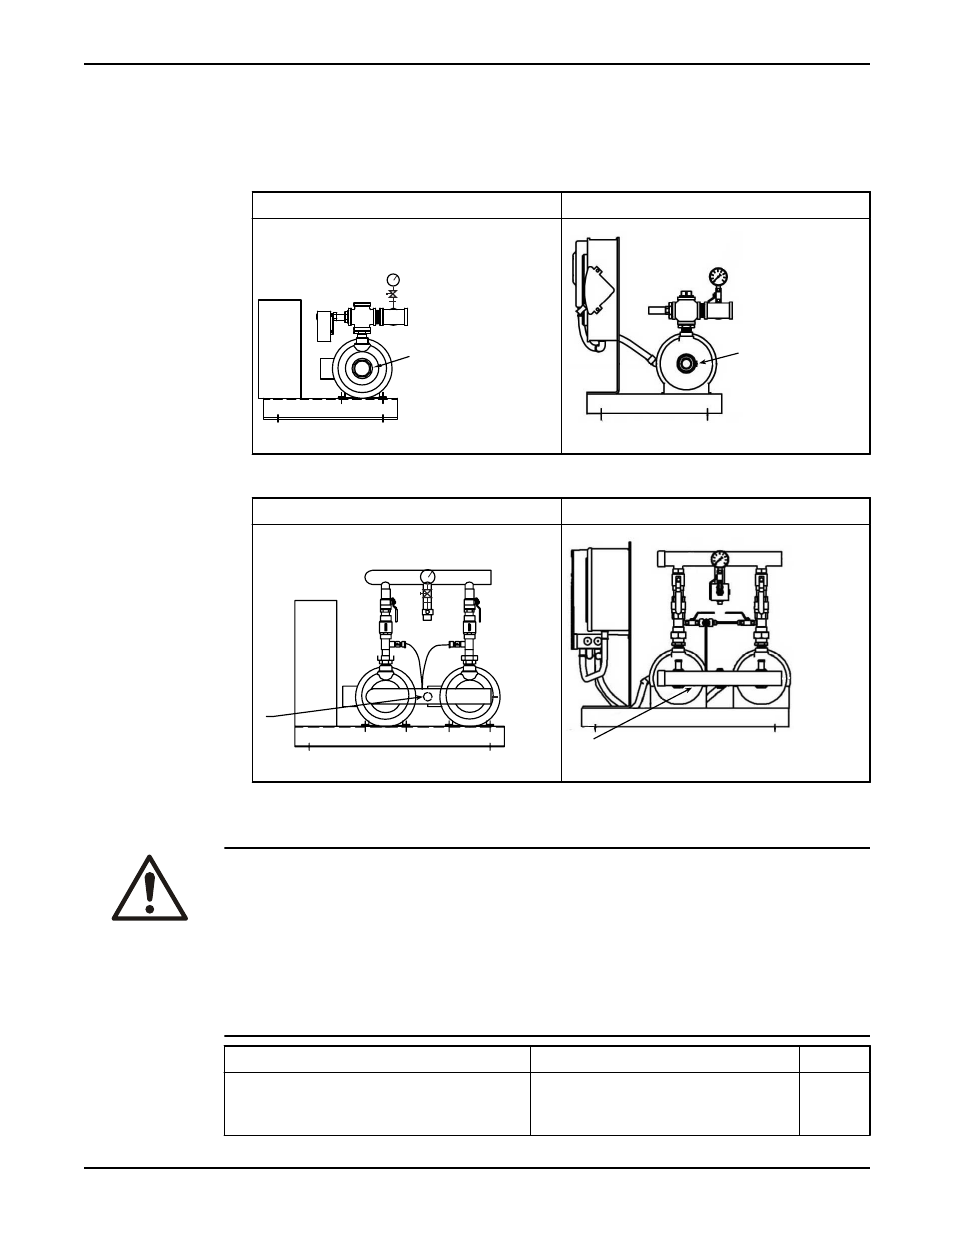
Connect the optional low-suction pressure switch
1. If the unit is a simplex configuration, then install the low-suction pressure switch piped
to the 1/4 in. inlet tap on the check valve as shown:
Constant speed
Variable speed
1
RS000023
1.
1/4 in. inlet tap on check valve
1
RS000025
1.
1/4 in. inlet tap on check valve
2. If the unit is a duplex configuration, then install the low-suction pressure switch piped
to the 1/4 in. tap on the suction manifold as shown:
Constant speed
Variable speed
1
RS000024
1.
1/4 in. inlet tap on check valve
1
RS000026
1.
1/4 in. inlet tap on check valve
Piping checklist
WARNING:
• The heating of water and other fluids causes volumetric expansion. The associated forces
can cause the failure of system components and the release of high-temperature fluids.
In order to prevent this, install properly sized and located compression tanks and
pressure-relief valves. Failure to follow these instructions can result in serious personal
injury or death, or property damage.
• Avoid serious personal injury and property damage. Make sure that the flange bolts are
adequately torqued.
• Never force piping to make a connection with a pump.
Check
Explanation/comment
Checked
Check that the suction and discharge pipes are
supported independently by use of pipe hangers near
the pump station.
This eliminates pipe strain on the pump
station.
Installation
AquaBoost CS and VS Pumping Packages Installation, Operation, and Maintenance Manual
27