Asus PIKE 1078 User Manual
Page 35
ASUS PIKE 1078
2-21
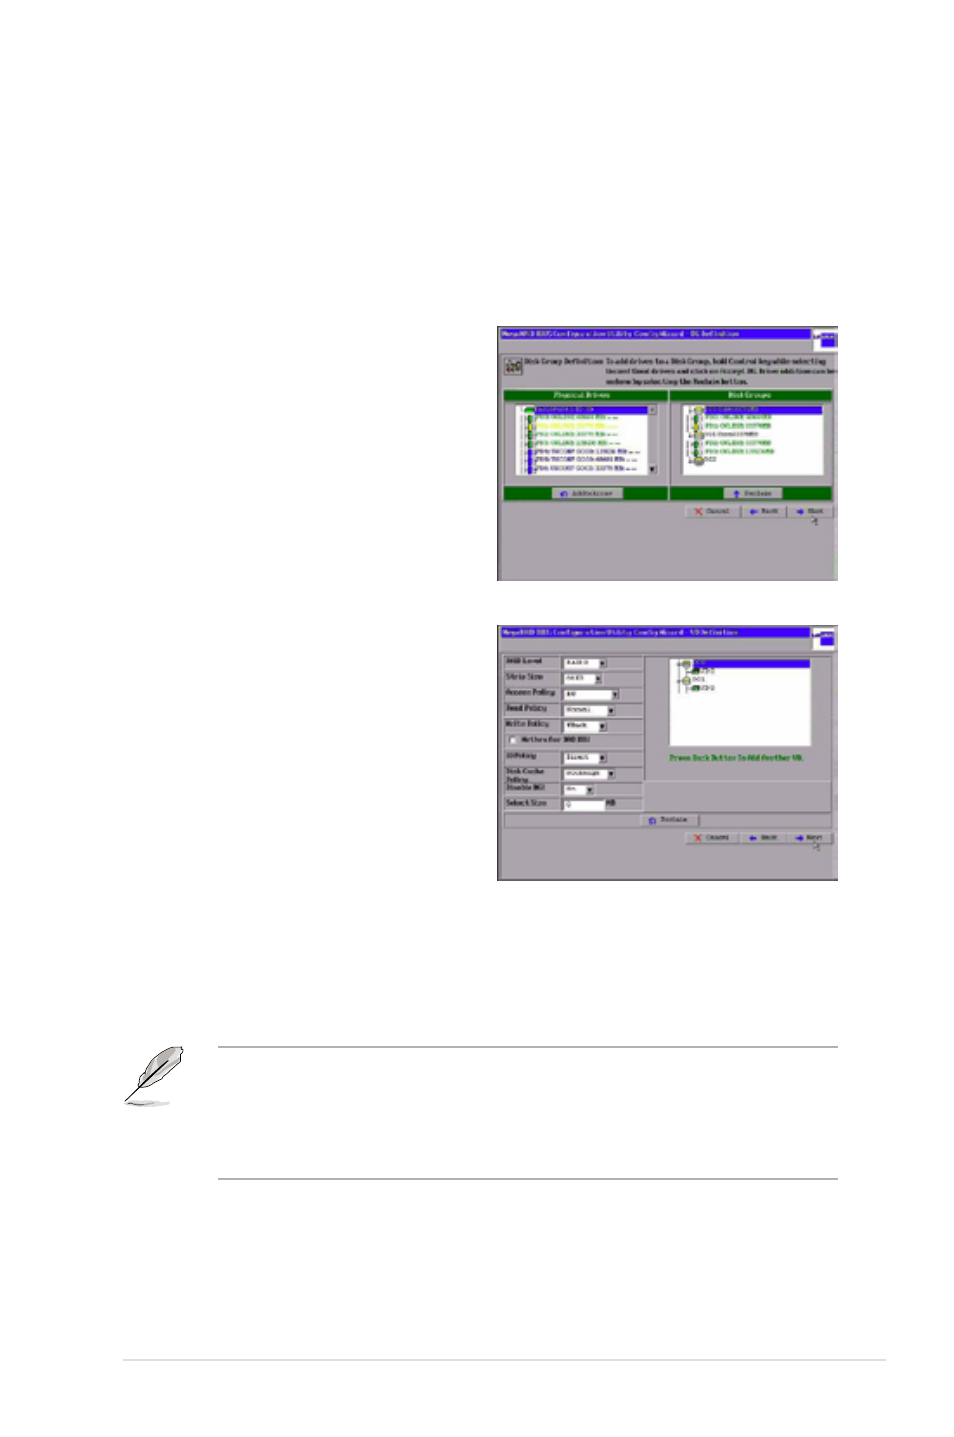
2. Click Accept DG to move the drives to a proposed two-drive disk group
configuration in the Disk Groups window on the right.
If you need to undo the changes, click the Back button.
3. Hold
Drives window to create a second two-drive disk group.
4. Click Accept DG to move the drives
to a second two-drive disk group
configuration in the Disk Groups
window, as shown in the right figure.
If you need to undo the changes,
click the Back button.
5. When you have finished selecting
physical disks for the disk groups,
click Next.
The span definition screen appears.
You should add both disk groups
you’ve created in the previous step
to Span section. Select the disk
group in Array With Free Space
section and then click Add to Span.
6. When finish, click Next. The Virtual
Disk Definition screen appears, as shown in the right figure.
You use this screen to select the RAID level, strip size, read policy, and other
attributes for the new virtual disks.
7. Hold
window on the right.
The WebBIOS Configuration Utility displays the maximum available capacity
while creating the RAID 10 disk group. In version 1.03 of the utility, the
maximum size of the RAID 10 disk group is the sum total of the two RAID 1 disk
groups. In version 1.1, the maximum size is the size of the smaller disk group
multiplied by two.
8. Change the virtual disk options from the defaults listed on the screen as
needed.
Here are brief explanations of the virtual disk options: