10 replacing the covers – Asus P3-PH4 User Manual
Page 36
2 - 2 0
2 - 2 0
2 - 2 0
2 - 2 0
2 - 2 0
C h a p t e r 2 : B a s i c i n s t a l l a t i o n
C h a p t e r 2 : B a s i c i n s t a l l a t i o n
C h a p t e r 2 : B a s i c i n s t a l l a t i o n
C h a p t e r 2 : B a s i c i n s t a l l a t i o n
C h a p t e r 2 : B a s i c i n s t a l l a t i o n
2.10
Replacing the covers
After you install all the necessary components on the system, replace the
covers following the instructions in this section:
2.10.1
2.10.1
2.10.1
2.10.1
2.10.1 Replacing the front panel assembly
Replacing the front panel assembly
Replacing the front panel assembly
Replacing the front panel assembly
Replacing the front panel assembly
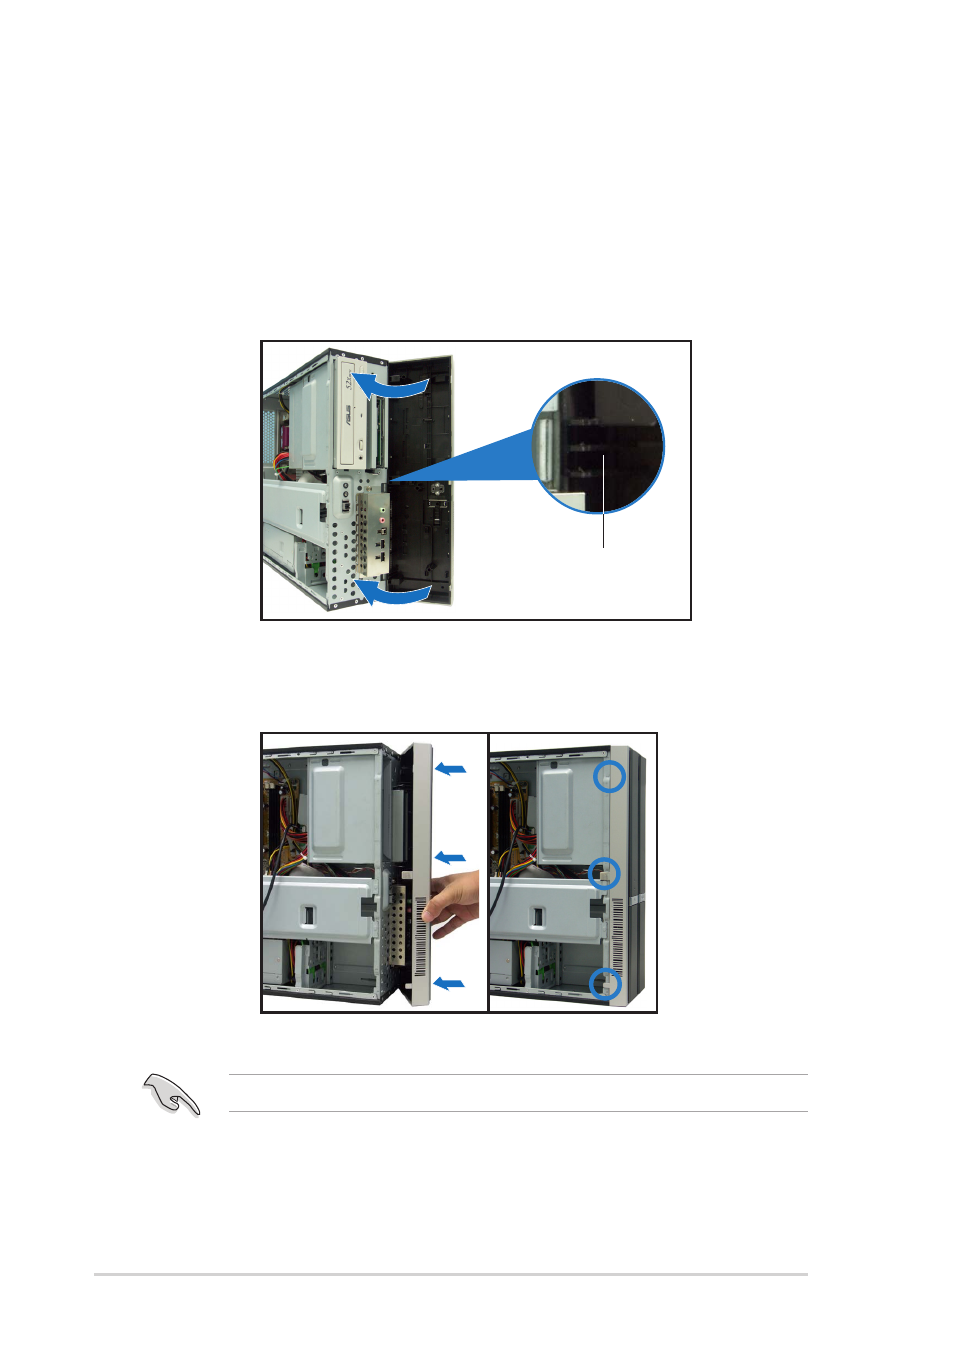
To replace the front panel assembly:
1.
Hook the hinge-like tabs to the holes on the right side of the chassis.
2.
Swing the left edge of the front panel inward, then attach the front
panel assembly hooks to the chassis until they snap in place.
Do not use too much force when replacing the front panel assembly.
H i n g e - l i k e t a b s
H i n g e - l i k e t a b s
H i n g e - l i k e t a b s
H i n g e - l i k e t a b s
H i n g e - l i k e t a b s