1 remove/install a cd-rom drive – Asus AP140R User Manual
Page 30
30
Chapter 4: Hardware Options
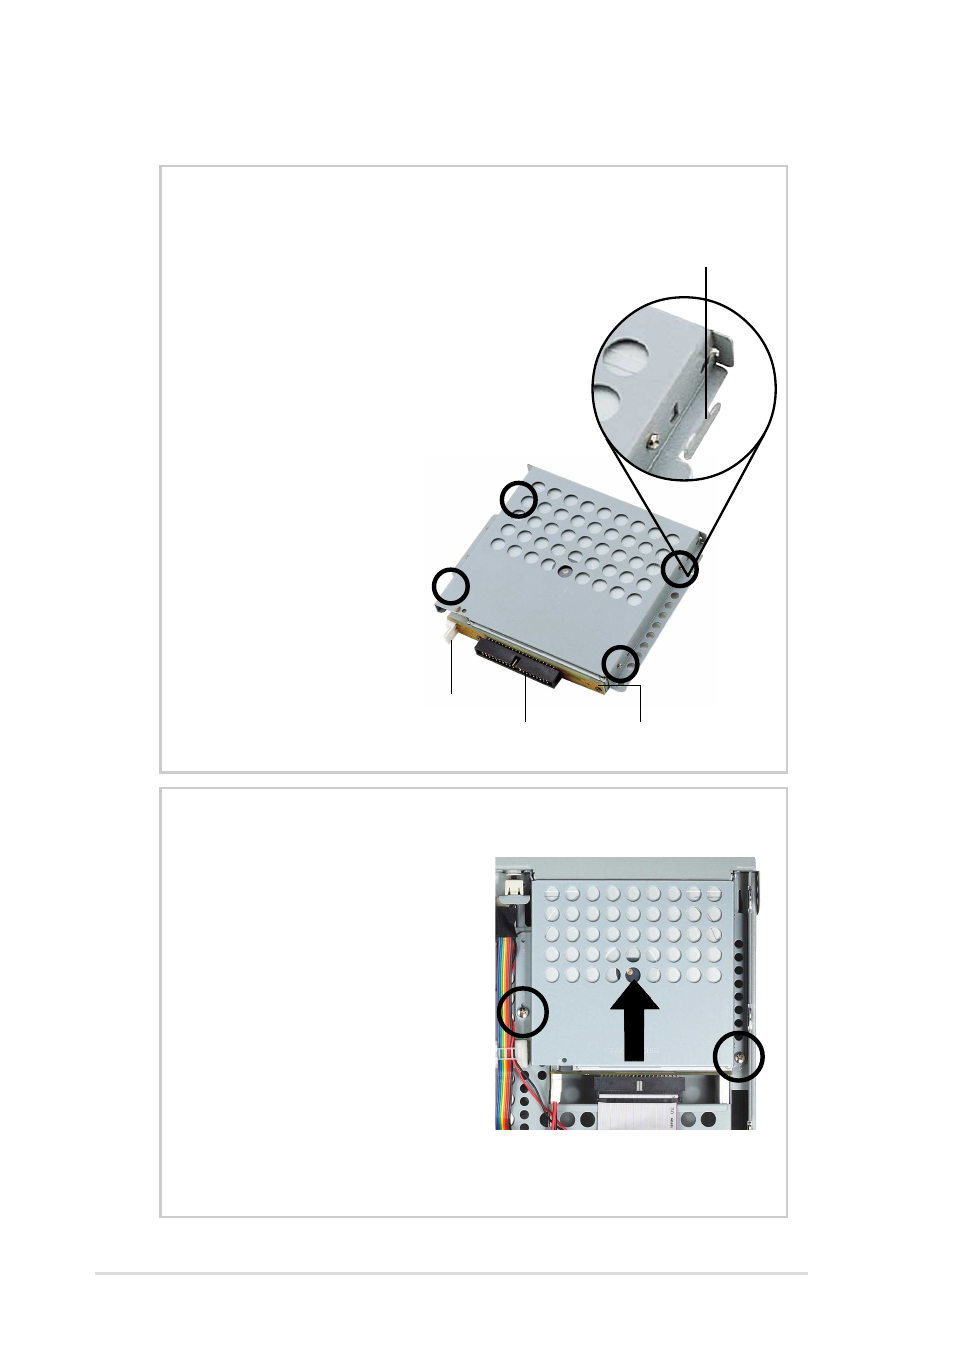
Power Connector
CD-ROM Adapter Board
IDE Connector
Cage Guide Tab
3.1 Remove/Install a CD-ROM Drive
Mounting the CD-ROM Drive
Installing the CD-ROM Drive
1. Place the CD-ROM drive on its
bay and slide it inward for
about an inch (as indicated by
the arrow), making sure that
the cage guide tab locks in
place.
2. Secure the drive cage to the
chassis with two screws in the
areas indicated by circles.
3. Connect the IDE and power
cables to the connectors on the
rear of the drive.
1. Attach the CD-ROM adapter
board to the rear end of the
slim CD-ROM.
2. Place the drive into the drive
cage. Take note of the drive
cage orientation. The front of
the drive should go to the end
with the cage guide tab.
3. Secure the drive to the cage
using four screws in the areas
indicated by circles as shown
in the picture.
- AP2500 (40 pages)
- AP1700-S5 (58 pages)
- RS700-E6/ERS4 (138 pages)
- AP1600R-E2(AA2) (150 pages)
- P7F-E (162 pages)
- RS161-E4/PA2 (126 pages)
- RS163-E4/RX4 (11 pages)
- M2N-LR (113 pages)
- P5BV/SAS (184 pages)
- K8N-DRE (142 pages)
- RS161-E5/PA2 (124 pages)
- LSI SAS3442X-R (68 pages)
- ESC4000/FDR G2 (200 pages)
- PIKE 2208 (16 pages)
- ESC4000 (162 pages)
- ESC4000 (22 pages)
- PSCH-SR/IDE (102 pages)
- P9D-M (156 pages)
- RS740-E7-RS24-EG (212 pages)
- P5M2-E/4L (12 pages)
- ESC2000 G2 (226 pages)
- TS700-E6/RS8 (166 pages)
- RS160-E3/PS4 (140 pages)
- PU-DLS (134 pages)
- TR-DLSR (100 pages)
- P5BV-C/2L (161 pages)
- TS100-E5/PI4 (166 pages)
- ESC1000 Personal SuperComputer (184 pages)
- NRL-LS (120 pages)
- PCI-DA2200 (369 pages)
- P8C WS (140 pages)
- RS120-E4/PA4 (174 pages)
- P5MT-M (150 pages)
- TS Mini (114 pages)
- TS Mini (2 pages)
- TS Mini (112 pages)
- P5MT-MX/C (156 pages)
- AP140R-E1 (52 pages)
- AP140R-E1 (132 pages)
- ASMB6-iKVM (114 pages)
- DSBF-D16/SAS (200 pages)
- DSBF-D16 (202 pages)
- RS160-E5 (164 pages)
- Z8PE-D12X (170 pages)
- Z8PE-D12X (168 pages)