Installing the cpu fan and heatsink assembly – Asus V3-P5945G User Manual
Page 5
5
Installation Manual
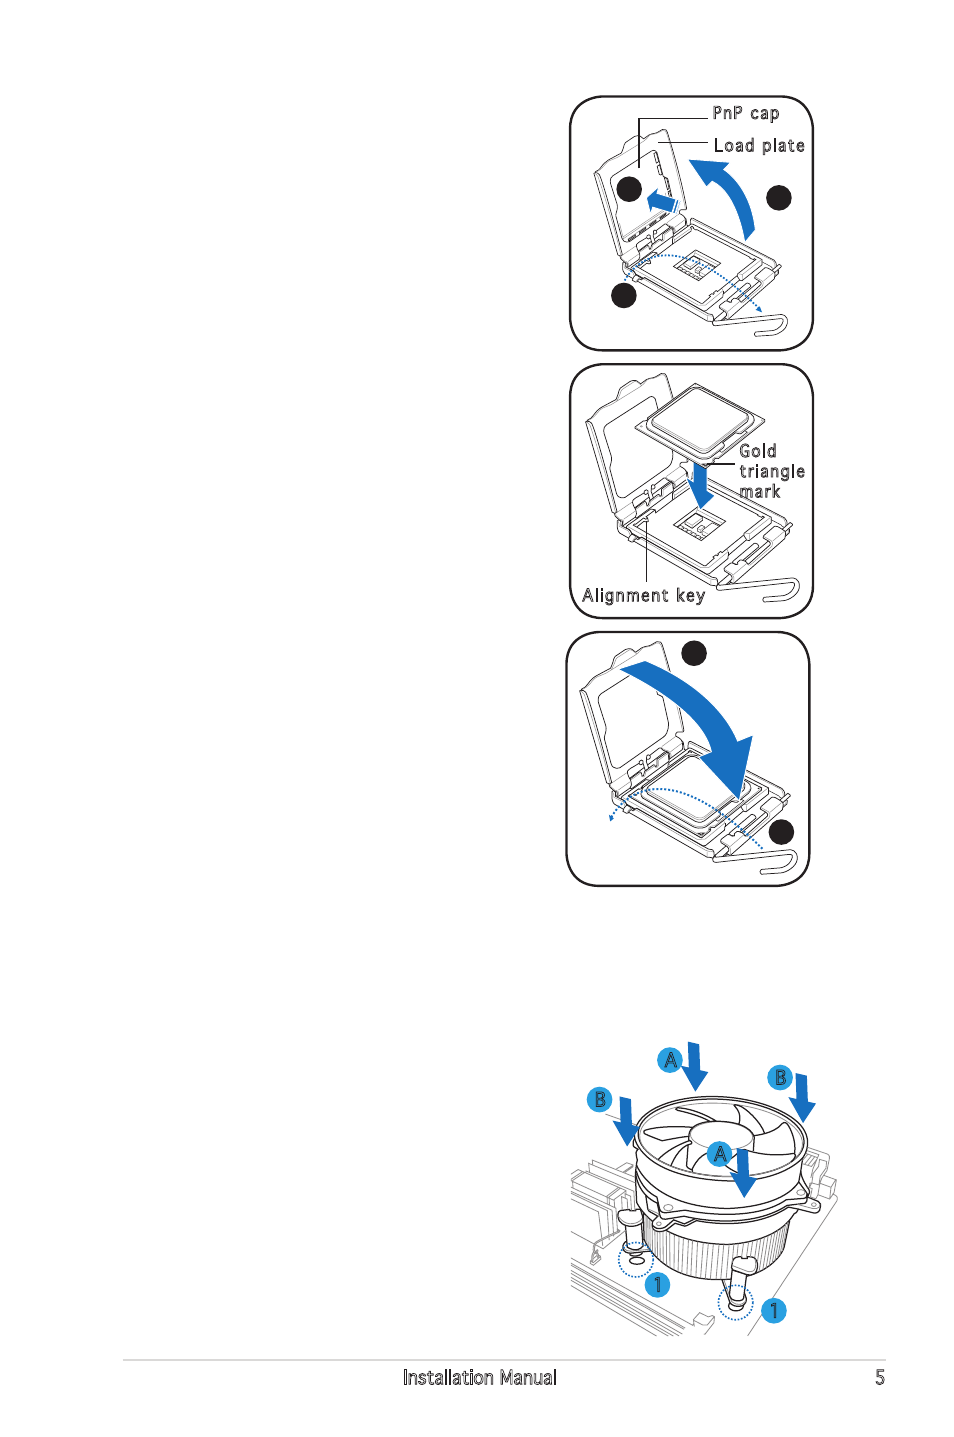
3. Lift the load lever in the direction of
the arrow to a 135º angle.
4. Lift the load plate with your thumb
and forefinger to a 100º angle (4A),
then push the PnP cap from the load
plate window to remove (4B).
6. Close the load plate (A), then push
the load lever (B) until it snaps into
the retention tab.
5. Position the CPU over the socket,
making sure that the gold triangle
is on the bottom-left corner of the
socket. Fit the socket alignment key
into the CPU notch.
Installing the CPU fan and heatsink assembly
The Intel
®
Pentium
®
4 LGA775 processor requires a specially designed
heatsink and fan assembly to ensure optimum thermal condition and
performance.
To install the CPU heatsink and fan:
1. Place the heatsink on top of the installed
CPU, making sure that the four fasteners
match the holes on the motherboard.
. Push down two fasteners at a time
in a diagonal sequence to secure the
heatsink and fan assembly in place.
3. When the fan and heatsink assembly is in
place, connect the CPU fan cable to the
connector on the motherboard.
1
A
B
A
B
1
3
4A
4B
Load plate
PnP cap
Gold
triangle
mark
Alignment key
A
B