10 re-installing the power supply unit – Asus T2-P User Manual
Page 39
39
ASUS Terminator 2 barebone system
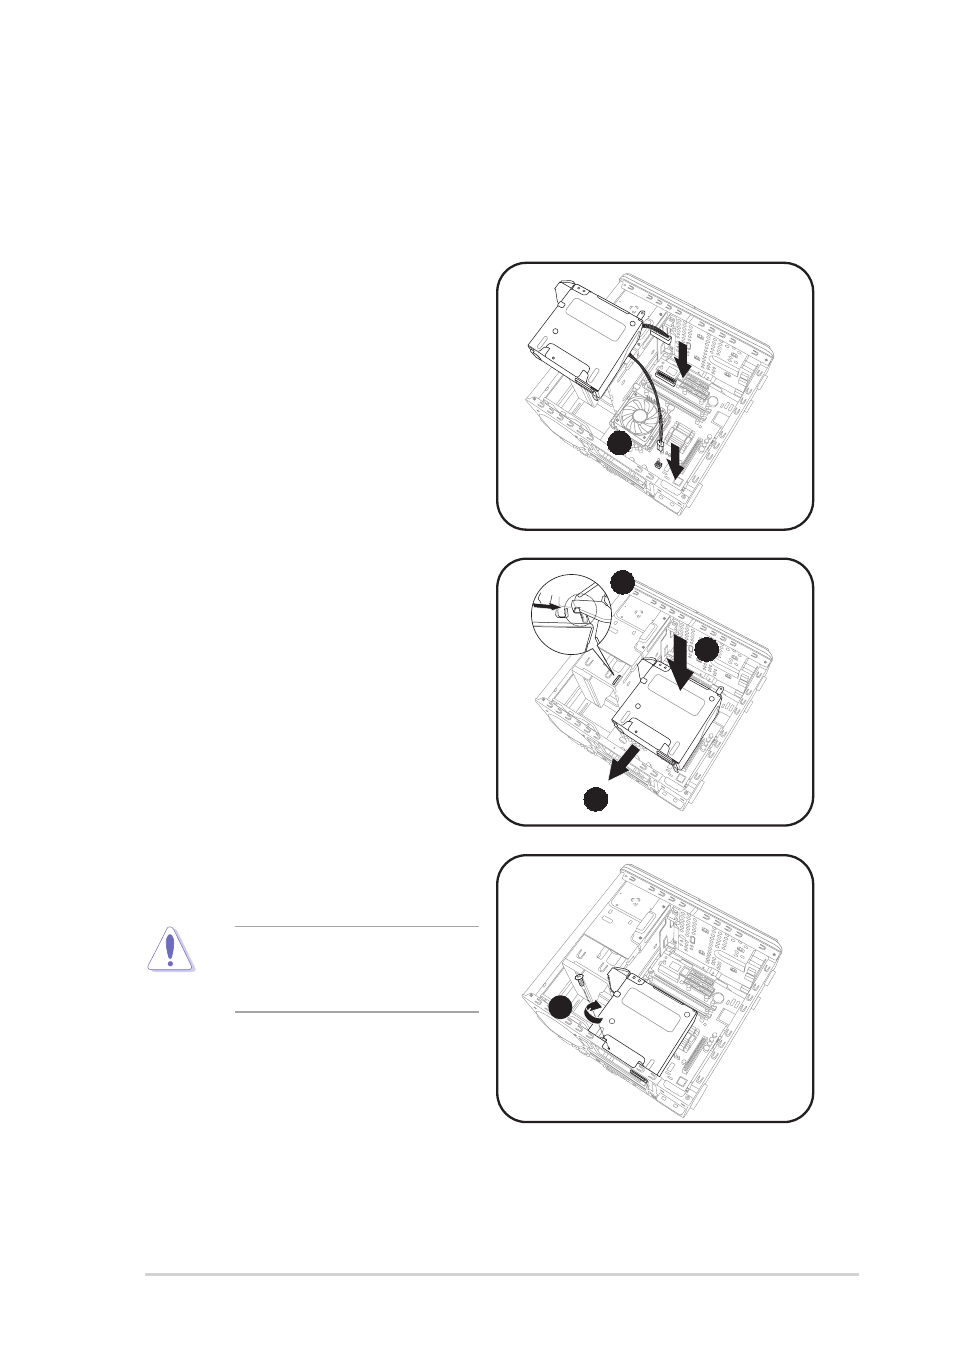
2.10 Re-installing the power supply unit
Re-install the power supply unit (PSU) after installing the system
components and reconnecting the cables, .
To reinstall the PSU:
1.
Connect the 4-pin 12V and the
20-pin ATX power plugs to the
ATX12V and ATXPWR
connectors, respectively. See
page 81 for the location of these
connectors.
2.
Position the PSU over the
chassis.
3.
Align the PSU side hook with the
metal slot located on the side of
the optical drive bay.
4.
Slide the PSU toward the
direction of the rear panel until it
fits in place.
2
3
4
5.
Secure the PSU with the screw
you removed earlier.
5
1
Make sure the PSU cables
do not interfere with the CPU
and/or chassis fans.
See also other documents in the category Asus Computers:
- CG8565 (410 pages)
- CG8565 (246 pages)
- CS5111 (26 pages)
- CS5120 (1 page)
- ET1611PUK (38 pages)
- S2-P8H61E (80 pages)
- P2-P5945GCX (90 pages)
- P2-PH1 (80 pages)
- P1-P5945G (80 pages)
- CG8270 (362 pages)
- CG8270 (218 pages)
- CG8270 (536 pages)
- CG8270 (72 pages)
- CG8270 (76 pages)
- CG8270 (534 pages)
- P3-P5G31 (100 pages)
- P3-PH4 (80 pages)
- P2-M2A690G (80 pages)
- P2-M2A690G (8 pages)
- P4-P5N9300 (82 pages)
- P4-P5N9300 (1 page)
- P1-P5945GC (92 pages)
- P2-P5945GC (92 pages)
- P3-P5G33 (98 pages)
- T3-P5945GC (80 pages)
- T3-P5945GCX (80 pages)
- P2-M2A690G (94 pages)
- T3-PH1 (82 pages)
- T3-PH1 (80 pages)
- T5-P5G41E (76 pages)
- T5-P5G41E (82 pages)
- S1-AT5NM10E (68 pages)
- P6-P7H55E (67 pages)
- ES5000 (174 pages)
- T4-P5G43 (104 pages)
- T-P5G31 (92 pages)
- BT6130 (60 pages)
- BT6130 (54 pages)
- BT6130 (2 pages)
- CG8265 (210 pages)
- CG8265 (350 pages)
- CM1740 (330 pages)
- CM1740 (70 pages)
- CM1740 (198 pages)
- P6-M4A3000E (59 pages)