Getting started, Panel layout, Connecting the hardware – SENA Parani-BCD110-210 User Manual
Page 11
11
2. Getting Started
This chapter describes how to set up the Parani-BCDx10 for the first time.
- 2.1 Panel Layout explains the panel layout.
- 2.2 Connecting the Hardware describes how to connect the Parani-BCDx10, the power, and the
serial device to the Jig Board.
Following items are pre-required to get started.
- One Jig Board (included in the Starter Kit package).
- One DC power adapter or one USB power cable (included in the Starter Kit package).
- One serial console cable for configuration (included in the Starter Kit package).
- One PC with RS232 serial port.
- Terminal emulation program running on the PC
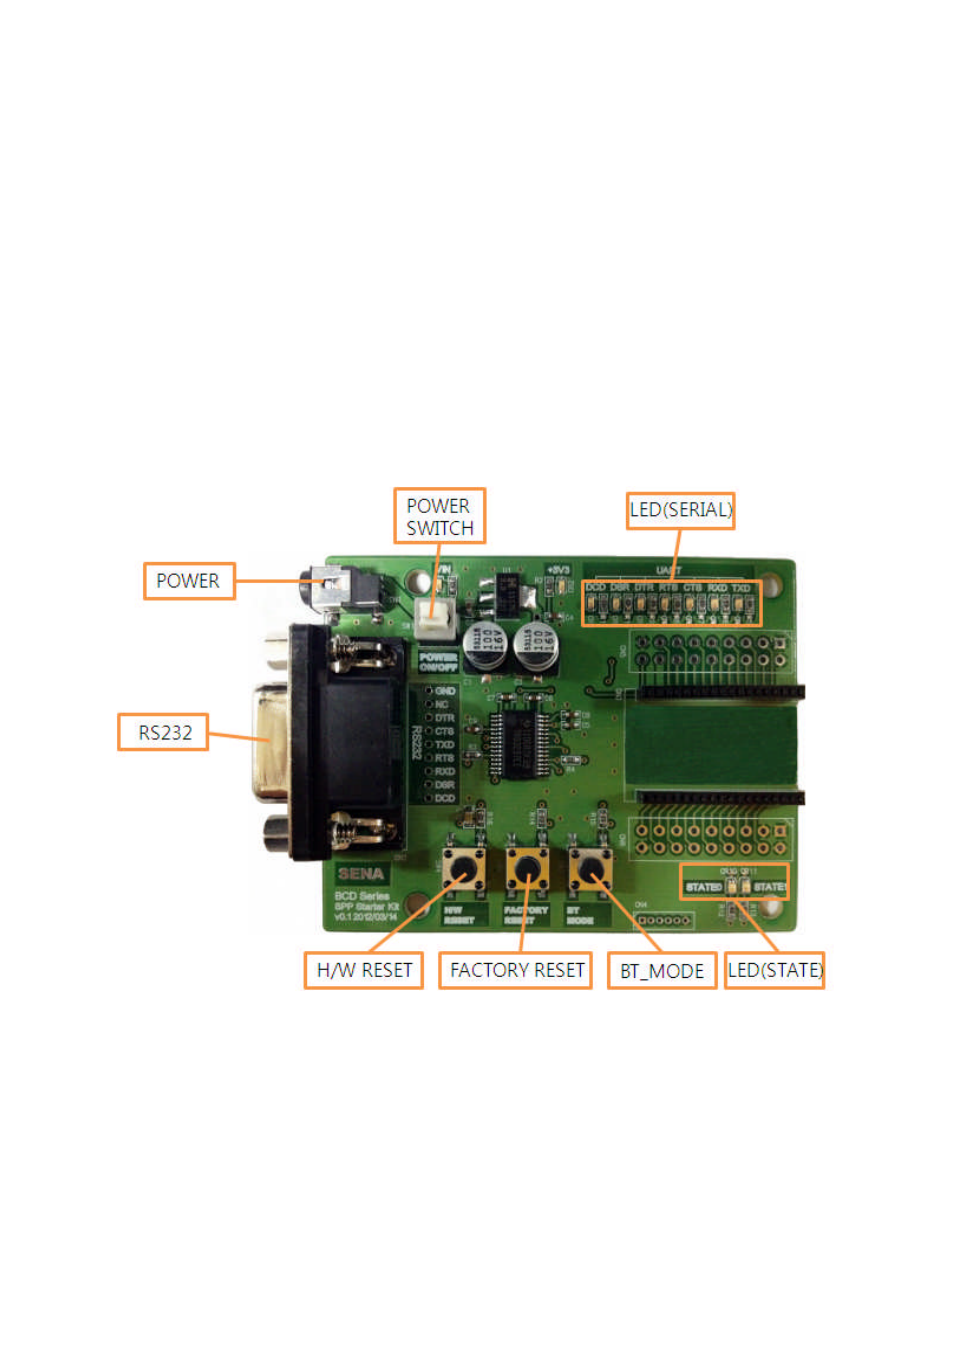
2.1. Panel Layout
This section describes the panel layout of the Development Board.
Figure 2-1 The Panel Layout of BCD Development Board
2.2. Connecting the Hardware
This section describes how to connect the Parani-BCDx10 to the Development Board and the
Development Board to the serial device for initial testing.
- Connect the Parani-BCDx10 to the Development Board.
- Connect a power source to the Development Board for the Parani-BCDx10.