Handleset installation (cont.) – Baldwin Stonegate Handleset User Manual
Page 9
Handleset Installation (cont.)
3
If you have any trouble installing your Baldwin product, feel free to call our toll-free consumer help line at 1-800-566-1986. Hours: 6 a.m. – midnight (east coast standard), 7 days a week.
6
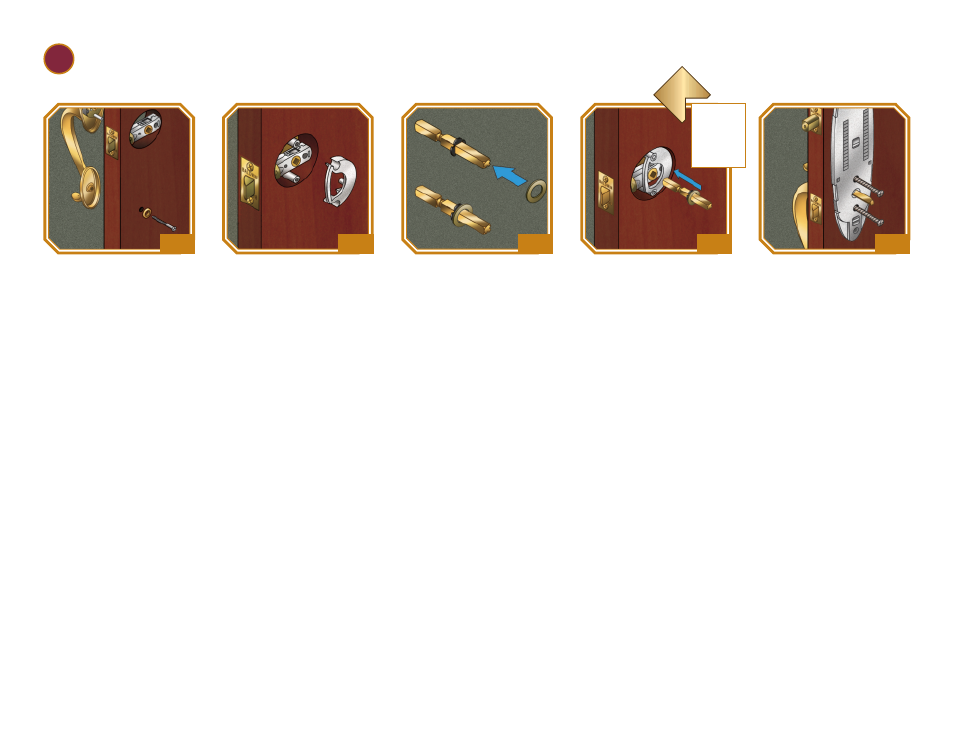
Attach handle by inserting
the #10-32 x 2
1
⁄
2
" flat head
screw on inside of door
through screw cover backplate
and the lower hole (E). Leave
screw loose for adjustment.
Note: Go to door preparation
if you do not have a lower
hole (E).
7
From inside of door, slide
alignment fitting between post
and around latch.
8
Measure the thickness of
your door. If door is less than
1
3
⁄
4
" thick, do not use the
spacer provided. If your door
measures 1
3
⁄
4
", slide the spacer
onto spindle.
9
From inside of door, insert
short end of spindle through
alignment bracket and latch,
with V groove on the long end
angled down and toward hinges.
Position outside handle assembly
so spindle slides into square hole
on thumbpiece cartridge. Make
certain spindle is inserted
through the latch to stops.
10
Slide emergency exit
cartridge onto spindle. Attach
lower cartridge with two #10-
32 x 1
1
⁄
4
" flat head screws, but
DO NOT TIGHTEN SCREWS
AT THIS TIME.
inside
inside
inside
inside
inside
V groove
on bottom
toward
hinges
Spindle
E
9.