Strikeplate installation – Baldwin Stonegate Handleset User Manual
Page 11
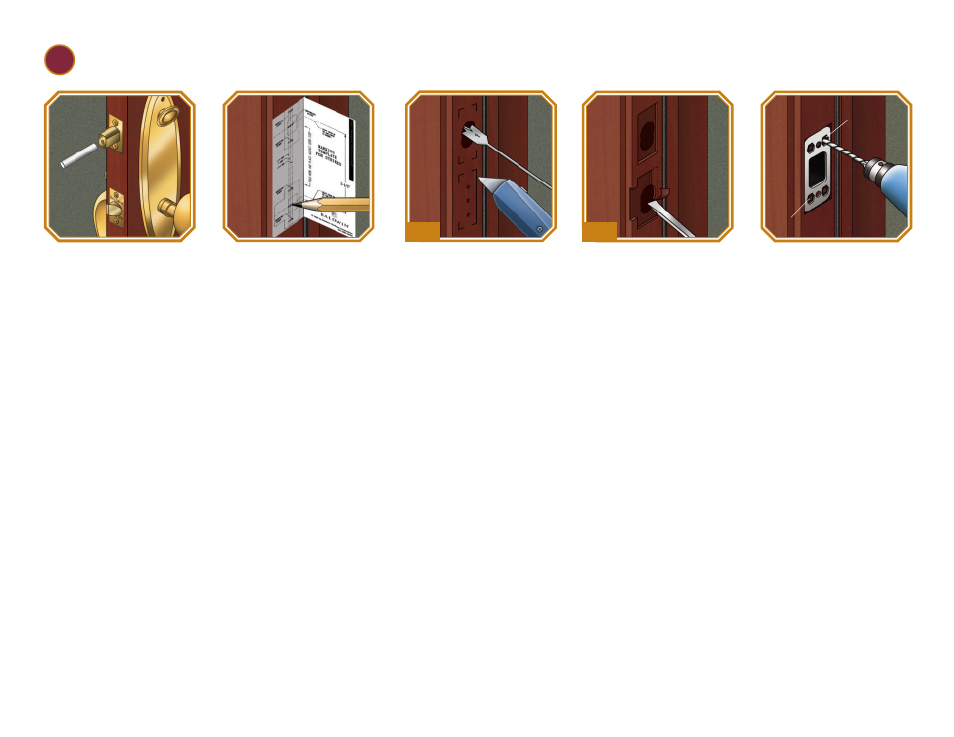
Strikeplate Installation
IMPORTANT! You must install Baldwin strikeplate or your warranty is void.
1
If weather stripping is
not installed, you must
install weather stripping
prior to strikeplate
installation. Mark center of
deadbolt with chalk, grease
pencil, or lipstick. Shut door
and lock deadbolt to mark
center point on doorframe.
4
2
On doorframe, align strike
hole template with center
point. Mark holes for center of
latch bolt and outer corners of
both strikes with pencil.
3
For Deadbolt and
Latch Strikeplates: Mark
drill points
5
⁄
16
" above and
below center points. Bore two
1" holes 1
1
⁄
4
" deep for deadbolt
dustbox and two 1" holes 1"
deep for latch dustbox. Score
chisel guide into doorframe
with utility knife.
4
For Deadbolt and Latch
Strikeplates: Chisel out holes
for dustboxes. Chisel out cavity
so deadbolt strikeplate and latch
strikeplate fit flush with door-
frame.
For deadbolt strikeplate,
cavity is
7
⁄
32
" deep.
For latch strikeplate,
cavity is
3
⁄
32
" deep.
5
For Deadbolt
Strikeplate: Using reinforc-
ing strikeplate as a template,
drill two
5
⁄
32
" pilot holes for 3"
long screws (outside holes)
and two
1
⁄
8
" pilot holes for #8
x
3
⁄
4
" screws (inside holes).
inside
inside
1/8"
5/32"
If you have any trouble installing your Baldwin product, feel free to call our toll-free consumer help line at 1-800-566-1986. Hours: 6 a.m. – midnight (east coast standard), 7 days a week.
11.