Strikeplate installation (cont.), Inside outside – Baldwin Stonegate Handleset User Manual
Page 12
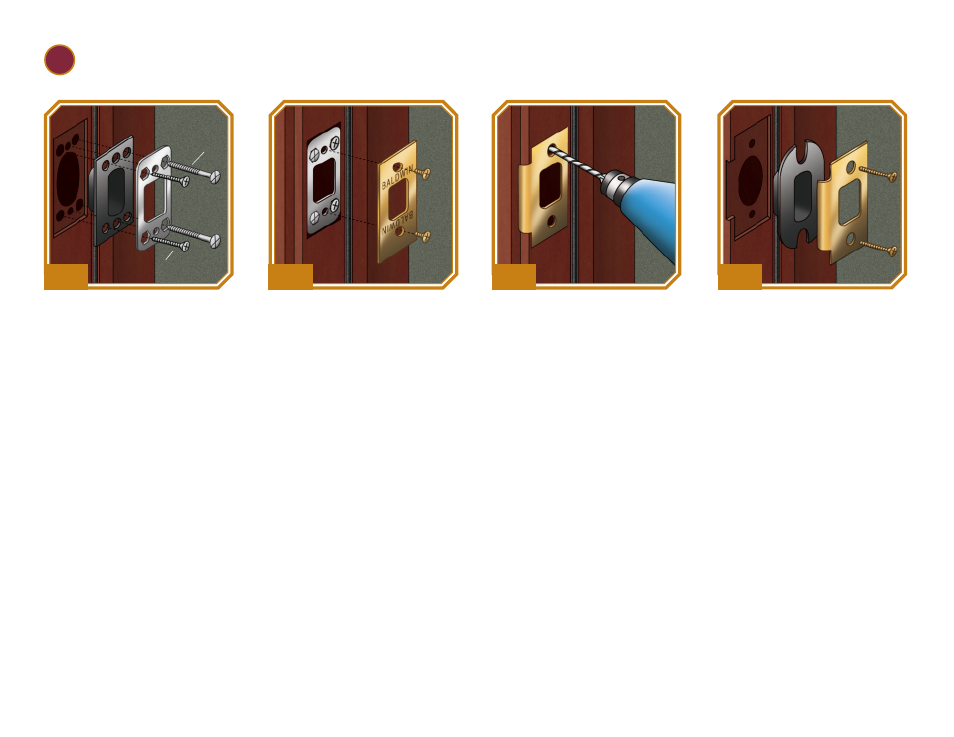
Strikeplate Installation (cont.)
IMPORTANT! You must install Baldwin strikeplate or your warranty is void.
4
8
For Latch Strikeplate:
Using latch as a template, drill
two
1
⁄
8
" pilot holes for the
#8 x
3
⁄
4
" screws.
6
For Deadbolt
Strikeplate: Insert dustbox
into hole, add reinforcing strike,
and secure with 3" reinforcing
screws (outside holes) and #8 x
3
⁄
4
" combination screws (inside
holes).
Helpful Hint: When installing
wood screws it is recommended
to put beeswax or soap on screw
threads to improve installation.
7
For Deadbolt
Strikeplate: Add strikeplate
and secure with #8-32 x
1
⁄
4
"
screws.
inside
inside
inside
9
For Latch Strikeplate:
Insert dustbox into hole, add
strikeplate, and secure by insert-
ing #8 x
3
⁄
4
" wood screws into
pilot holes.
Helpful Hint: when installing
wood screws it is recommended
to put beeswax or soap on screw
threads to improve installation.
inside
inside
outside
If you have any trouble installing your Baldwin product, feel free to call our toll-free consumer help line at 1-800-566-1986. Hours: 6 a.m. – midnight (east coast standard), 7 days a week.
12.