Dexter Laundry T-30X2 EXPRESS - 60 Hz Gas (On-Premise) User Manual
Page 9
9
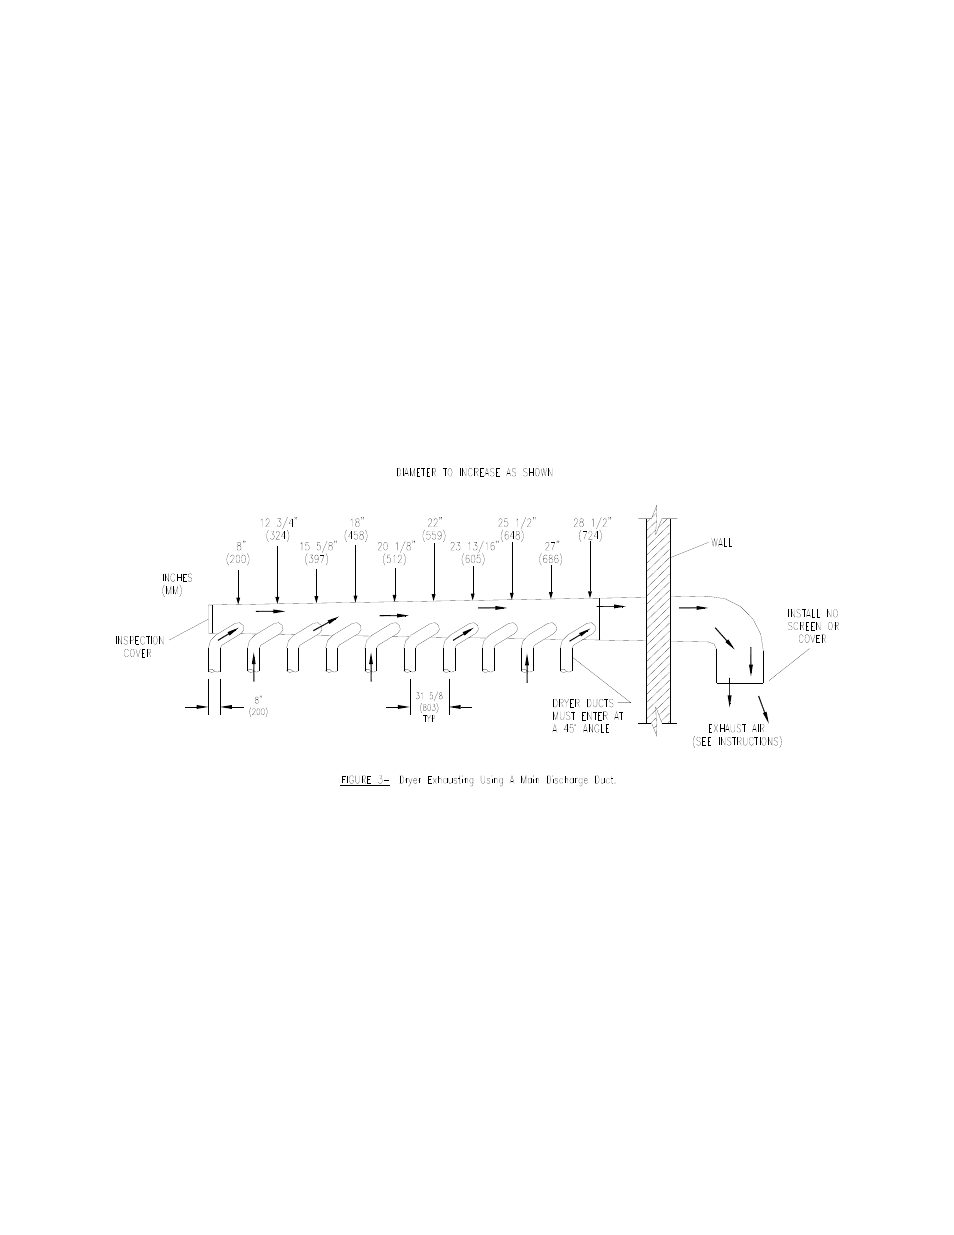
Installation of several dryers, where a main discharge duct is necessary, will need the
following considerations for installation (see Figure 3). Individual 8" ducts from the dryers into
the main discharge duct should be at a 45-degree angle in the direction of discharge airflow.
NOTE: Never install the individual 8" ducts at a right angle into the main discharge duct.
The individual ducts from the dryers can enter at the sides or bottom of the main
discharge duct. Figure 3 indicates the various round main duct diameters to use
with the individual dryer ducts. The main duct can be rectangular or round,
provided adequate airflow is maintained. For each individual dryer, the total
exhausting (main discharge duct plus duct outlet from the dryer) should not
exceed the equivalent of 14 ft (4.27m) and two elbows. The diameter of the main
discharge duct at the last dryer must be maintained to exhaust end.
NOTE: A small diameter duct will restrict airflow; a large diameter duct will reduce air
velocity; both contributing to lint build up. An inspection door should be
provided for periodic clean out of the main duct.
8. DRYER IGNITION (SOLID STATE IGNITION). The solid-state ignition system lights
the main burner gas by spark. The gas is ignited and burns only when the gas-valve relay (in the
electronic controller) calls for heat. The procedure for first-time starting of a dryer is as follows:
A. First, review and comply with the “Warnings About Use and Operation” found on the
inside front cover of this manual. Be sure the electrical power supply is connected correctly.
The dryer MUST be properly grounded.
B. Make sure all gas supply lines are purged of air, close the main gas shut-off valve and
wait for five minutes before turning the valve back on.
C. Turn on main electrical power switch, close loading door, use manual mode to set the