3B Scientific Chester Chest™ With New Advanced Arm User Manual
Page 7
www.vatainc.com
fig. 9
fig. 10
fig. 11A
fig. 12
fig. 11B
Then remove the Chest Tissue Flap on the left
side of the chest (do not place on printed papers
as this can stain the tissue flap), attach a Huber
needle to a syringe and access the port. Repeat
the procedure used to prime the tunneled central
venous catheter, until simulated blood is visible
in the syringe (see fig. 9). If you have ordered
your model with optional subclavian or jugular
catheters, prime using steps for tunneled central
catheters (see fig. 9).
The torso is now primed and ready for use.
Please note that one of the three parallel tubing
sets is not used and has a cap attached to the
male leur connector. This tubing set is provided
should you wish to add a subclavian or jugular
catheter (purchase of a special connector may be
needed for some catheters).
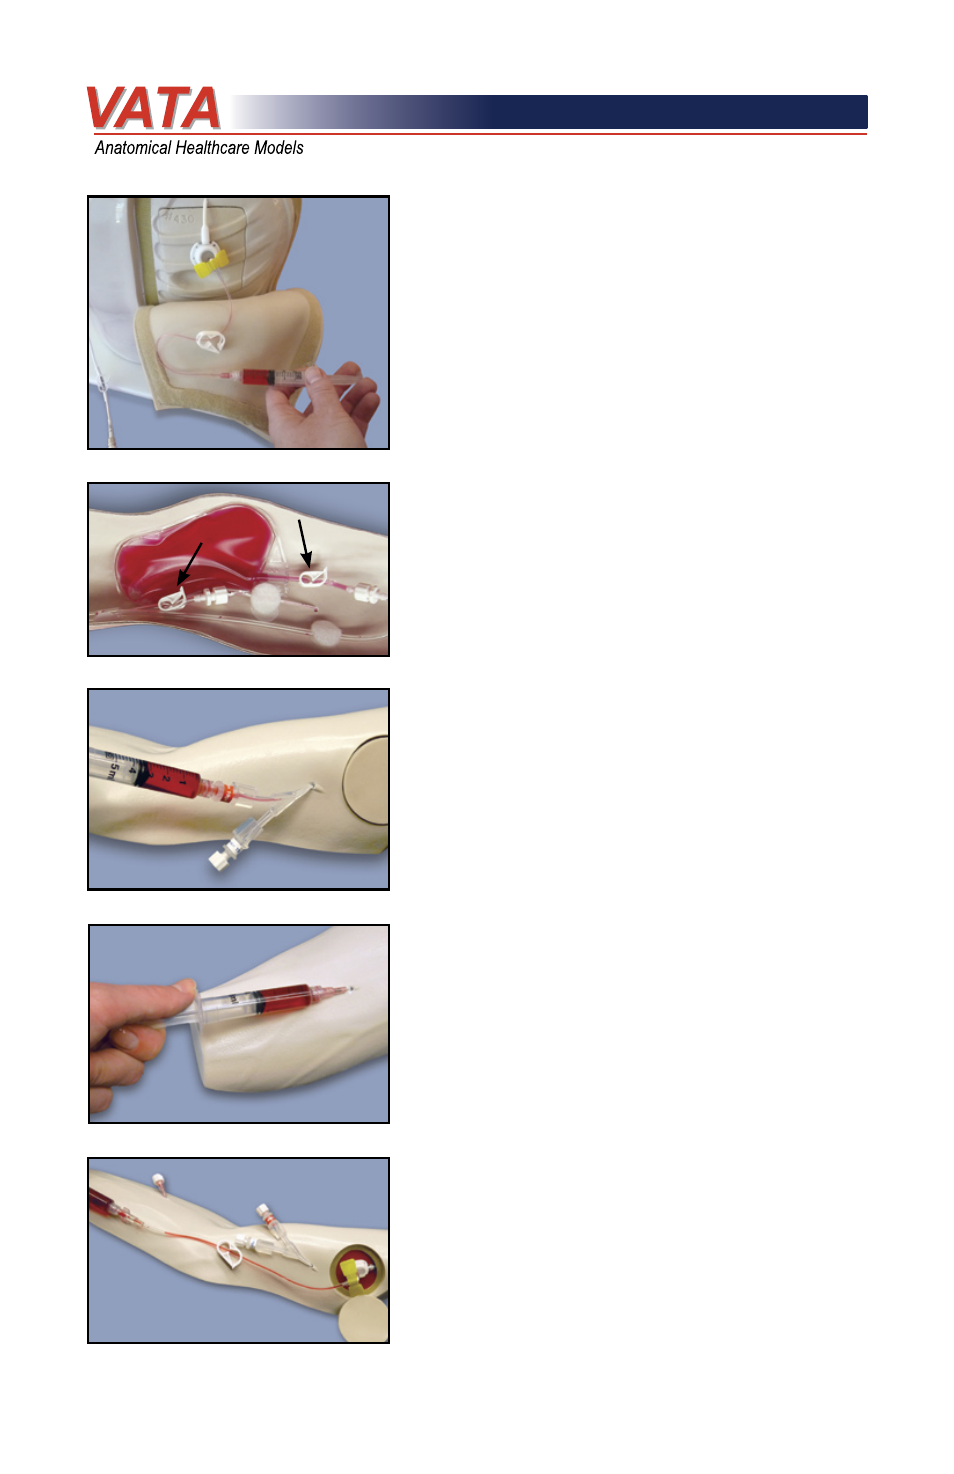
To prime the arm tubing, attach injection caps or
needless access devices on the IV catheters and
dual lumen PICC before attaching the simulated
blood reservoir bag. On the backside of the arm,
open all snap clamps (see fig. 10).
Attach a syringe to each side of the dual lumen
PICC and withdraw air, until simulated “blood”
is visible in the syringe. This procedure may
need to be repeated, depending on the size of
your syringe. Repeat this procedure with the IV
catheter (see fig. 11A & 11B). If you have ordered
your arm with the
optional peripheral port, attach
a Huber needle to a syringe, access the port and
withdraw air until simulated blood is visible in the
syringe (see fig. 12). The arm is now primed and
ready for use.
7