Setting up your chester chest™ 2400 for use – 3B Scientific Chester Chest™ With New Advanced Arm User Manual
Page 6
www.vatainc.com
Unwrap the arm and body. Set the bag of additional
parts, packed with the torso, aside for use later. Place
the torso on a flat surface in an upright position.
Remove the wing nut from the arm, keeping the
bolt in place, and align the bolt with the hole in the
right shoulder; insert and reattach the wing nut
(see fig. 4).
If you are going to use injection caps or needleless
access caps, attach before attaching the simulated
“blood” reservoir bag. On the backside of the torso,
locate the simulated “blood” reservoir bag and remove
from torso. Carefully remove the white cap on the
simulated blood reservoir bag, taking care not to let
the liquid leak out and attach the female leur fitting to
the male leur fitting on the bottom of the triple parallel
tubing (see fig. 5).
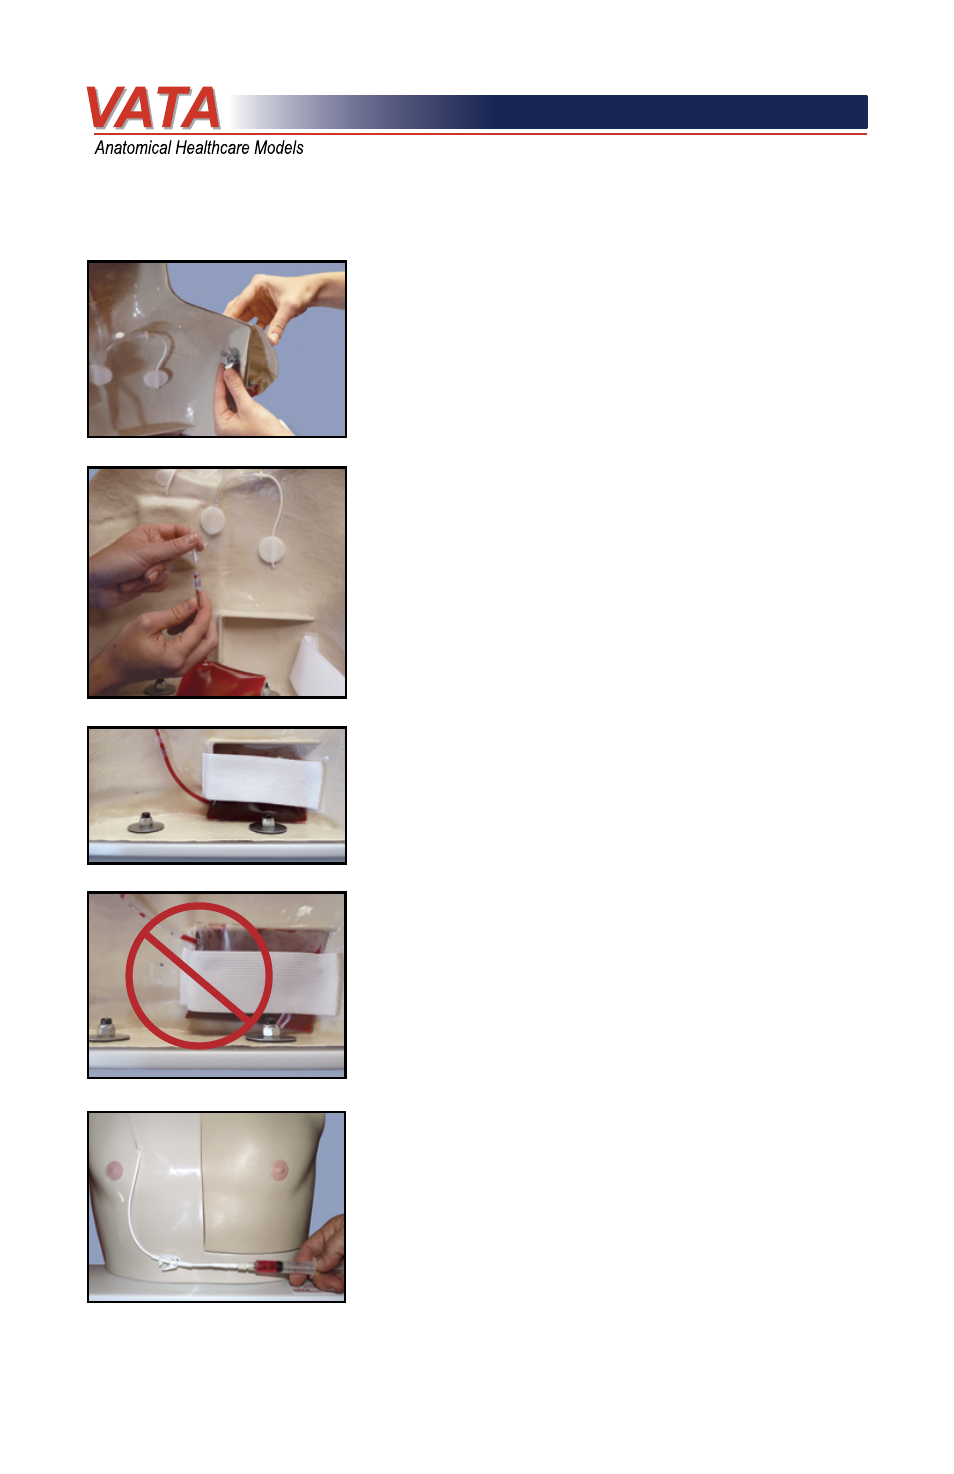
Replace the reservoir bag behind the white retention
strap, making sure that the tubing attached to the
bag is positioned exiting the bag from the bottom
(see fig. 6).
Do not position reservoir bag with tubing exiting from
the top as you will withdraw air (see fig. 7).
To prime the tubing with simulated blood attach a
syringe to the tunneled central venous catheter and
drawback to remove all the air in the line. Be sure the
snap clamp is open on the catheter. This procedure
may need to be repeated depending on the size of
your syringe. You are done when the simulated blood
is visible in the syringe (see fig. 8).
Setting up your Chester Chest™ 2400 for use
fig. 4
fig. 5
fig. 6
fig. 7
fig. 8
6