16 top hook – R&M Materials Handling ELECTRIC CHAIN HOISTS LoadMate Chain Hoist LM 16-20-25 User Manual
Page 40
LM16-20-25 I&M MANUAL/EN/11.30.2010
40/73
This document and the information contained herein, is the exclusive property of R&M Materials Handling, Inc., and represents a non-public, confidential and proprietary trade secret that
may not be reproduced, disclosed to third parties, altered or otherwise employed in any manner whatsoever without the express written consent of R&M Materials Handling, Inc.
Copyright © (2010) R&M Materials Handling, Inc. All rights reserved.
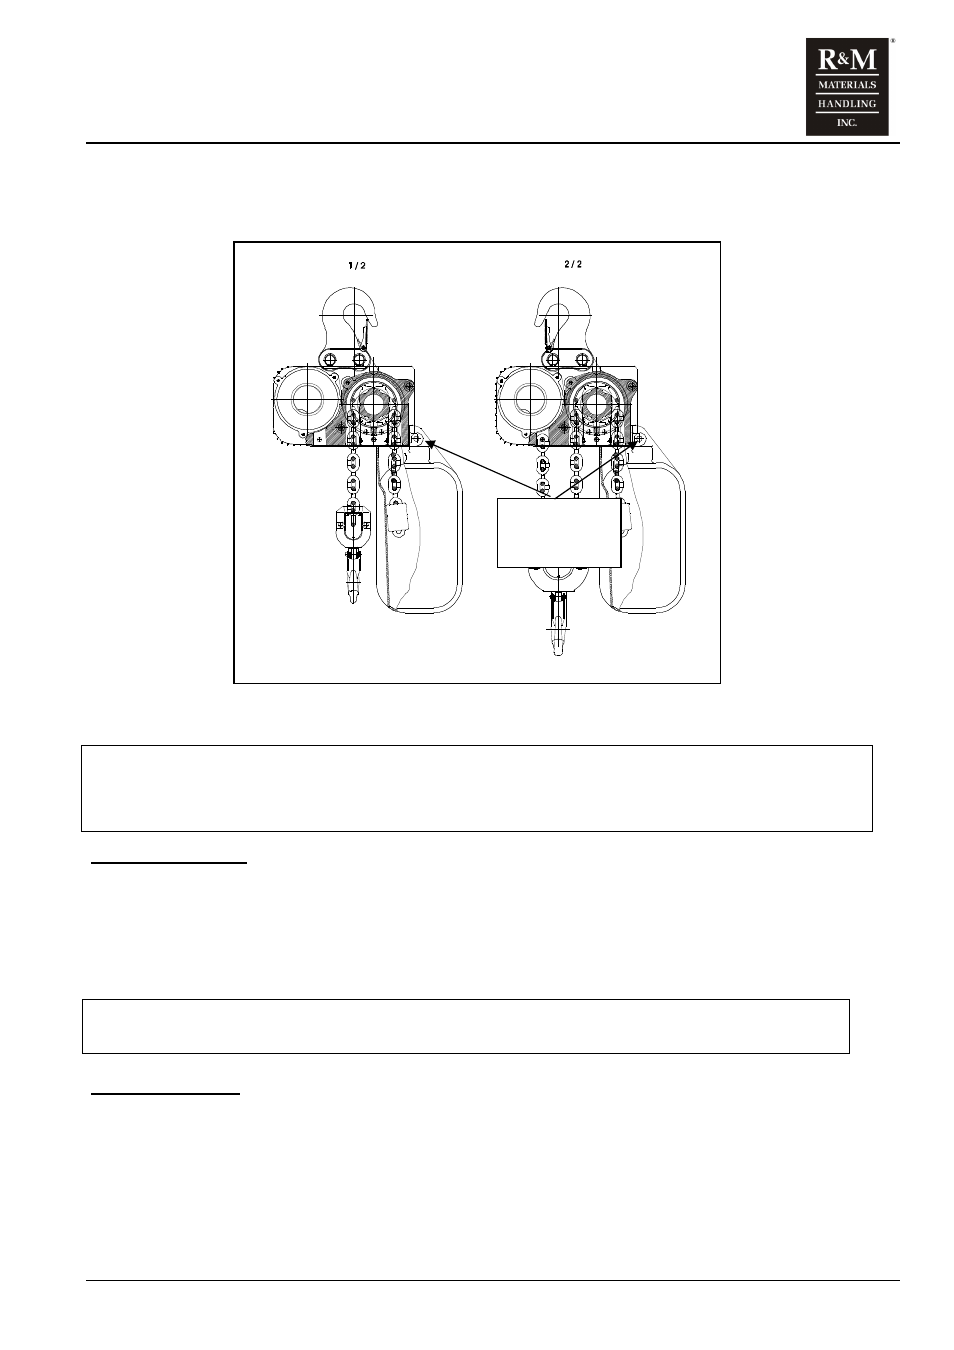
6.16 Top Hook
Figure 18. Top Hook Orientation
P25020
m
CAUTION: Before removing Top Hook, de-energize the power to the hoist per ANSI Z244.1 and
make certain that any load is removed from the load hook. Also support the total weight of the
hoist, including chain, prior to removing the Top Hook.
Removing Top Hook
1. Place hoist on workbench. Protect limit switches on bottom of hoist.
2. There are two pins holding top hook in place. Remove retaining ring and washer on one end of each
pin.
3. Pull pins out and remove hook. Keep washers and snap rings.
m
CAUTION: Proper installation of top hook is critical for hoist balance.
Installing Top Hook
1. Place hoist on workbench. Protect limit switches on bottom of hoist.
2. Verify if hoist is 1-fall or 2-fall configuration. The hook is symmetrical and can be positioned two
different directions. It is important to place top hook is correct position. Verify position of top hook
with the above drawing.
3. Place top hook in location. Install pins and retaining hardware. Verify that a snap ring and washer is
securely in place on each end.
CHAIN
CONTAINER
BRACKET