Warning – BabyTrend 1204 - TRENDLITE User Manual
Page 4
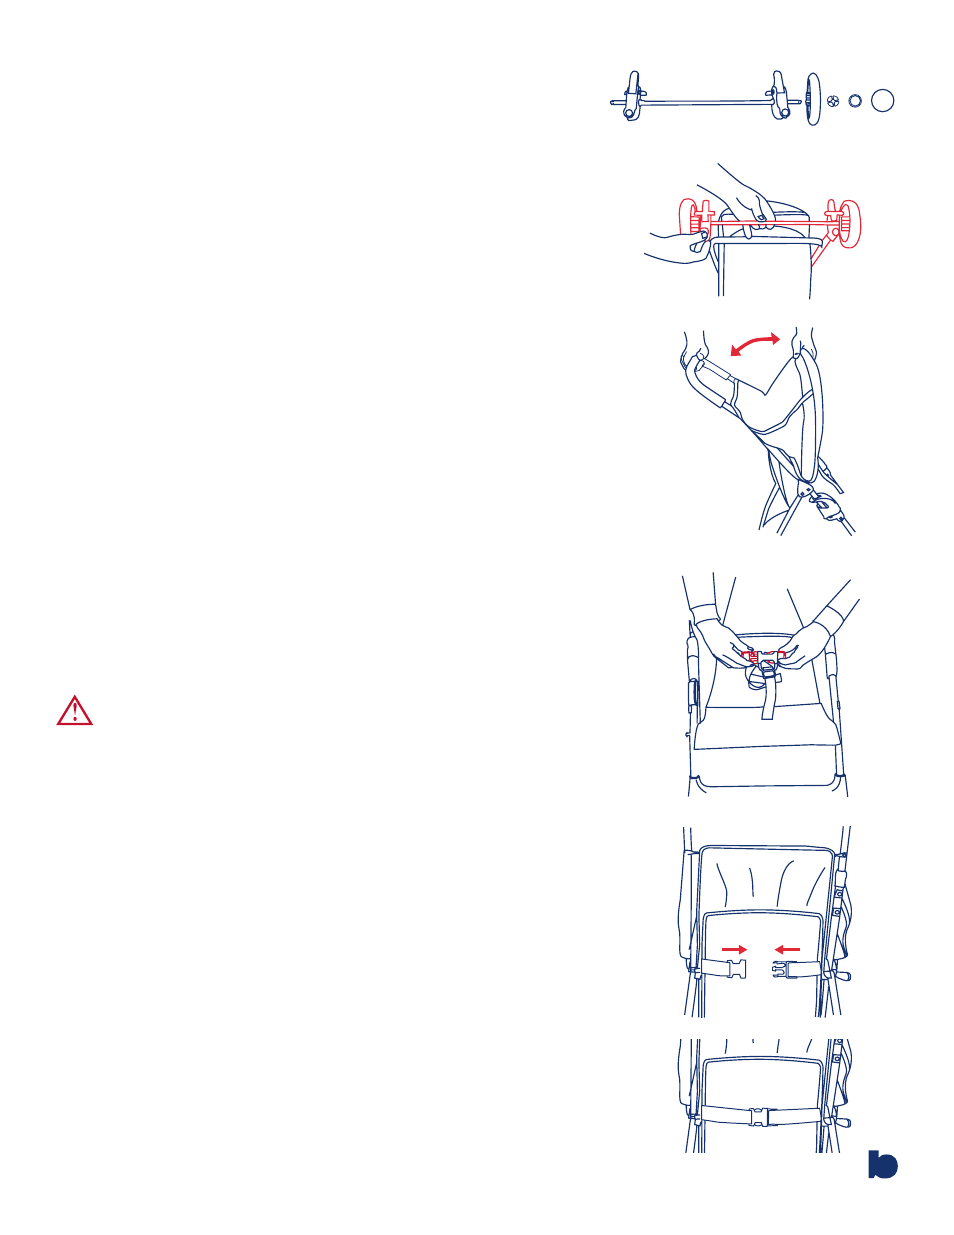
Fig. 8
Fig. 9
Fig. 7
3
Copyright © 2006 - 2007, Baby Trend Inc., All Rights Reserved.
4. Attach rear wheels to axle, one side at a time, as follows:
a. Slide one (1) rear wheel onto axle, brake cluster side first.
(Fig. 5)
b. Place locking washer onto axle and push firmly into place.
(Fig. 5a)
c. Push a solid metal cap onto the end of the axle. (Fig. 5b)
d. Finish by installing hubcap. (Fig. 5c)
Repeat the above process for the other wheel.
5. Attach the assembled rear wheel and axle assembly to stroller.
Place rear wheel housings onto the rear frame tubes with the
brake levers facing the rear of the stroller. (Fig. 6) Push down on
both housings at the same time, applying equal pressure to both.
Push until both side snap and lock into place. Tug on each side to
confirm that they are securely attached and locked into place.
CANOPY
• To open the canopy, push forward on the front frame of the canopy. Pull
backwards on the canopy frame to fold completely. Always fold the canopy
prior to folding the stroller frame. (Fig. 7)
DO NOT
use stroller until assembled completely and you
have read and understand all the safety warnings and how
to properly use the stroller. If you are having any kind of
problem, please contact our customer service department
for further information and assistance. Customer service is
available M-F, 8:00am to 4:30pm, PST at (800) 328-7363.
WARNING:
Always use the seat
belt to avoid serious injury from falling or
sliding out.
TO SECURE THE CHILD
• Carefully place the child in the stroller seat and bring the seat belt around
the child's waist. Place the crotch strap between the child's legs. Insert the
male end of each seat belt into the female buckle until snapped into place.
Tighten the seat belt to be snug around the child's waist. (Fig. 8)
• To release, apply pressure to both sides of each male clip until the clip is
released. This process requires a moderate amount of effort so as to prevent
an accidental release by your child.
SEATBACK POSITIONING
• The seat has a (2) position recline that is controlled by a buckle behind
the seat. (Fig. 9) To recline the seat, release the buckle and place the seat
in relined position. For upright postion, bring both side belts together and
connecting the buckles in the center.
The upright position should be used only for a child that is at least
6 months old.
Fig. 5
Fig. 6
a. b. c.