Assembly, Warning, Important – BabyTrend PY90918 - MINI NURSERY CENTER - TWILIGHT User Manual
Page 6
Copyright © 2009 - 2010, Baby Trend Inc., All Rights Reserved.
Copyright © 2009 - 2010, Baby Trend Inc., All Rights Reserved.
10
9
ASSEMBLY
IMPORTANT!
To ensure safe operation of your bassinet,
please follow these instructions carefully. Please keep these instructions
for future reference.
IMPORTANT!
Before assembly and each use, inspect this
product for damaged hardware, loose joints, missing parts or sharp
edges. NEVER use if any parts are missing or broken.
IMPORTANT!
Adult assembly is required.
TO ASSEMBLE Close N Cozy
BASSINET
WARNING:
This product
must be fully assembled before use.
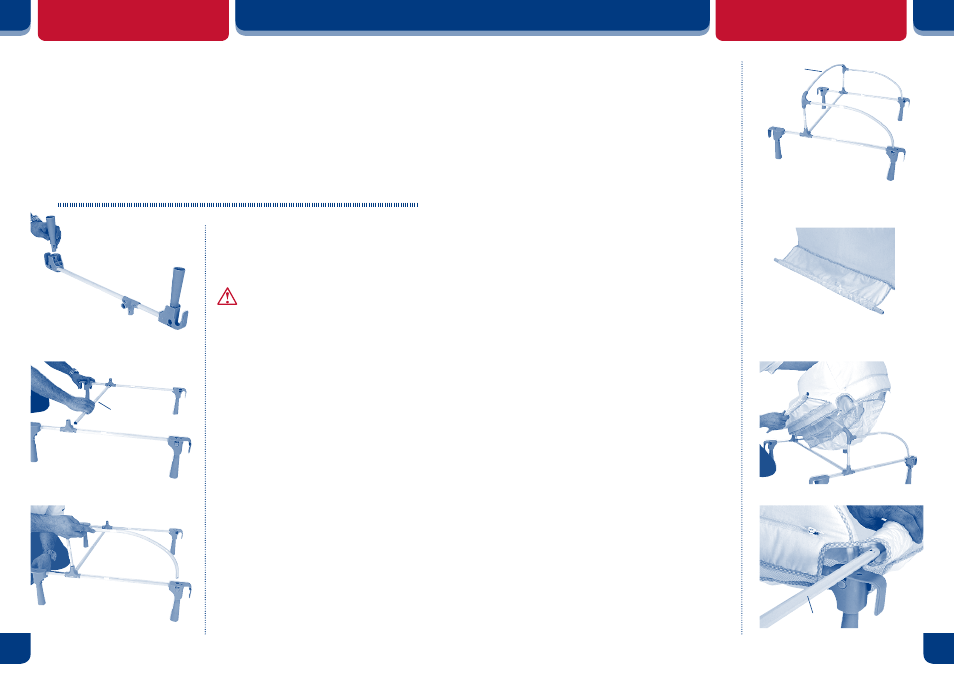
STEP 1:
Connect the LEGS (4ea.) to the side frame corners
by inserting each leg into the round hole and
pushing firmly into place. (Fig. 34) Check to make
sure each leg is securely connected by pulling
on it.
STEP 2:
Connect the center CROSS bar by lining up the
two side frames and inserting each end of the bar
into the housing. Line up snap-pins on all bars
with the holes in the housing and “snap” into
place. (Fig. 35)
IMPORTANT: Never loosely connect any parts
of the frame.
STEP 3:
Connect the upper LEFT frame section to the left
side frame by inserting the bars into the housing
and frame corner as shown.The snap-pin on the
curved bar should be facing outward. (Fig. 36)
Repeat for the other side.
Fig. 34
Fig. 35
Cross Bar
STEP 4:
Connect the upper BACK bar by lining up the
snap-pins with the holes in the housings and insert
into the upper left and right frame housings.
(Fig. 37)
STEP 5:
Soft Cover with Back Panel
Insert the lower BACK bar through the back panel
of the soft cover as shown as Fig. 38.
STEP 6:
Slip soft cover onto and over frame. (Fig. 39)
STEP 7:
Insert the lower FRONT bar through the round,
padded sleeve on the front of the soft cover.
(Fig. 40)
ASSEMBLY
Fig. 36
Fig. 37
Fig. 38
Fig. 39
Back Bar
Fig. 40
Lower bar