Assembly montaje assemblee – BabyTrend PY91960 - NURSERY CENTER - KIKU User Manual
Page 12
Copyright © 2010, Baby Trend Inc., All Rights Reserved. Todos los derechos reservados. Tous droits réservés.
10
ASSEMBLY MONTAJE ASSEMBLEE
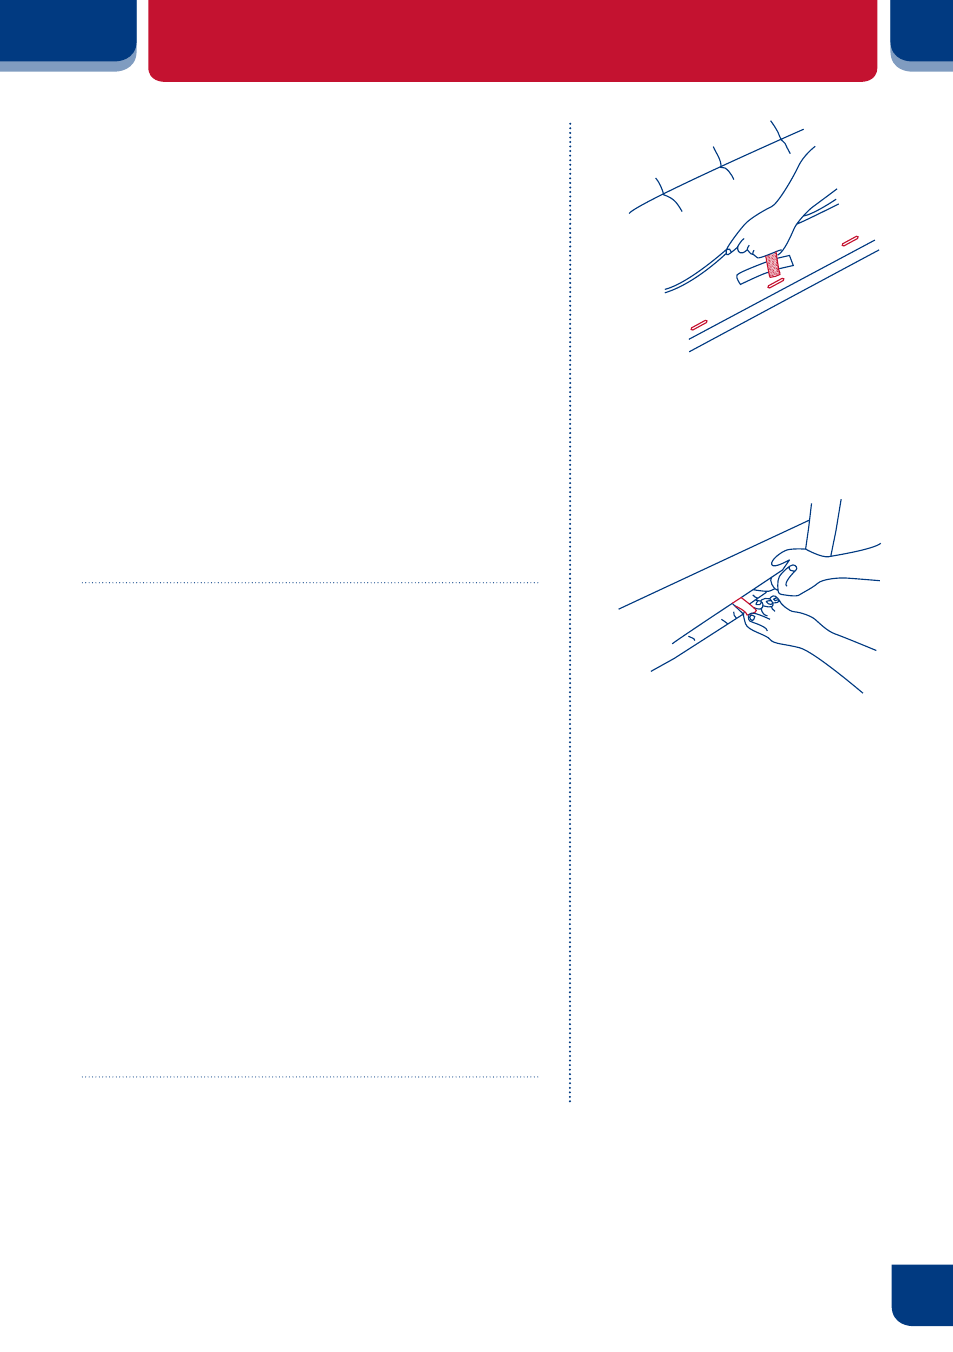
Fig. 5a
Fig. 5b
• Insert the three (3) Velcro® straps located
on the underside of the Mattress through
the slots in the floor of each end of the
Playard (Fig. 5a). Fasten the hook and loop
straps to the underside of the Playard floor
to prevent the Mattress from moving.
(Fig. 5b)
IMPORTANT: The handle located in the
center of the Playard floor MUST remain
raised (Approx. 45.7 cm or 18 inches) while
locking the side rails in place. If the center
is not raised the rails will NOT lock.
If you experience difficulty and one side
of the rail will lock but the other side will
not then, unlock the rail by squeezing the
release in the center and try again. If you
still have difficulty, contact our Customer
Service Center at
1-800-328-7363 or visit us online at
www.babytrend.com
• Introduzca las tres (3) correas de Velcro®
ubicadas en la parte inferior del colchón
a través de las ranuras del piso en cada
extremo del corralito de juegos (Fig. 5a).
Trabe el gancho y pase las correas por la
parte inferior del piso del corralito de juegos
para evitar que el colchón se mueva. (Fig. 5b)
IMPORTANTE: La manija ubicada en
el centro del piso del corralito DEBE
permanecer levantada (aprox. 45.7 cm o
18 pulg.) mientras se traban en su lugar
las barandas laterales. Si el centro no está
levantado, las barandas NO se trabarán.
Si tiene dificultades y se traba sólo
un lado de la baranda pero el otro no,
destrabe la baranda apretando el botón
de liberación que se encuentra en el
centro e intente nuevamente. Si continúa
teniendo dificultades, llame al centro de
atención al cliente al 1-800-328-7363
o visítenos en www.babytrend.com.
• Localisez les trois (3) courroies Velcro®
situées sous le matelas puis insérez-les
dans les fentes situées à chacune des
extrémités du plancher du parc (Fig. 5a).
Attachez les courroies sous le plancher du
parc pour empêcher le matelas de glisser.
(Fig. 5b)
IMPORTANT : La poignée située au centre
5)