F.i.t. tiles, Ergonomic flooring installation guide, Step 1 – Wearwell 558 ERGODECK COMFORT OPEN - Installation Guide User Manual
Page 5: Step 2, Step 3, Step 4
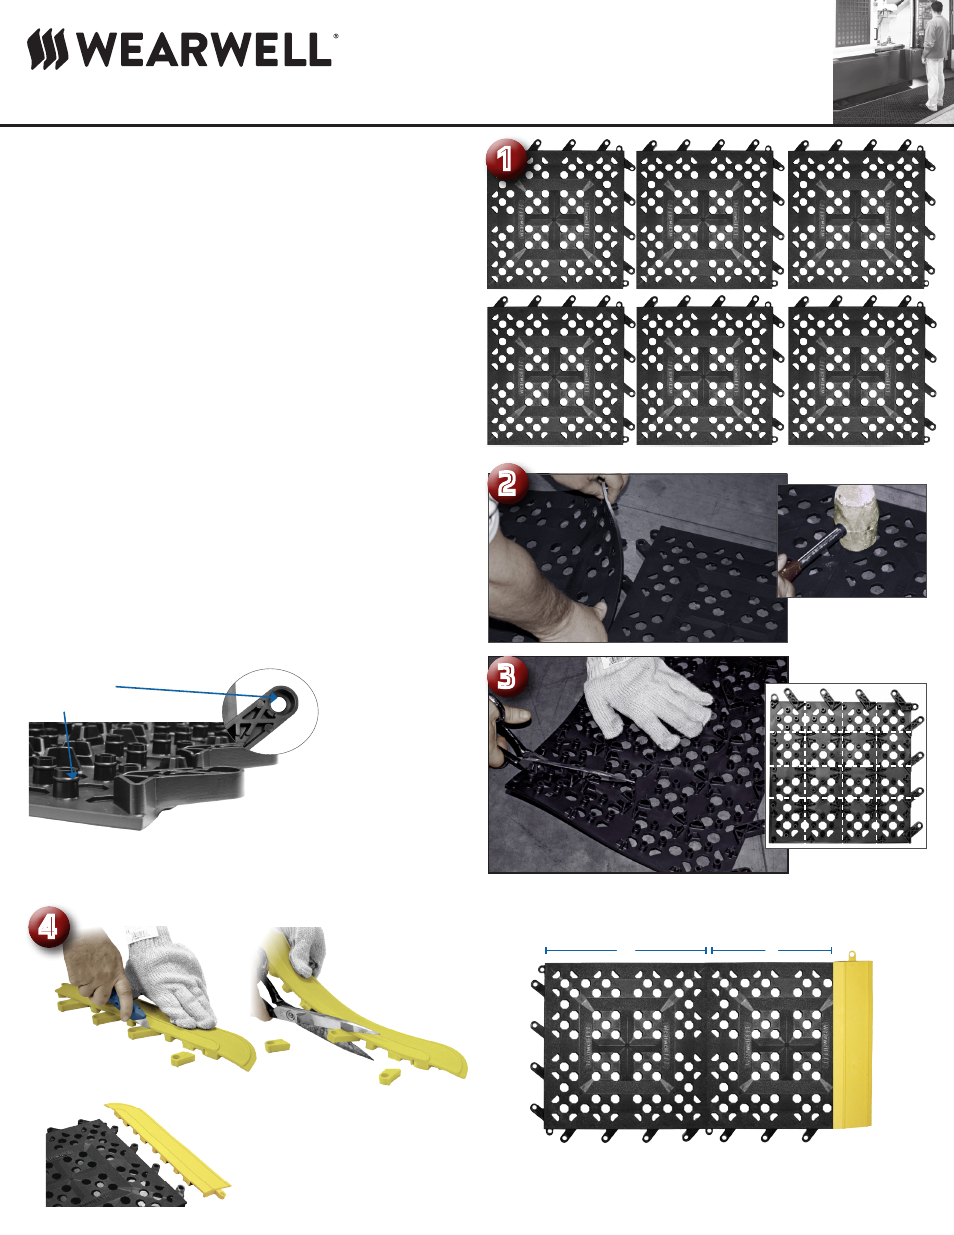
Ergonomic Flooring Installation Guide:
F.I.T. TILES
STEP 1.
Plan the layout. When laying out the area, position the tiles so that the edges
without the tabs are to the inside corner. This will make installation faster and
easier.
STEP 2.
Lay the second tile over the first, placing the male side over the female
interlocks.
Using a rubber mallet, secure the tiles together. Repeat this process completing
one row at a time. F.I.T. can be assembled with bare hands, but using a mallet
simplifies the installation process.
STEP 3.
F.I.T. is designed for on site customization. The tiles can be cut every 3” and still
connect. Just cut the tiles and reconnect for a seamless installation.
Line the tiles next to each other
and then use a mallet to expe-
dite installation.
Use a utility knife or sharp shears to cut tiles.
Tiles can be cut every 3” and
retain connectibility.
1
2
3
Female Connectors
Male Connectors
STEP 4.
Attach safety ramps to the tiles. Designed for simplicity, the ramps and ramps
with corners will connect to either the male or female side of a F.I.T. tile.
All ramps are manufactured with the female connectors and easily “lock” to the
male side of a F.I.T. tile.
Although the tiles and ramps can be cut with an industrial shears, if you have
multiple tiles to modify, we recommend the use of a band saw or a Skil
®
saw.
These will also insure a straight cut.
A utility knife or industrial
shears can be used to cut the
connectors.
When the connectors have been cut, the ramp is able to
securely interlock to the female side of the mat.
12”
9”
To attach the ramp to the female side of a F.I.T. tile, simply cut these con-
nectors off with a utility knife or an industrial shears.
4
5
Protected Design, F.I.T.
®
. U.S. Patent No. 3,739,710