Atdec Telehook TH-WH-PJ-FM Installation manual User Manual
Page 2
Centre of
Flush Mount
Centre of Gravity
Extension Bracket
Bottom Spacer
Spacer
Recessed Mounting Hole
D.1.
Pick up the projector using both of your index fingers.
Move your fingers along the side of the Projector (follow
Step 1) until it is level. Remember the balance point.
D.2.
Repeat this process for the perpendicular side
(follow Step 2)
D.3.
Where both balance points meet is the Centre of Gravity
of your projector. Use a pencil to mark this point.
Choose the appropriate installation procedure depending on your ceiling type.
E
Installing the Ceiling Plate
C
Finding the Center of Gravity of the Projector
D
Attaching the Flush Mount Assembly to the Projector
E
Nylon
Anchor
Plug
Centre of Gravity
M5x10mm
Bracket Screws
3mm
Allen Key
Extension
Bracket
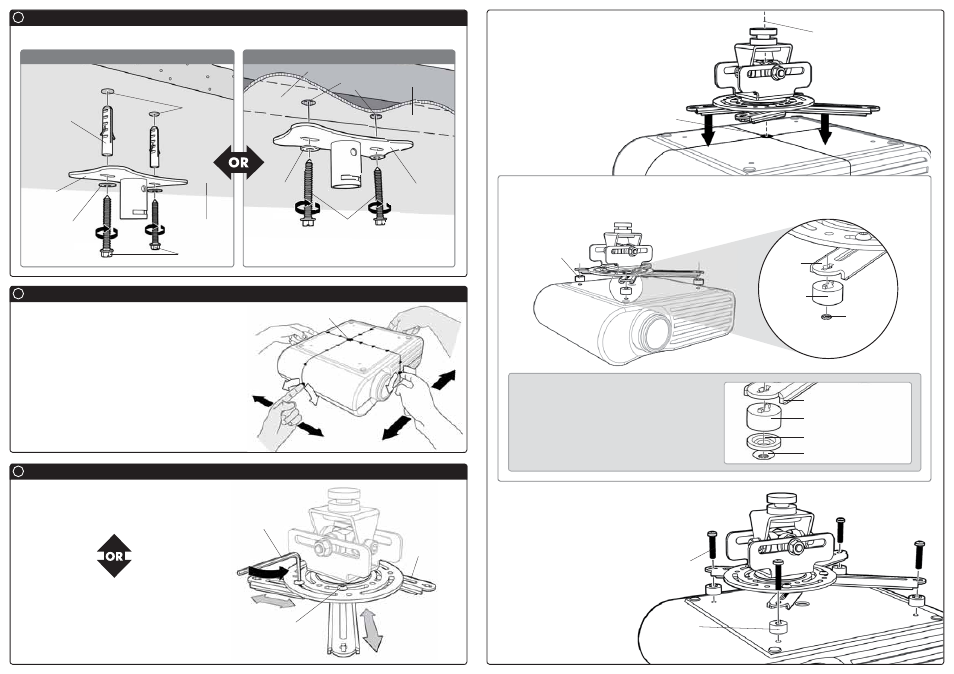
E.1.
Loosen the M5x10mm Screws using the supplied
3mm Allen Key until you can slide the extension
brackets freely, as shown.
You may need to replace the attached Extension
Brackets with the additional longer brackets
supplied in the package, to suit the mounting
hole configuration of your projector.
E.3.
Place the Bottom Spacers in between the Extension Brackets and the Projector, and align the mounting
holes as shown below.
E.4.
Select the correct Mounting Screws
from the Bits Bag and firmly screw
the Flush Mount Assembly onto your
Projector.
Once this is done, the Projector
Flush Mount Assembly is ready to be
mounted onto the Ceiling Plate.
Bottom
Spacers
Bottom
Spacer
Extension
Bracket
Mounting
Hole
Mounting Screws
Bottom Spacer
E.2.
Place the Flush Mount Assembly over the
Projector and align the centre of the Flush Mount
with the Centre of Gravity marked previously on
the Projector.
Step 1
Step 1
Step 2
Step 2
NOTE:
Ensure the screws
are securely fixed
into the Timber Beam
Ceiling
Mount
Washer
14 Gauge
Coach Screw
Masonry
Ceiling
8mm
(
5
/
16
”)
Holes
Timber
Beam
Washer
14 Gauge
Coach Screw
Ceiling
Plate
Plaster
Board
3mm (
1
/
8
”)
Holes
Tighten
Tighten
Masonry
Plaster Board
NOTE
If your mounting holes are recessed
into the projector, you may need to use
the additional Spacers supplied in the
Bits Bag. Please select the appropriate
Spacers according to the design of your
projector.